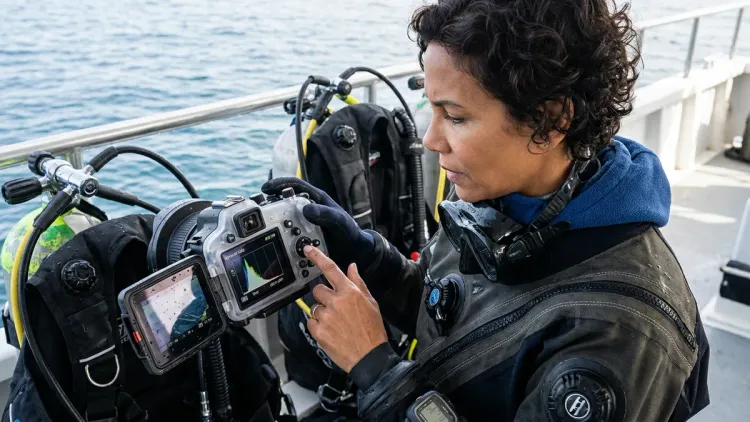
When I first took my camera underwater, I had no idea what I was doing with the settings. I figured "auto mode" would handle everything—but my photos came back blue, blurry, and honestly pretty disappointing. Learning proper underwater photography camera settings changed everything for me. It took some trial and error (and a lot of wasted dives shooting unusable images), but once I understood the basics, my shots improved dramatically.
In this guide, I'm going to walk you through exactly how to set up your camera for underwater photography, step by step. We'll cover everything from shooting modes to ISO, shutter speed, aperture, white balance, and focus settings. I'll share what works for me as a recreational diver shooting mostly reef scenes and marine life in Caribbean waters, plus the mistakes I made so you can skip them. This is beginner-friendly—I promise not to overcomplicate things. If you're shooting your first few underwater dives or feeling overwhelmed by all the settings, this is for you.

Time estimate: About 10-15 minutes to read and configure your settings topside. Then plan to adjust and refine during your first few dives.
What You'll Need
Before we dive into the settings, here's what you should have ready:
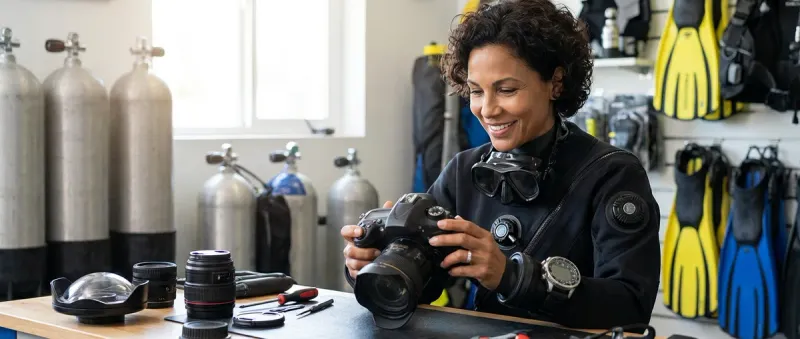
- A camera in an underwater housing (whether that's a compact camera, mirrorless, or DSLR in a proper housing—check out the best underwater camera housings if you're still shopping)
- Memory cards with plenty of space (you'll be shooting a lot as you dial things in)
- Basic understanding of your camera's menu system (skim your manual if this is brand new to you)
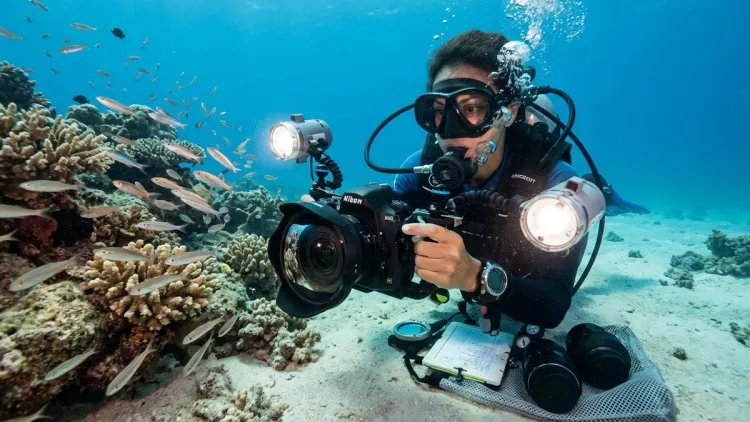
- Optional: External strobes or video lights (these will drastically affect your settings—see strobes vs continuous video lights for guidance)
- Good buoyancy control (your settings won't matter if you can't hold still—seriously, work on this first: buoyancy control for underwater photography)
- Checklist mindset (I keep an underwater photography gear checklist that includes my go-to settings written on a slate)
Step 1: Switch to Manual or Aperture Priority Mode
Okay, first things first: get out of full auto mode. I know it feels safe there, but underwater conditions mess with your camera's automatic calculations in ways that surface photography doesn't. The colors, the light absorption, the particulate matter in the water—none of that plays well with auto settings.
I shoot in Manual mode about 80% of the time now, but when I was starting out, Aperture Priority mode (usually labeled "A" or "Av" on your mode dial) was my best friend. In Aperture Priority, you control the aperture (which affects depth of field and how much light gets in), and your camera automatically adjusts the shutter speed to match. It's a great middle ground when you're still building confidence.
Why Manual mode is ideal: Underwater lighting changes constantly—swimming from bright shallow water into a shadowy overhang, or turning toward the sun then away from it. In Manual, your exposure stays consistent, which makes your images look more uniform and professional. You adjust settings intentionally rather than letting the camera chase the light.
My workflow: I set everything manually before I descend, test with a few shots in the shallows, and then tweak as needed. Once you get a feel for your local dive sites and lighting conditions, you'll start to recognize patterns. For me in Belize, shallow reef dives in midday sun mean one set of baseline settings. Deeper dives or overcast days mean another.
If Manual feels too intimidating right now, start with Aperture Priority and commit to switching to Manual once you've done five or six dives with your camera.
Step 2: Set Your Aperture Based on Your Subject

Aperture controls how wide your lens opens—it's measured in f-stops like f/2.8, f/5.6, f/11, and so on. Smaller numbers mean wider openings (more light, shallower depth of field), and larger numbers mean narrower openings (less light, deeper depth of field).
Here's what confused me at first: underwater, you often want more depth of field than you'd typically use on land, especially for reef scenes or fish portraits. Water already reduces contrast and sharpness a bit, so having more of your subject in focus helps compensate.
For wide-angle reef scenes and larger animals (turtles, rays, reef panoramas), I shoot at f/8 to f/11. This keeps the reef structure, the fish in the mid-ground, and the background water all reasonably sharp. If you're using strobes, they'll provide plenty of light to compensate for the narrower aperture.
For macro subjects (nudibranchs, tiny crabs, coral polyps), I'll sometimes open up to f/5.6 or f/8. Macro lenses naturally have very shallow depth of field, so you need to balance getting enough light with keeping your subject's key features in focus. If you're shooting a tiny shrimp and only its eyeball is sharp, that's frustrating—trust me, I've been there.
For available light photography (no strobes, just natural sunlight), you might need to open up to f/4 or even wider depending on depth and conditions. Just be aware that your depth of field gets very slim, so your focus has to be spot-on.
Start with f/8 as your baseline for general underwater photography camera settings. It's forgiving, works well with strobes, and gives you sharp results across most scenarios.
Step 3: Choose Your Shutter Speed to Freeze Motion
Shutter speed determines how long your camera's sensor is exposed to light—and underwater, it's mostly about freezing motion. Fish don't hold still. Neither do you, even with great buoyancy control. The water itself moves. So you need a shutter speed fast enough to prevent blur.
My go-to starting point is 1/125th of a second for general reef scenes. It's fast enough to freeze most fish movement and compensate for minor camera shake. If I'm shooting faster-moving subjects—like a school of jacks or a shark cruising by—I'll bump it up to 1/160th or even 1/200th.
For macro photography, you can sometimes get away with 1/100th or even 1/80th if your subject is relatively still (like a resting octopus or a stationary nudibranch). But honestly, I err on the side of faster shutter speeds because nothing's more disappointing than reviewing your shots topside and realizing everything's slightly soft from motion blur.
One big exception: If you're shooting in very low light or at depth without strobes, you might need to slow down to 1/60th to gather enough light. At that point, your buoyancy control becomes absolutely critical—any wobble and your shot is toast. I try to brace myself against a rock or the sand (without touching coral, obviously) when shooting that slow.
Strobe users, take note: If you're using external strobes, your shutter speed also controls the ambient light balance in your image. Faster shutter speeds (like 1/200th) will darken the blue water background, while slower speeds (1/60th to 1/100th) let more blue ambient light in. This is actually a creative tool—I'll adjust my shutter speed to control how bright or moody the background water looks.
Step 4: Dial In Your ISO for Light Sensitivity
ISO controls how sensitive your camera's sensor is to light. Lower ISO (like 100 or 200) means less sensitivity and cleaner images with minimal grain. Higher ISO (like 800, 1600, or more) means more sensitivity but introduces digital noise, which looks like speckles or grain in your photos.
Underwater, I keep my ISO as low as possible while still getting a proper exposure. For daytime dives in clear, shallow water with strobes, I'm usually at ISO 200 to 400. The strobes provide plenty of light for my subject, and the low ISO keeps everything crisp and clean.
If I'm diving deeper (say, 80-100 feet) or the water's a bit murky, I'll push it to ISO 400 to 640. And if I'm shooting available light only—no strobes—I might go as high as ISO 800 or even ISO 1000 depending on conditions.
Modern cameras handle higher ISOs way better than older models. My camera stays pretty clean up to ISO 800, but older compacts might start showing noticeable grain at ISO 400. You'll need to test your specific camera to see where image quality starts to degrade.
Here's my rule of thumb: Adjust aperture and shutter speed first to get the effect you want (depth of field and frozen motion). Then adjust ISO to get the overall exposure right. ISO is your "fine-tuning" control. Don't crank it up unnecessarily—but don't be afraid to use it when you need it either.
One thing I learned the hard way: underexposed photos are easier to brighten in post-processing than overexposed ones. If you're unsure, err slightly on the darker side and bring up the shadows later. But try not to rely on "I'll fix it in post" as a crutch—getting it right in-camera saves you editing time and gives you better image quality.
Step 5: Adjust Your White Balance to Correct Color Loss
This was the biggest "aha moment" for me in underwater photography. Water absorbs colors as you descend—reds and oranges disappear first, then yellows, until everything looks blue-green. Your camera's Auto White Balance tries to compensate, but it usually doesn't do a great job underwater.
If you're shooting with strobes, set your white balance to Daylight or Flash (around 5500K). The strobes bring back the full color spectrum to your subject, and the Daylight preset handles it well. Your subject will look vibrant and natural, while the background water stays that beautiful blue.
If you're shooting available light only (no strobes), you need to help your camera correct for the color loss. Some cameras have a dedicated Underwater white balance preset—use that if you have it. If not, you can use Custom white balance: take a photo of something white or neutral gray (a slate, your hand, a white part of your housing) at your shooting depth, then set that as your white balance reference. I'll be honest, this is a bit fiddly to do underwater, so I usually just shoot in RAW format and correct the white balance in post-processing. RAW files capture all the color data, so you have maximum flexibility to correct underwater color loss later.
For a quick ballpark: if you're diving at 30-40 feet in clear water, try a white balance around 3200-4000K (more orange/warm) to counteract the blue. Deeper means you need even warmer correction. But honestly, every dive site is different—water clarity, time of day, sun angle, and depth all affect this. Test, review your shots, and adjust.
Pro tip: If your camera has it, enable the RGB histogram in your playback screen. It'll show you if you're losing color information in any of the red, green, or blue channels. Super helpful for catching white balance issues while you're still underwater.
Step 6: Select the Right Focus Mode and Area
Autofocus is your friend underwater—but you need to configure it correctly. Most cameras offer multiple focus modes: Single Shot (AF-S or One-Shot), Continuous (AF-C or AI Servo), and sometimes Auto. For underwater photography camera settings, I use Single Shot AF for stationary subjects and Continuous AF for moving subjects.
Single Shot AF: Your camera focuses once when you half-press the shutter button, then locks that focus. Perfect for macro subjects like nudibranchs, sleeping octopuses, or coral details. Once you lock focus, you can recompose slightly if needed before taking the shot.
Continuous AF: Your camera continuously refocuses as long as you half-press the shutter. Essential for swimming fish, rays, sharks, or turtles. The camera tracks the subject and keeps adjusting focus as it moves. It's not perfect—fast-moving subjects or low contrast scenes can confuse it—but it's way better than trying to manually focus on a moving fish.
Focus area matters too. Most cameras let you choose between a single focus point, a zone of focus points, or full-frame automatic. For macro, I use a single focus point positioned right where I want sharp focus (usually the subject's eye). For wide-angle, I use either a zone or center-weighted area—it gives the camera a little flexibility to grab focus on the reef or fish without being too picky.
Manual focus is an option, especially for macro photographers who want absolute control. I've tried it, but honestly, I'm not steady enough yet to nail critical focus manually while managing my buoyancy and composition. Maybe that's something I'll master down the road—for now, autofocus works great for my skill level.
One last thing: underwater visibility isn't always perfect, and sometimes autofocus hunts back and forth, unable to lock on. If that happens, switch to a higher-contrast area to focus (a dark rock against bright sand, a fish's eye against its body), then recompose. Or enable your camera's focus assist light if it has one (though that can sometimes spook skittish marine life).
Step 7: Enable Continuous Shooting Mode and RAW Format
Underwater moments happen fast. A turtle swims into view, pauses for two seconds, then disappears into the blue. A school of fish swirls around you for just a heartbeat. You don't get second takes.
That's why I always shoot in Continuous (Burst) mode. When I press the shutter button, my camera fires off 3-5 frames in quick succession. This dramatically increases my chances of getting one sharp, well-composed shot in the sequence. Even if the first frame is slightly off, the second or third might be perfect.
Most cameras offer a few burst speed options—I usually use the medium continuous setting (around 4-5 frames per second). The fastest burst modes can fill up your memory card quickly and sometimes bog down the camera's processing, so medium is a nice balance.
RAW format is the other non-negotiable for me. RAW files are much larger than JPEGs (sometimes 5-10 times bigger), but they capture way more information about color, dynamic range, and detail. When you get back to your computer, you have so much more latitude to adjust white balance, recover shadows, tame highlights, and correct exposure. Underwater lighting is tricky, and RAW format is basically insurance that you can salvage shots that looked "meh" on the camera's LCD screen.
If your camera lets you, shoot RAW + JPEG. That way you get the easy-to-share JPEG for quick posting to social media, plus the RAW file for serious editing later.
One downside: RAW files mean you need post-processing software (Lightroom, Capture One, or even free options like RawTherapee). You can't just plug your camera into a printer or upload the files directly—RAW files have to be converted. But trust me, the results are worth the extra step. Some of my best underwater shots looked flat and bluish straight out of the camera, then came alive after a few minutes of editing in Lightroom.
Step 8: Review and Adjust After Your First Few Shots
Here's the thing: no preset underwater photography camera settings will be perfect for every dive. Depth, water clarity, lighting conditions, subject distance—everything affects your exposure and color. That's why I always review my first few shots once I'm underwater and make adjustments on the fly.
Most underwater housings have controls for shutter speed, aperture, and ISO accessible from the outside. Learn where those controls are before you get in the water. Practice adjusting them on land with the housing closed. It should become second nature.
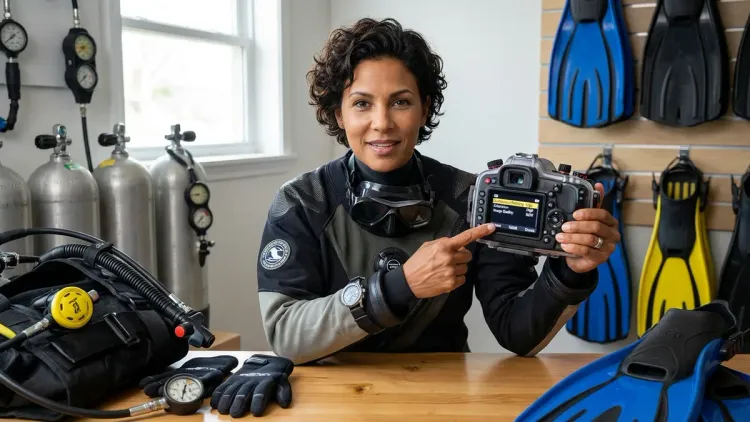
My typical workflow: Once I descend to my shooting depth, I take a test shot of the reef or my dive buddy. Then I check the image on my LCD screen (I shield it with my hand or body to block sunlight). I look at:
- Overall exposure: Is it too bright (overexposed) or too dark (underexposed)? Adjust ISO or aperture slightly.
- Background water brightness: If the blue water is too bright and distracting, I'll increase shutter speed. If it's too dark and murky-looking, I'll slow it down.
- Color balance: Are my strobes firing correctly? Is the white balance close? If everything looks too blue, I know I need to adjust strobe position or settings.
- Sharpness: Is my subject crisp? If not, I might need faster shutter speed or better focus discipline.
Don't be afraid to take dozens of test shots during your first few photo dives. Yes, you're "wasting" bottom time—but you're building a mental database of what settings work. By your fifth or sixth photo dive, you'll start to intuitively know "shallow reef, clear water, midday = f/8, 1/125th, ISO 320."
And please, check your images throughout the dive, not just at the end. I've had entire dives where my strobe wasn't firing properly (a flooded sync cord I didn't notice), or my white balance got bumped to the wrong preset. Catching those issues early means you can fix them and still salvage the dive.
Pro Tips & Common Mistakes
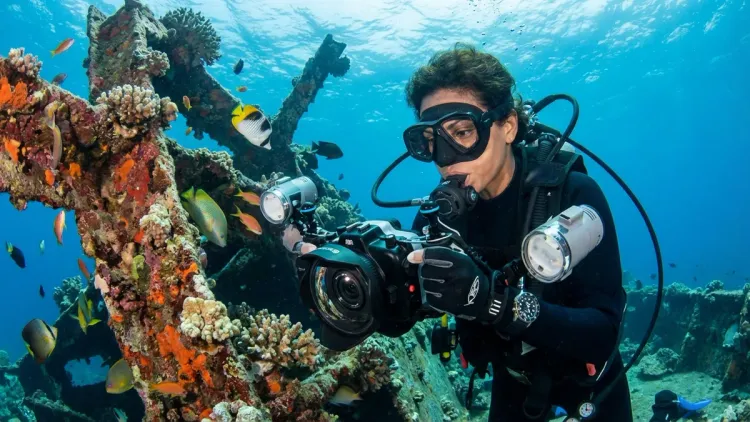
Pro tip #1: Shoot upward when possible. Positioning yourself below your subject and shooting upward toward the surface creates beautiful, bright backgrounds and silhouettes. It also separates your subject from the reef clutter. Plus, it's easier on your buoyancy control than trying to hover perfectly neutral above a subject.
Pro tip #2: Get close. Like, closer than feels comfortable. Water reduces contrast and sharpness even in crystal-clear conditions. The less water between your lens and your subject, the better your image quality. I've learned to approach slowly and let skittish fish get used to my presence, then inch even closer. Most of my best shots are taken from 1-3 feet away, not 6-8 feet.
Pro tip #3: Mind the backscatter. If your photos are full of white specks that look like snow, that's backscatter—your strobe light reflecting off particles in the water. Position your strobes farther from your lens axis, angle them slightly outward, and avoid stirring up sand. This took me forever to figure out.
Common mistake #1: Forgetting to format your memory card between dives. I've scrambled to delete images mid-dive because my card was full. Now I format after every dive (after backing up, obviously). Keep a spare card in your dive gear bag too.
Common mistake #2: Shooting too fast without checking settings. I've wasted entire dives because my ISO was stuck at 1600 from a previous night dive, or my white balance got bumped to Tungsten. Always do a full settings check as part of your pre-dive camera maintenance.
Common mistake #3: Chimping too much. "Chimping" is constantly reviewing your LCD screen instead of watching the reef. Yes, check your shots—but stay present. Some of the best photo opportunities happen when you're just observing and noticing behavior, not staring at your screen.
Frequently Asked Questions
What are the best camera settings for beginner underwater photography?
For beginner underwater photography, start with Aperture Priority mode set to f/8, ISO 400, and let your camera choose the shutter speed. Use continuous autofocus for moving subjects and single-shot for stationary ones. Set white balance to Daylight if using strobes or a custom underwater preset if shooting natural light. Shoot in RAW format and continuous burst mode to maximize your chances of sharp, well-exposed images while you're learning.
Should I use Manual mode or Aperture Priority for underwater photos?
Aperture Priority mode is ideal when you're starting out because it handles shutter speed automatically while you control depth of field and ISO. Once you're comfortable, switch to Manual mode for full control over exposure, especially useful when lighting conditions change frequently underwater. I recommend shooting at least 5-6 dives in Aperture Priority before attempting full Manual mode.
What ISO should I use for underwater photography?
For clear, shallow water with strobes, use ISO 200-400 to minimize digital noise. At greater depths (60-100 feet), increase to ISO 400-640. For available light photography without strobes, you may need ISO 800-1000 depending on conditions. Always use the lowest ISO that still gives you proper exposure, as higher ISO introduces grain that reduces image quality.
How do I fix blue or green color in my underwater photos?
Blue or green color cast happens because water absorbs warm colors as you descend. If using strobes, set white balance to Daylight preset (5500K). For natural light photography, use your camera's Underwater preset or shoot in RAW format and correct underwater color loss during post-processing. At 30-40 feet, try white balance around 3200-4000K to add warmth back into your images.
Summary
Getting your underwater photography camera settings right takes practice, but starting with solid fundamentals will save you a lot of frustration (and wasted dives shooting unusable images—been there!). Switch to Manual or Aperture Priority mode, set your aperture around f/8 for general scenes, use shutter speeds of 1/125th or faster to freeze motion, and keep ISO as low as conditions allow. Correct your white balance based on whether you're using strobes or natural light, nail your focus mode for your subject type, and always shoot RAW in continuous burst mode.
The real learning happens underwater. Review your test shots, adjust settings as conditions change, and build that mental database of what works for your local dive sites. Check out the full underwater photography and video guide for more context on gear and technique, and remember: your buoyancy control matters just as much as your camera settings. Master both, and your images will improve dramatically. Now get out there and shoot—those reef scenes aren't going to photograph themselves!