I learned about underwater camera maintenance the hard way—watching around $2,800 camera housing fill with seawater at 60 feet because I skipped a simple o-ring check. That's an expensive lesson I don't want you to repeat. This checklist covers the essential pre-dive and post-dive care steps that keep your camera gear watertight, your images sharp, and your investment protected. Whether you're shooting with a compact point-and-shoot in a basic housing or a full mirrorless rig with strobes, these maintenance habits apply across the board. They're not glamorous, but they're the difference between bringing home stunning shots and salvaging a flooded camera with a bag of rice and a prayer.
Pre-Dive Camera Inspection
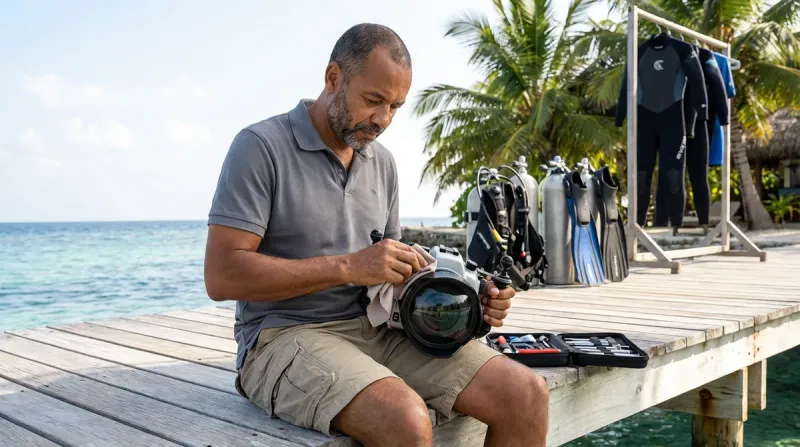
This is where most floods are prevented. I spend about 10 minutes on this routine before every dive, and it's saved me countless times. Here's what I check, in order:

O-ring inspection and lubrication — Remove the main housing o-ring completely and inspect it under good light for any hair, sand, scratches, or flat spots (they'll show up as dull patches). Even a single grain of sand can create a leak path. Clean the o-ring with your fingers (no towels—they leave lint) and apply a thin layer of silicone grease specific to camera housings, not the thick stuff you'd use on a scuba regulator.
O-ring groove cleaning — Use a cotton swab or your finger to remove any debris from the groove where the o-ring sits. I've seen tiny salt crystals hide in there and compromise the seal. The groove should feel smooth and clean, not gritty.
Port inspection — Check the port o-ring separately, and inspect the acrylic or glass for scratches, especially if you've been shooting macro and getting close to reef structures. Minor scratches affect image quality; deeper ones can create stress points that fail under pressure. Clean both sides of the port with a microfiber cloth—fingerprints and water spots will show up in your shots, particularly when shooting into sunlight.
Seal test before entering water — Close the housing completely, then submerge it in fresh water (a rinse bucket works) for 2-3 minutes before putting your camera inside. Watch for bubbles. If you see any, you've got a leak path. Better to find it in a bucket than at depth. This simple test has caught several marginal o-ring seals for me over the years.
Control button function check — Press every button and turn every dial with the housing closed but empty. They should move smoothly without binding. Stiff controls can mean salt buildup internally, and you don't want to discover a jammed shutter release when a manta ray swims past.
Strobe connection verification — If you're using external strobes (and you should be for anything beyond ambient light snapshots), check that fiber optic cables are seated properly and clean. Wipe the cable ends and the connection points—any debris blocks the light trigger. Test-fire your strobes on land to confirm they're syncing with your camera's internal flash. Here's a useful overview of strobes vs continuous video lights if you're deciding which system works for your shooting style.
Desiccant pack freshness — If your housing has space for a silica gel pack or humidity indicator card, make sure it's active (usually blue, not pink). These prevent internal fogging by absorbing moisture. I replace mine every 10-15 dives or whenever they change color. Internal fogging won't flood your camera, but it'll ruin every shot until you surface and open the housing.
Battery and memory card confirmation — Sounds obvious, but I've watched divers splash with dead batteries or full memory cards. Check both, format your card if needed, and confirm your settings are correct. Once you're sealed up and underwater, you can't fix these problems. I keep a dive-specific camera settings checklist on my phone—same ISO, white balance, and shooting mode configuration every time, so I'm not troubleshooting 20 feet down.
Post-Dive Rinse and Cleaning Protocol
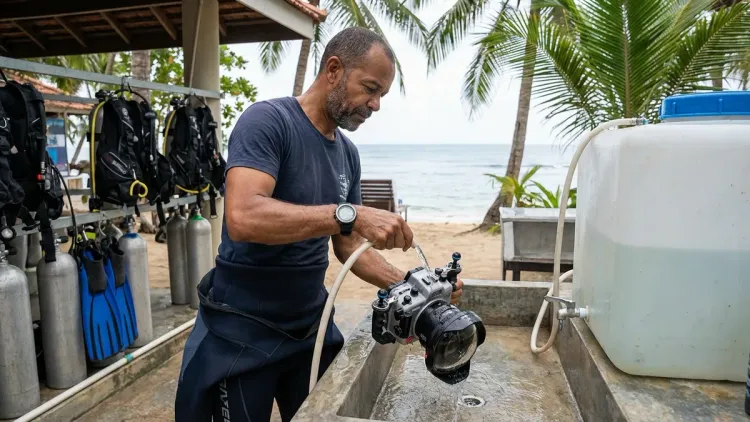
This is where gear lives or dies. Skip the post-dive rinse, and salt crystals will work their way into every seal and joint. I've seen housings with corroded controls and frozen buttons because someone threw their rig in a gear bag wet and called it a day.
Immediate freshwater soak — As soon as you're off the boat or back on shore, submerge the entire sealed housing in fresh water. Don't just spray it—soak it for at least 5 minutes. I use a dedicated mesh dive bag with my housing and strobes submerged in a large rinse bin. While it soaks, gently press all the control buttons underwater to flush salt water out of the mechanical linkages.
Control button actuation during rinse — Press every shutter release, mode dial, and zoom control multiple times while the housing is submerged in fresh water. You're flushing trapped salt water from inside the button mechanisms. Salt crystals form as water evaporates, and they'll jam your controls if left to dry. This step takes 30 seconds and extends housing life by years.
Port cleaning technique — Remove the port if your housing design allows it, and rinse the port and port o-ring separately. Clean the front and back glass surfaces with a microfiber cloth and lens cleaning solution. I carry two separate cloths—one for the outside (which touches saltwater and my fingers) and one for the inside glass (which stays pristine). Mixing them up puts scratches and debris on your optical surface.
Strobe arm and connection rinse — Salt loves to accumulate in ball-mount joints and clamps. Loosen each joint slightly and rinse under running fresh water, then re-tighten. Fiber optic cable ends should be wiped clean with fresh water and a soft cloth. If you're using AMAZON: underwater photography strobes, they'll have their own o-ring seals that need the same attention as your housing.
Drain and dry housing exterior — After the soak and rinse, hold the housing at various angles to drain water from button recesses and joints. Shake it gently. Then leave it open to air (still sealed with camera inside) for about 10 minutes before opening. This prevents dripping water near the o-ring groove when you remove the back.
Inspection before opening — Before you pop the housing open, dry the exterior one more time and visually inspect the seal area. Any standing water near the opening should be wiped away. I've seen people open a housing with a puddle sitting right on the seal line, and gravity does the rest—straight onto the camera electronics.
Camera and Housing Interior Maintenance
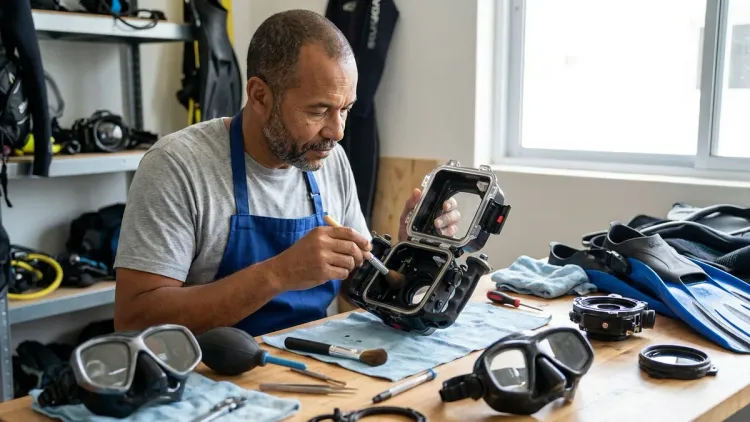
This is what most people skip. The outside gets rinsed, but the inside degrades slowly until something fails. Interior maintenance is less frequent but critical for longevity.
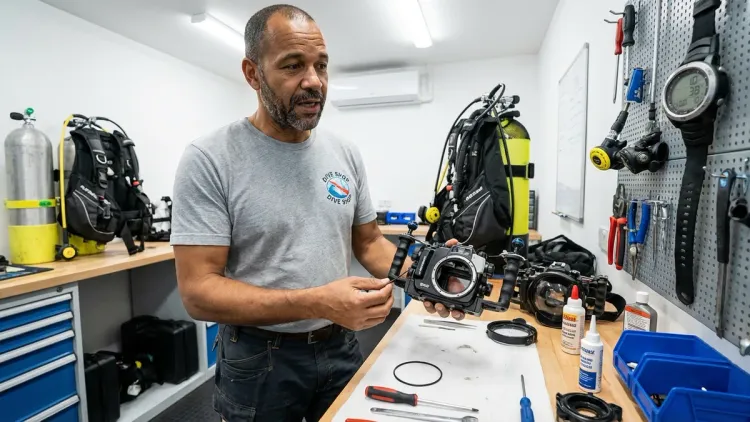
O-ring removal and storage — At the end of a dive trip (or every 5-10 dives if you're diving frequently), remove the main housing o-ring and store it in a sealed plastic bag or o-ring case with a light coating of lubricant. Leaving o-rings installed under compression for long periods can cause them to take a set—they develop flat spots and lose sealing ability. Manufacturer guidelines (Ikelite, Nauticam, and Sea & Sea all publish maintenance schedules) typically recommend o-ring replacement annually, but I replace mine every 50 dives or sooner if I see any wear.
Internal corrosion inspection — Open the housing completely and inspect internal metallic controls, screws, and linkages for any signs of corrosion or salt deposit. If you see white or green crusty buildup, you've had moisture infiltration. Clean it with a cotton swab dipped in fresh water, dry thoroughly, and consider having the housing pressure-tested before your next dive trip. Minor surface corrosion isn't an emergency, but it's a warning sign.
Control mechanism lubrication — Housing manufacturers specify lubrication points for internal button mechanisms and control shafts. This isn't an o-ring application—it's usually a dry lubricant or light silicone spray on mechanical pivot points. Check your housing manual. Over-lubricating creates a dirt magnet; under-lubricating causes binding and wear. I lubricate these points once per year or every 100 dives.
Desiccant replacement schedule — Silica gel desiccant packs lose effectiveness with humidity exposure. I replace mine after every 10 dives or whenever the indicator card shows saturation. You can reactivate silica gel by baking it in an oven at 250°F for a couple hours (check the package instructions), but fresh packs are cheap insurance. Internal fogging during a dive usually means your desiccant is spent or you opened the housing in humid conditions.
Leak alarm battery check — If your housing has a built-in leak alarm (some higher-end models do), test it every few months and replace the battery annually. These alarms give you a few seconds' warning before catastrophic flooding, which is enough time to abort the dive and surface. I've heard the alarm go off exactly once—on a housing with a failed port o-ring at 40 feet. That around $15 battery saved around $3,000 in camera gear.
Storage and Long-Term Care

How you store your camera gear between dive trips determines whether it's ready to go next time or needs overhaul. Proper storage prevents corrosion, mold, and seal degradation.
Humidity-controlled environment — Store your housing, ports, and camera in a dry environment, ideally with 30-50% relative humidity. I keep mine in a climate-controlled room with a small dehumidifier. High humidity promotes mold growth on o-rings and internal camera surfaces; extremely low humidity can dry out o-ring rubber and cause cracking. Room temperature is fine—extreme heat or cold degrades o-ring elasticity.
O-rings removed and bagged — For storage longer than two weeks, remove all o-rings from housings and ports, clean them, apply a light coat of lubricant, and store them in individual sealed bags away from direct sunlight. UV light degrades rubber compounds. I keep mine in a small plastic case inside my camera bag, labeled by which seal they belong to.
Housing stored with back open — Never store a housing sealed for extended periods. This traps moisture and promotes corrosion. Leave the back open or loosely set in place without latching. This allows airflow and prevents pressure differentials that can stress seals.
Strobe o-ring and battery maintenance — Remove batteries from strobes if you're not diving for more than a month. Battery corrosion inside a strobe is a common failure mode, and it's completely preventable. Check and lubricate strobe o-rings on the same schedule as your housing seals—they're just as critical but often overlooked.
Annual pressure testing — Even if everything looks perfect, have your housing professionally pressure-tested once a year if you're doing deep dives (beyond 60 feet) regularly. Dive shops with camera departments can usually do this, or you can send housings back to the manufacturer. This catches seal degradation and micro-leaks before they become catastrophic. It costs around $30-50 and is worth every cent if you're shooting expensive camera bodies.
Port storage orientation — Store acrylic or glass dome ports vertically, never face-down. This prevents dust settling on the optical surface and reduces the chance of scratching. Flat ports can be stored face-up in a padded case. I wrap my ports individually in microfiber cloths before packing them.
Final Check Before You Go
Here's a condensed 60-second checklist I run through right before entering the water—after all the detailed prep is done. This is your last line of defense:
- Main o-ring and port o-ring inspected, cleaned, and properly seated
- Housing sealed, submerged in freshwater for 2-3 minutes with no bubbles
- All control buttons tested and moving freely
- Strobes connected, syncing, and firing on test shots
- Battery charged, memory card empty and formatted
- Desiccant pack fresh and active (blue, not pink)
- Camera settings confirmed: correct ISO, white balance, shooting mode
- Lanyard or attachment point secure (I've dropped housings during surf entries—learn from me)
This list lives on a laminated card in my camera bag. I've been diving and shooting for over a decade, and I still check it. Complacency floods cameras.
If you're also working on your buoyancy control for underwater photography, you'll appreciate that solid camera maintenance means one less thing to worry about while you're hovering inches from a reef trying to nail a macro shot. Equipment that works lets you focus on the image, not whether your housing is filling with water.
Frequently Asked Questions
How often should I replace my underwater camera housing o-rings?
Replace your main housing and port o-rings at least once per year if you're diving regularly (20+ dives annually), or every 50 dives, whichever comes first. Visual inspection matters more than a fixed schedule—if you see any nicks, flat spots, stretching, or if the o-ring feels brittle or sticky rather than smooth and pliable, replace it immediately regardless of dive count. Strobe o-rings follow the same replacement schedule, though they're often overlooked. Budget o-rings usually cost around $5-15 each; a flooded housing repair starts at around $500, so this is cheap insurance.
Can I use any silicone grease for my camera housing o-rings?
No, use only grease specifically formulated for underwater camera housings—brands like Ikelite, Nauticam, and Sea & Sea sell their own formulations, and they're compatible across most housings. Regular scuba regulator grease is often too thick and can attract more dirt, while petroleum-based greases degrade rubber o-rings over time. Camera housing o-ring grease is thinner, stays cleaner, and maintains the exact seal compression these housings require. One small tube lasts 100+ dives and usually costs around $10. It's a small detail that makes a measurable difference in seal reliability.
What should I do immediately if I notice moisture inside my camera housing underwater?
Abort the dive immediately, ascend at a safe rate (no faster than 30 feet per minute, making safety stops as required), and keep the housing as level and still as possible to prevent water from reaching the camera. Once at the surface, don't open the housing right away—that can pull more water inside. Get to shore or back on the boat, rinse the housing exterior with fresh water, dry it thoroughly, then carefully open it away from the camera side (tilt it so the back faces down). Remove the camera, dry everything you can, and let it air-dry completely before attempting to power it on. Remove the battery and memory card immediately. If the camera took on water, don't turn it on—bring it to a professional electronics repair service within 24 hours. Saltwater corrosion accelerates quickly once the water evaporates and leaves salt crystals behind on circuit boards.
Final Thoughts
Underwater camera maintenance isn't glamorous, but it's what separates people who get consistent shots from people who post "camera flooded" stories in dive forums. I've been on both sides. The detailed checklists and rinse protocols feel tedious until you're 80 feet down on a wreck in Cozumel, watching a nurse shark cruise past, and your housing is bone-dry and working perfectly because you spent 10 minutes that morning inspecting o-rings.
This stuff matters more than the camera body you choose, the housing brand you buy, or how many strobes you're running. Maintenance is the foundation. Get it right, and everything else—composition, lighting, timing—gets easier because you're focused on the image, not wondering if your housing is leaking. Start with the pre-dive inspection, commit to the post-dive rinse, and check your o-rings every single time. Your camera will last longer, your shots will be sharper, and you won't be that diver trying to dry around $3,000 mirrorless rig with a hair dryer in a dive shop bathroom. Trust me on that one.