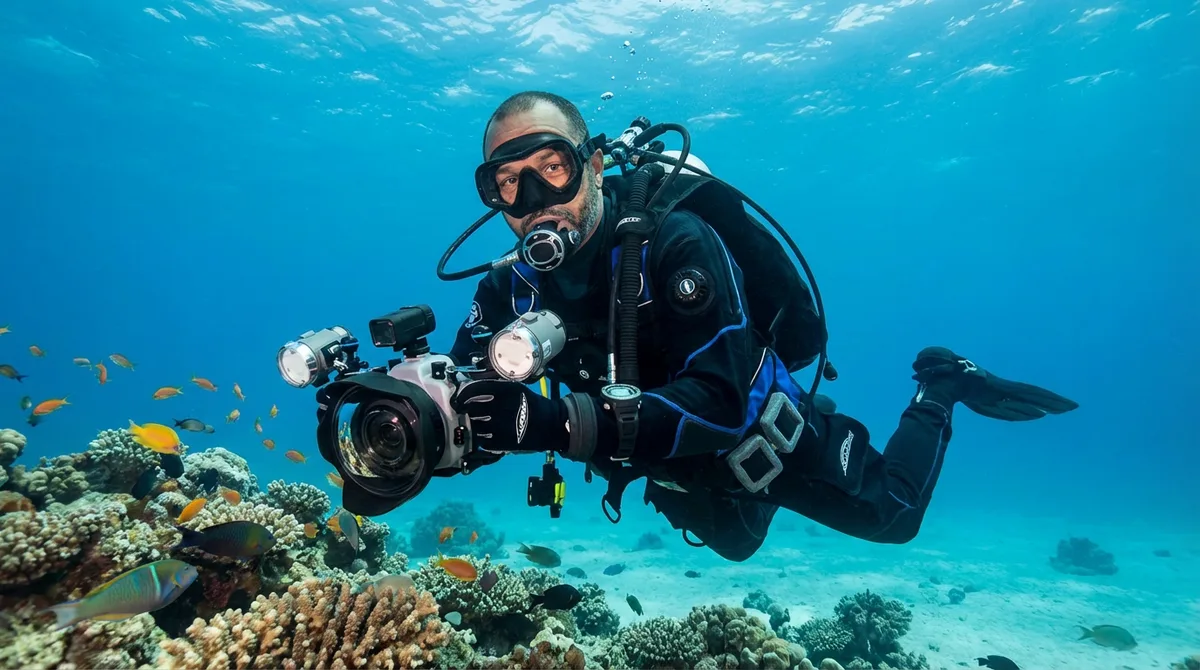
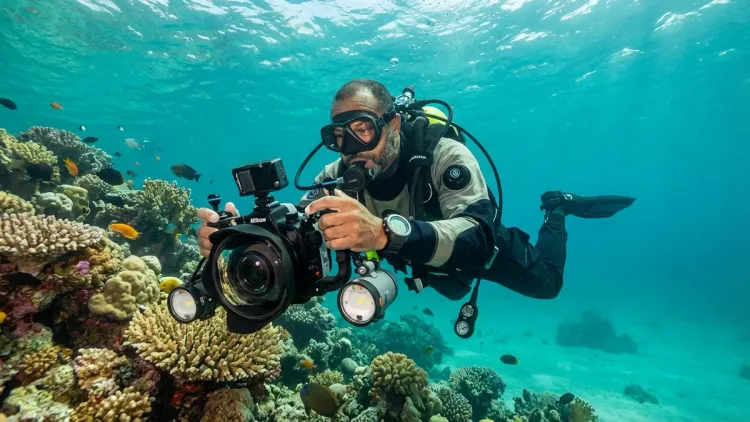
I've spent thousands of dives chasing shots—nudibranchs, wrecks, whale sharks, you name it—and I can tell you with absolute certainty that buoyancy control underwater photography is the single most important skill you'll develop as an underwater shooter. Not your camera settings, not your strobe positioning, not even your composition eye. If you can't hover motionless at exactly the right depth while framing a shot, none of the other skills matter. You'll blow out the sand, scare away your subject, or drift right past the moment you traveled halfway around the world to capture.
This guide will walk you through the specific techniques I use to achieve rock-solid buoyancy while shooting underwater. We'll cover weighting adjustments for camera rigs, breathing rhythm modifications, and body positioning strategies that work in current, surge, and every situation in between. Whether you're shooting macro subjects an inch off the reef or working with wide-angle over kelp forests, these methods will transform how you move—or rather, how you don't move—underwater.
Skill level: Advanced beginner to intermediate (you should be comfortable with basic buoyancy and have at least 20 logged dives)
Time to develop: 10-15 dives of dedicated practice, though you'll see improvement immediately
What You'll Need
Before we dive into technique, here's what you need to have dialed in:
- A properly fitted BCD with responsive dump valves and inflator you can operate without looking (how to choose a buoyancy compensator covers the selection process)
- Your complete camera rig including housing, strobes/lights, arms, and any accessories you'll actually use
- Correct base weighting for your exposure suit without the camera (complete a BCD pre-dive safety check before every session)
- A reliable dive computer to monitor depth without constant head movement (how to read a dive computer display underwater if you're still getting comfortable with yours)
- At least 10 recent dives in your current exposure suit configuration
- A buddy or instructor willing to observe and provide feedback (especially for the first few practice dives)
- A calm, shallow site (20-40 feet ideal) with minimal current for your initial practice sessions
- Patience because this will feel awkward before it feels natural
Step 1: Re-Calculate Your Weighting With Your Full Camera Rig
Here's what nobody tells you when you first start underwater photography: that shiny new camera housing you just bought completely changes your buoyancy profile. I learned this the hard way on a trip to Bonaire in 2021, where I showed up with a brand-new housing and my usual 12 pounds of lead. I spent the entire first dive porpoising like a drunken dolphin because I hadn't accounted for the negative 4 pounds my aluminum housing became at depth.
Start with a buoyancy check at your planned shooting depth. Get neutral without your camera first—at the end of a dive with 500 PSI in your tank, you should hover at 15 feet with an empty BCD. Write down exactly how much weight that takes. Now add your full camera rig and repeat the exercise on your next dive. Most aluminum housings with strobes will add around 3-5 pounds of negative buoyancy at depth. Smaller compact setups might only add around 1-2 pounds. Big DSLR rigs with dual strobes and 8-inch dome ports can add around 6-8 pounds of negative weight.
The counterintuitive part: you want to remove 1-2 pounds of lead from your belt once you add that camera rig. Yes, remove it. The reason is control range. If you're perfectly neutral with your camera, you have equal ability to add or dump air for micro-adjustments. If you're too negative, you're constantly adding air to your BCD to compensate, which makes you sluggish and less responsive to depth changes.
I now dive 2 pounds lighter with my full Nauticam housing than I do on recreational dives without a camera. That gives me a hair of positive tendency that I counteract by holding the rig slightly below my center of mass—which brings me to body position, but we'll get there in step 4. The point here is that accurate weighting isn't a one-time calculation. Every time you change exposure suits, add equipment, or modify your camera setup, you need to recalculate from scratch.
Step 2: Master Breath Control and Lung Volume Management
Your lungs are a buoyancy compensator that holds roughly 5-7 pounds of lift variation between full and empty. That's more range than most photographers need to add or remove from their BCD during an entire dive. The problem is that breathing is automatic—your body does it without conscious input—which means you're making constant buoyancy adjustments without realizing it.
The fundamental technique: Breathe slowly and maintain consistent lung volume at the bottom of each exhale. When I'm setting up a shot, I'm breathing in a 4-second cycle: 2 seconds in, 2 seconds out, with a natural pause at the bottom of the exhale. That pause is where I'm most stable. If I need to drop 6 inches to frame something lower, I extend that pause by another second or two and let myself sink naturally. If I need to rise slightly, I take a fuller inhale and hold at the top for a moment.
Here's the practical drill I run with students: Find a sandy bottom at 25 feet. Achieve neutral buoyancy in your normal breathing rhythm. Now, without touching your BCD controls, rise and sink 3 feet using only breath control. You should be able to go up by taking a deep breath and holding it for 5-6 seconds, then sink back down by exhaling fully and holding at the bottom of the breath. Practice this for an entire tank—just up and down, controlled entirely by lung volume. It's boring as hell, but it's the foundation of everything else.
One warning: don't hold your breath while ascending, even during these exercises. The exhale-hold technique only works when you're maintaining depth or descending. Any time you're moving up in the water column, you need to be breathing out continuously or at least exhaling in pulses. I had a student in Cozumel nearly give himself an arterial gas embolism scare because he was holding his breath to "stay steady" while drifting upward in current. The physics of Boyle's Law don't care about your composition—expanding air in your lungs will hurt you.
Step 3: Use Your BCD in Micro-Adjustments, Not Full Dumps and Blasts
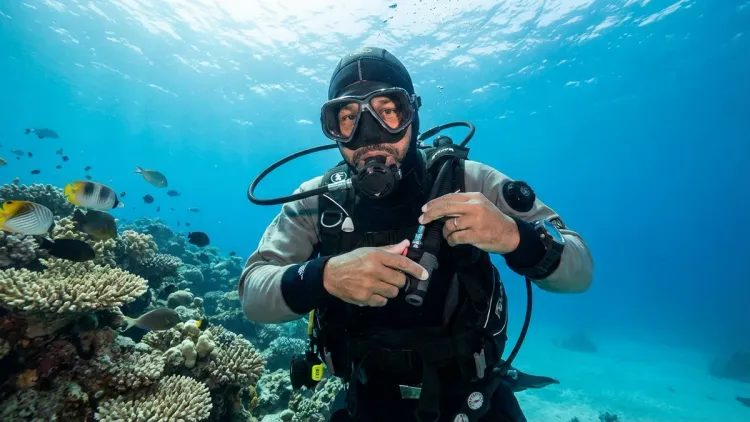
Most divers treat their BCD inflator like a binary switch: empty or full. Underwater photographers need to think of it as a precision instrument with infinite gradients. The difference between being planted perfectly in front of a pygmy seahorse and drifting into the reef is often a half-second tap of air—maybe half a cubic inch added or vented.
Develop a "tap and wait" rhythm. When you realize you're slowly sinking, don't blast air into your BCD for a full second. Tap the inflator for a quarter-second—just enough to hear a brief hiss—then wait 3-4 seconds to see how your buoyancy changes. If you're still sinking, give it another quarter-second tap. This approach prevents the overcorrection cycle that plagues new photographers: too much air, now you're rising, dump some out, now you're sinking, add more back, and you've just spent 30 seconds bobbing like a cork while your subject swims away.
The same principle applies to dumping air. Don't pull your dump valve wide open. Crack it slightly and release short bursts while maintaining your body position. I use my left shoulder dump almost exclusively while shooting because I can reach it without shifting my camera rig, and I've trained myself to release air in half-second pulses while monitoring my rate of descent.
Here's a practical benchmark: On a good photo dive where I'm working a single subject for 5-10 minutes, I'm probably making 20-30 BCD adjustments, but each one involves less than one second of inflator or dump valve activation. Compare that to a typical recreational dive where I might make 4-5 major adjustments of several seconds each. The total air moved is similar, but the distribution is completely different. You're constantly trimming, not constantly correcting.
One more thing: use your power inflator, not your mouth to add air. I know old-school divers who can orally inflate with one hand while holding a camera with the other, but it's a terrible habit for photography. Oral inflation requires you to break your breathing rhythm, shift your jaw position (which changes your overall body angle), and remove your regulator. All of that creates movement. Power inflator taps can be done without disrupting anything else.
Step 4: Position Your Camera Rig to Optimize Your Center of Mass
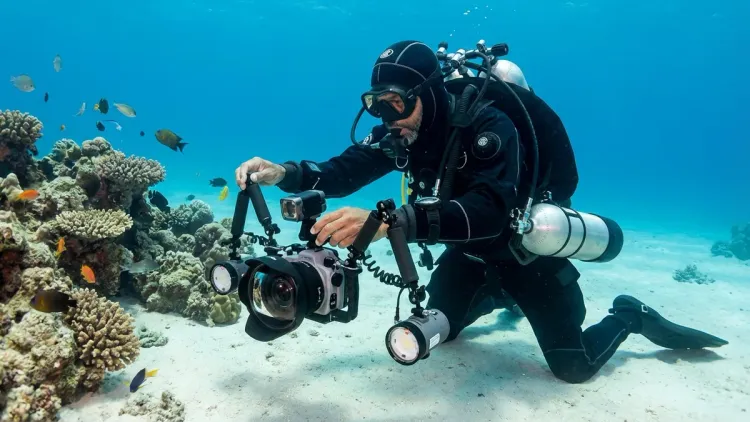
This is where physics gets fun. Your body underwater isn't a uniform cylinder—you're heavier toward your tank and core, lighter toward your feet and head. Where you hold your camera rig relative to your center of mass directly affects your trim angle and buoyancy stability.
For horizontal shooting positions (most wide-angle work, reef scenes, pelagic subjects), hold your camera rig slightly below and in front of your chest. This counteracts the weight of your tank and keeps you in a comfortable horizontal trim without needing to arch your back. Your arms should be slightly bent, not fully extended, so you're not fighting to hold position. I see a lot of photographers lock their elbows and extend the camera way out in front of them—that creates a torque moment that rotates your body head-down and makes you work much harder to stay level.
For vertical shooting positions (macro work, looking down at sand-dwellers), bring the camera closer to your chest and use your entire body as a stable platform. I'll often tuck my elbows against my ribs and use micro-adjustments in my fin angle to control vertical movement. The camera becomes part of your core mass rather than a weight you're holding at arm's length.
Here's the part that takes practice: adjust your body position with your rig, not the other way around. When you spot a subject, your first instinct is to contort yourself into position and then bring the camera up to shoot. That's backwards. Position your camera where it needs to be for the shot, then adjust your body—fins, head angle, arm position—to stabilize yourself around that camera position. The rig is the anchor point, your body is the stabilization system.
I spent a week in Lembeh specifically working on this with a housing that was 3 pounds more negative than I was used to. Every time I extended the camera to frame a shot, my head would tilt down and my fins would rise. The fix was learning to adjust my fin angle and hip position simultaneously with extending the camera—essentially pre-compensating for the weight shift before it happened. Now it's automatic, but it took probably 15 dives of conscious practice before the movement pattern locked in.
Step 5: Develop a Pre-Shot Hover Sequence
Even with perfect weighting, breathing, and body position, you're not going to nail a shot if you're still moving when you press the shutter. I learned this the brutal way: reviewing 200 images from a trip to Raja Ampat and realizing that 150 of them had some degree of motion blur or composition drift. I was pressing the shutter while still in motion, hoping I'd get lucky with timing. That's not photography, that's gambling.
The hover sequence I use now: First, I establish rough neutral buoyancy and position myself about 2 feet farther from the subject than my final shooting distance. Second, I make my final BCD micro-adjustments—usually a tiny dump if I'm slowly rising, or a tap of air if I'm settling. Third, I pause and take two full breath cycles while holding the camera in shooting position but not looking through the viewfinder. This lets me assess whether I'm actually stable or just moving slowly. Fourth, I bring the camera to my eye, frame the shot, and take one more breath cycle. Fifth—and only fifth—I press the shutter at the bottom of an exhale.
That sequence sounds long, but it takes maybe 10-12 seconds in practice. Compare that to the 30-60 seconds I used to waste fighting my buoyancy, taking half-focused shots, checking the LCD, repositioning, and repeating the whole cycle. Stable first, shoot second is the mantra. You cannot skip the stability phase.
Here's the mistake I see constantly, even from experienced divers: they achieve momentary stability, press the shutter, and then immediately check their LCD to see if they got the shot. The instant you tilt your head down to look at the screen, you break your trim angle, shift your center of mass forward, and start sinking. Now you're scrambling to re-establish buoyancy while also trying to reframe for a second shot. It's chaos.
Take 3-5 shots before you review anything. Hold your position, maintain your breathing rhythm, and work the subject for multiple frames. Only then—once you're done with that shooting sequence—move off, stabilize in a new position, and review your images. This discipline alone will probably double your keeper rate.
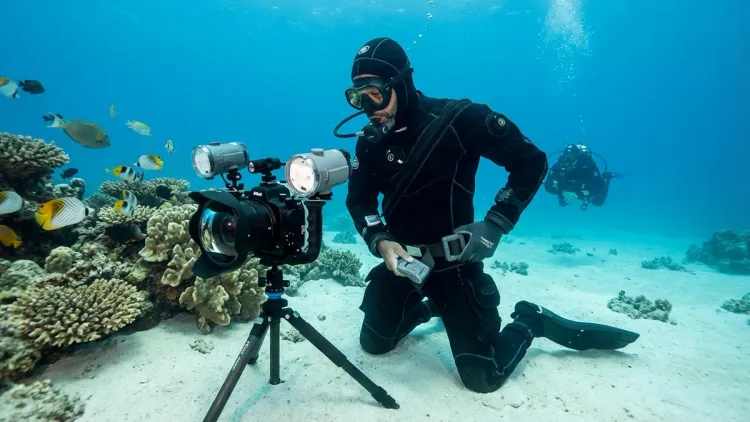
Step 6: Use Environmental Anchors and Reference Points
Perfect buoyancy in open water is one thing. Perfect buoyancy 18 inches from a reef wall while shooting a tiny blenny in surge is a different sport entirely. You need external reference points to maintain position when conditions aren't cooperating.
The reef hook technique: In current, I'll often carry a small reef hook (a simple stainless steel hook on 3-4 feet of line) that clips to my BCD D-ring. When I find a subject, I can hook onto dead coral or rock and let the current hold me in position while I shoot. This only works if you're properly weighted—if you're too negative, the hook doesn't help because you're still sinking. I used this extensively in Palau where current is the norm, and it transformed my productivity. Just be extremely selective about what you hook onto—dead substrate only, never living coral, and never in protected areas where it's prohibited.
The fin-tip touch: For macro work near the sand or reef, I'll use the very tip of one fin to lightly contact the bottom as a stability reference. Not pressing down, not resting weight on it—just enough contact to give me tactile feedback about drift. The moment I feel that contact point shifting, I know I'm moving and can correct. This technique requires excellent buoyancy control as a prerequisite; if you're overweighted, you'll end up kneeling on the reef, which is both environmentally destructive and looks terrible to other divers.
The visual reference method: In open water or when shooting pelagic subjects, pick a visual reference at the same depth as your subject—a particle in the water, a distant reef feature, anything stationary. Use your peripheral vision to monitor that reference point while you're shooting. If it's moving relative to your subject, you're drifting. I used this technique extensively while shooting schooling fish in the Azores where there was no bottom and current was variable. It's less precise than physical contact points, but it's better than nothing.
One important note about reference points: they're aids, not crutches. The goal is to develop buoyancy control that doesn't require them. On an ideal dive in calm conditions with no current, you shouldn't need to touch anything or hook onto anything—you should be able to hover in free water with your camera at shooting position for 5-10 minutes without meaningful drift. Reference points are for when conditions exceed your skill level, not for normal operating procedure.
Step 7: Practice Finning Techniques That Don't Destroy Your Stability
Your fins are both your primary propulsion system and your biggest source of buoyancy disruption. Every fin kick creates a momentum vector that moves you through the water—which is exactly what you don't want when you're trying to hold position for a shot. The solution isn't to not use your fins; it's to use them in ways that provide micro-adjustments without creating major movement.
The flutter kick is your enemy while shooting. That long, sweeping motion that's efficient for cruising creates huge momentum swings and disrupts your horizontal trim. Once you're in shooting position, the flutter kick has no place in your technique. Instead, you need precision alternatives.
Modified frog kick is my primary adjustment tool. Small, slow frog kicks with your fins moving horizontally (not up and down) let you make tiny positional corrections without disrupting your upper body. I'll use a partial frog kick—where I'm only extending my fins 6-8 inches rather than the full range—to creep forward or backward by inches while maintaining camera position. The key is keeping your knees bent and moving only from the knees down, not from the hips.
Helicopter turn is essential for rotating in place. Cross one fin over the other and make a small circular motion—this spins you on your vertical axis without any forward/backward movement. I probably use this technique 30 times per dive when I'm working small subjects and need to adjust my angle relative to the subject without changing my distance.
Reverse kick for backing away from subjects. This is just a backwards frog kick, pushing water forward instead of backward. Critical for macro work when you suddenly realize you're 6 inches too close and need to back off without disturbing the sand with your fins or spooking your subject with sudden upward movement.
The sculling fin: For ultra-fine adjustments, I'll make tiny figure-eight patterns with just my ankles—imagine stirring soup with your feet. This creates almost no momentum but gives you precise control for holding position against slight current or adjusting position by centimeters.
Here's the hard truth: these techniques require fins that are appropriate for precision work. If you're diving in split fins or long freediving fins, you're going to struggle. Precision photography finning works best with medium-stiffness paddle fins or technical diving fins with spring straps. I personally dive Scubapro Jet Fins for photography—they're heavy and old-school, but they give me incredible control for small movements. That negative weight in the water also helps me maintain horizontal trim without effort.
Step 8: Build Your Skill Progressively Through Deliberate Practice Dives
Everything I've described sounds simple on the surface, but integration is where most photographers stall out. You can't work on all these elements simultaneously on a regular dive—you need dedicated practice sessions with specific goals.
My recommended progression: Dive 1-2 should focus exclusively on weighting and breath control. No camera, or if you bring it, don't turn it on. Just work on hovering at various depths using only breathing. Dive 3-4, add the camera rig and practice the pre-shot hover sequence without actually taking photos—just go through the motion of framing shots while holding position. Dive 5-6, shoot only stationary subjects (sponges, anemones, anything that's not going anywhere) while focusing on your buoyancy rather than your composition. Don't even worry if the shots are good; you're training muscle memory.
By dive 7-8, you should be ready to combine buoyancy control with actual photography on moving subjects. This is where it gets fun, because you'll suddenly realize you're getting shots you would have missed entirely a few weeks earlier. I track my "keeper rate"—the percentage of shots that are technically acceptable (sharp, properly framed, correct exposure). When I started this progression, my keeper rate was maybe 15%. After 15 dedicated practice dives, it was over 60%. That's the difference between hoping you get a good shot and knowing you will.
Find a photography buddy who's ahead of you skill-wise. Having someone who can watch you work and point out when you're drifting, sinking, or fighting your gear is invaluable. I spent a week diving with a photographer in Anilao who was willing to follow me around and give me real-time feedback between shots. Brutal at times—"You just kicked up a cloud of sand, and you're not even aware you're doing it"—but that external observation accelerated my learning curve by months.
One last element: video yourself. Mount a GoPro on your BCD shoulder strap pointing at your fins, or have your buddy shoot video of you while you're working. Watching yourself from an external perspective is humbling and illuminating. I thought I had good horizontal trim until I watched footage of myself shooting and realized I was constantly see-sawing between 5 and 10 degrees head-down. I genuinely had no idea I was doing it. One dive of conscious correction and the problem was mostly fixed.
Pro Tips & Common Mistakes

The "camera-drop test": If you're truly neutral with your full rig, you should be able to release your camera (while it's secured with a tether, obviously) and have it hang neutrally in front of you without pulling you down or floating up. If it sinks, you're overweighted. If it rises, you need more weight somewhere—either on your body or in the housing. I see photographers fighting their gear on every dive because they've never actually checked whether their rig is close to neutral.
Avoid weight belt adjustments during the dive. Every time you shift lead around, you're changing your center of mass and your trim angle. Get your weighting right on the surface with a proper buoyancy check, then leave it alone for the entire dive. If you find yourself constantly adjusting your belt position to compensate for camera weight, that's a red flag that your overall weighting calculation is wrong.
Don't fight your drysuit. If you're shooting in cold water with a drysuit, the buoyancy dynamics get significantly more complex because you now have two independent buoyancy systems: your BCD and your suit. The general principle: use your drysuit for gross buoyancy and your BCD for fine-tuning. But honestly, drysuit photography deserves its own entire guide—the squeeze/expansion characteristics and the air migration issues add a layer of complexity that's beyond the scope of this article. Just know that if you're struggling in a drysuit, the principles here still apply, but you'll need additional training specific to drysuit buoyancy management.
The biggest mistake I see: Photographers trying to compensate for bad buoyancy with fast shutter speeds. Yes, 1/250s will freeze your subject's motion, but it won't freeze your motion if you're drifting through the frame. You need both stable position and adequate shutter speed. One doesn't substitute for the other.
Frequently Asked Questions
How long does it really take to master buoyancy control for underwater photography?
Based on working with dozens of students, most divers need 10-15 dedicated practice dives over 4-6 weeks to develop solid buoyancy control underwater photography skills. You'll see improvement immediately—probably 30-40% better stability on your first conscious practice dive—but the integration of breath control, body position, and camera handling into automatic muscle memory takes time. Advanced skills like holding position in current while shooting macro or maintaining horizontal trim while tracking moving subjects can take 30-50 dives to truly master. The key factor is deliberate practice: if you're just hoping your buoyancy improves while doing regular photo dives, progress will be much slower than if you dedicate specific dives to working on particular elements of buoyancy control.
Should I adjust my weighting differently for macro versus wide-angle photography?
Generally no—your base weighting should remain constant regardless of what you're shooting, but your camera rig's buoyancy characteristics might change significantly. A macro setup with a compact camera and single small strobe might be around 2-3 pounds negative, while a wide-angle setup with a DSLR housing, dual strobes, and an 8-inch dome port might be around 6-8 pounds negative. The solution isn't to change your lead weight for each setup; it's to adjust your camera rig's buoyancy by adding foam floats to strobe arms or choosing housings with different buoyancy characteristics. Your goal should be a camera rig that's close to neutral at depth so it's not constantly fighting against your body's buoyancy. I keep my personal weighting at 10 pounds in a 3mm suit regardless of camera setup, but I have different float configurations for different rigs to bring the camera close to neutral.
What's the best BCD type for underwater photography?
Back-inflate BCDs and wing-style BCDs generally provide better horizontal trim and stability for photography compared to jacket-style BCDs, but the real answer depends on your diving style and experience level. Back-inflate designs keep your center of buoyancy behind your center of mass, which naturally positions you in a horizontal shooting orientation without effort. Jacket BCDs tend to push you into a more upright position, which means you're constantly fighting trim angle while trying to shoot. That said, if you learned on a jacket and it's what you're comfortable with, don't rush to change—buoyancy control technique matters far more than equipment type. I dive a Zeagle Ranger for photography because I prefer the weight-integrated design, but I know excellent photographers who shoot in jackets. Focus on skill development first, equipment optimization second.
Can I practice buoyancy control for photography in a pool?
Yes, pool sessions are excellent for developing the foundational skills—breath control, fin techniques, hovering in place, and pre-shot sequencing—but they have limitations because pool water is usually warmer than ocean water and you're in a controlled environment without current, surge, or thermoclines. I recommend pool practice for the first 3-5 practice sessions to build basic muscle memory without the complexity of open-water conditions, then transitioning to shallow ocean sites (20-30 feet) for real-world application. The key benefit of pool practice is repetition: you can do 20 hover sequences and position-hold drills in an hour-long pool session, whereas ocean conditions might limit you to 5-10 good practice opportunities per dive. Just make sure you're practicing with your full camera rig and the same exposure suit you'll use in open water, not just a bathing suit, or your weighting and buoyancy characteristics will be completely different when you transition to real diving.
Summary
Mastering buoyancy control underwater photography transforms you from someone who occasionally gets lucky with a good shot to someone who consistently captures the images you envision. The progression is straightforward but requires dedication: accurate weighting with your full camera rig, breath control that becomes second nature, BCD micro-adjustments instead of gross corrections, body positioning that works with physics instead of against it, and deliberate practice that builds skill incrementally.
Start with the basics—weighting and breathing—before you worry about complex finning techniques or environmental reference points. Every element builds on the previous one. I've watched photographers with expensive camera setups and years of diving experience struggle to get sharp images simply because they never invested the time to develop rock-solid buoyancy fundamentals. Don't be that person.
The diving world has excellent resources on related topics like understanding BCD lift capacity and proper BCD maintenance, but ultimately, buoyancy for photography comes down to time in the water with conscious focus on improvement. Fifteen dedicated practice dives will change everything about how you move—and how you shoot—underwater.