I've watched divers skip their BCD pre-dive check more times than I'd like to admit, and I've also seen what happens when they do: uncontrolled ascents from stuck inflator buttons, rapid descents from blown dump valves, and the particular panic that sets in when you realize at 60 feet that your oral inflator won't seal. This comprehensive BCD pre-dive check guide walks you through every critical inspection point before you enter the water—whether you're diving a jacket-style BC on a Caribbean reef or a back-inflate wing system on a technical wreck dive.
Your buoyancy compensator is the one piece of gear that directly controls your position in the water column, which means it's also the one piece that can ruin your dive—or save it—in seconds. I've logged over 3,000 dives, and I still run through this checklist every single time, because muscle memory catches problems that casual glances miss.

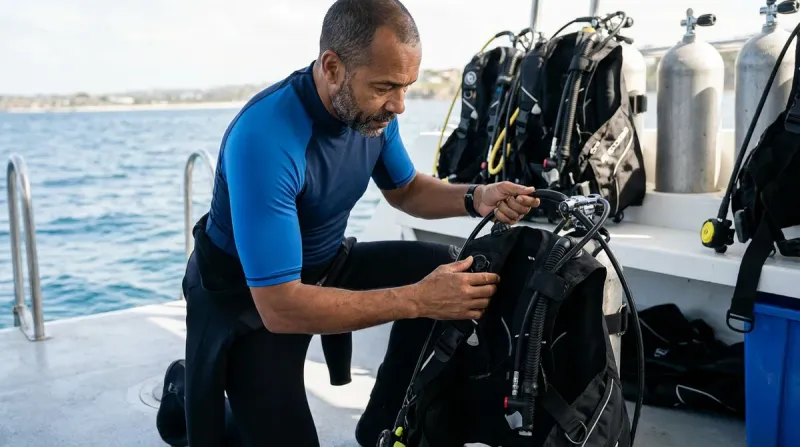
Visual Inspection: Structural Integrity Check
Before you even pressurize your BCD, you need to identify any damage that could compromise the bladder or affect structural performance underwater. This takes maybe ninety seconds, but it's caught everything from UV-degraded shoulder straps to pinholes in high-pressure zones.
Check all seams and stitching for fraying or separation: Look especially at weight pocket attachment points and D-ring mounting seams where load stress concentrates—I once had a weight pocket tear free on a giant stride because the stitching had dry-rotted.
Inspect the bladder material for abrasions, punctures, or delamination: Run your hands over the entire surface, including the back panel that contacts your cylinder—pinch points between the tank and hard surfaces create slow leaks that only show up underwater.
Examine shoulder straps, waist belt, and crotch strap (if equipped) for material degradation: Nylon webbing shows UV damage as a chalky, stiff texture; if you can't easily flex the strap, it's compromised and could fail under load.
Verify all buckles, slides, and adjustment hardware are intact and functional: Quick-release buckles should snap cleanly with no mushiness; cam bands on integrated systems should hold firm tension without slipping when you torque them.
Look for rust or corrosion on metal D-rings, tank bands, and weight pocket hardware: Marine-grade stainless steel shouldn't rust, but lower-grade hardware absolutely will—if you see orange or white crystalline deposits, that component is on its way out.
Check corrugated hose for cracks, especially at the flex points near connections: The hose curves where it meets the inflator mechanism and at the shoulder junction take repetitive stress; tiny cracks there will worsen rapidly once water intrusion begins.
Inspect oral inflator mouthpiece for tears or degraded rubber seal: A compromised mouthpiece seal means you can't manually inflate your BCD in an inflator failure scenario, which is exactly when you'd need it most.
Understanding how your BCD's components work together helps you spot problems before they become emergencies. The visual check catches the obvious stuff; the functional tests we're about to run reveal the hidden failures.
Inflator System: Power Inflator and Oral Backup
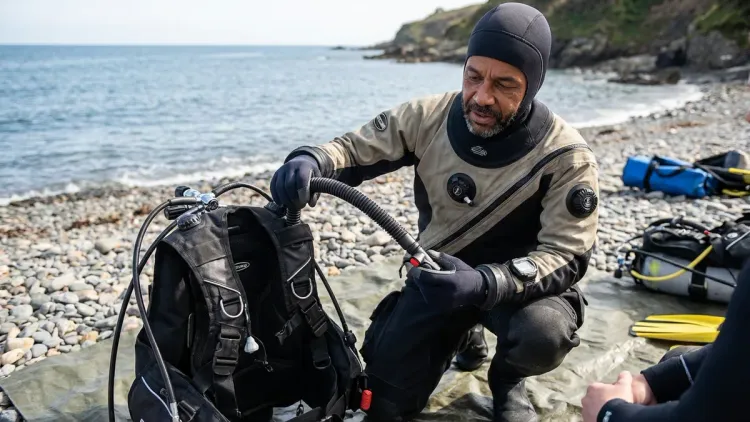
This is where most BCD failures actually happen—stuck buttons cause uncontrolled ascents, leaking connections cause slow deflation, and corroded mechanisms jam when you need them. I test my inflator system on every dive, full stop.
Connect your low-pressure inflator hose and listen for air leaks at the coupling: You should hear nothing except a brief equalization hiss; continuous hissing means an O-ring is compromised or the coupling isn't fully seated—proper LP connection standards apply here just like with your regulator.
Press the inflator button and verify immediate air delivery, then confirm clean release: The button should return to neutral without sticking, and air should stop instantly when you release—if it continues even a split-second longer, your inflator mechanism is fouled with salt or sand.
Hold the inflator button for 3-5 seconds to partially inflate the BCD, checking for consistent airflow: Sputtering or intermittent delivery suggests either a clogged internal valve or intermediate pressure issues in your first stage that could worsen at depth.
Test the deflator function by pressing the opposite button (or same button, depending on design) while lifting the inflator overhead: Air should evacuate smoothly without resistance; sluggish deflation means the exhaust valve is partially blocked or the bladder has an internal restriction.
Remove the LP hose and test oral inflation by blowing firmly into the mouthpiece: The air should stay in—if you hear or feel backflow, the oral inflator check valve is stuck open, and you've just lost your backup inflation method.
With the BCD partially inflated, close the oral inflator and observe for 30-60 seconds: Any noticeable deflation indicates a bladder leak, seam failure, or valve issue that will absolutely worsen during the dive when differential pressure increases.
I've had inflator buttons stick on me twice, both times in cold water where my reaction time was already slower—one at 90 feet on a wreck, the other at 40 feet under kelp. Both times I caught it immediately because I knew exactly what my inflator should feel like from repetitive pre-dive testing. You want that muscle memory.
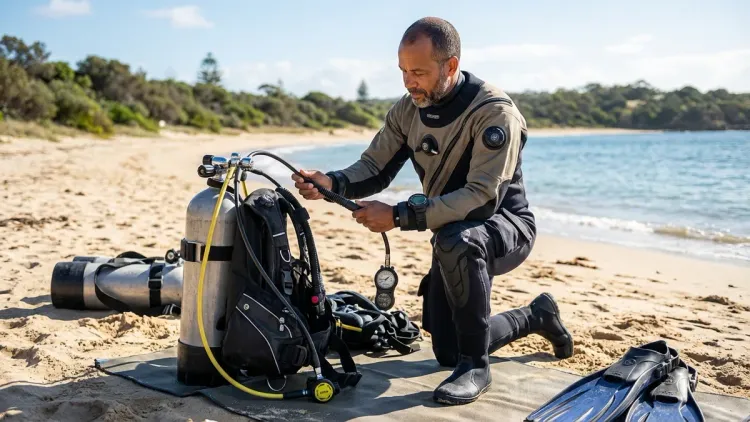
Dump Valve System: All Pressure Relief Points
Your BCD typically has three to five dump valves—shoulder, rear, kidney, and sometimes dedicated quick-dumps. Each one is a potential failure point, and each one needs individual verification before you descend.
Locate all dump valves on your specific BCD model: This sounds obvious, but rental BCDs vary wildly, and I've watched divers struggle at depth because they didn't know where their rear dump pull was located—proper BCD fitting and familiarization should happen on the surface.
Pull each dump valve cord and verify the valve opens cleanly with moderate tension: It should operate smoothly without excessive force; if you have to yank hard, the cord is bound internally or the spring mechanism is corroded—either way, it won't work reliably when you're task-loaded underwater.
While pulling each valve, physically feel or listen for air escaping: With the BCD inflated, you should hear a distinct rush of air; if you don't, that valve is either stuck closed or mechanically disconnected from its cable.
Release each cord and verify the valve closes completely—no continued air loss: A dump valve that won't reseal is just as dangerous as one that won't open; you'll bleed air continuously and fight to maintain neutral buoyancy throughout the entire dive.
Test the overpressure relief valve (OPV) if accessible—this typically auto-vents around 3 PSI: Some OPV designs can be manually opened; if yours can, verify it opens and reseals cleanly—this valve prevents bladder rupture if you ascend with a full BCD, so it's genuinely safety-critical.
Check that dump valve pulls are secured and won't snag on other equipment: I zip-tie loose cord ends to minimize entanglement risk, especially on complex technical rigs where you're managing multiple hoses, lights, and backup equipment.
On back-inflate BCDs, the rear dump valve is your primary venting mechanism in horizontal trim. If that valve fails and you're diving a drysuit, you have a real problem—you can't easily get head-up to use your shoulder dump when you're task-loaded. Test everything.
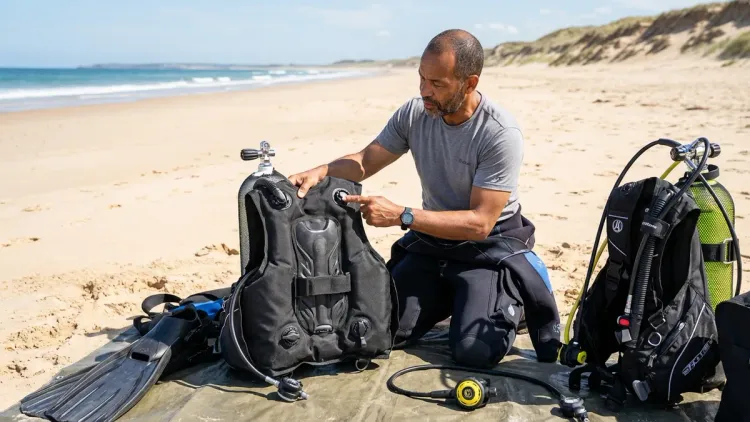
Strap and Harness Security: Load-Bearing Systems
Your BCD's harness holds a cylinder that weighs 30-40 pounds, plus additional weight from integrated pockets—strap failure isn't just inconvenient, it's a safety issue that can destabilize your entire rig mid-dive.
Tighten all adjustment straps to your body, then verify buckles hold under pulling tension: I physically pull hard on each buckle after securing it—cam buckles should lock without slipping, quick-release buckles should resist pull-through until you press the release mechanism.
Check integrated weight pocket security—press down and pull outward to confirm retention: Weight pockets should sit firmly in their sleeves with no vertical play; loose pockets can slide out during entries or when you're maneuvering through restrictions.
Verify weight pocket quick-release handles are accessible and operate smoothly: In an emergency ascent, you need to drop weights immediately—practice the pull motion on the surface so you know exactly where your hand goes and how much force is required.
If using a crotch strap, adjust it snugly and verify the buckle holds: A loose crotch strap allows the BCD to ride up on ascent; an improperly secured buckle means you could lose the strap entirely during the dive, which makes buoyancy control significantly harder in a back-inflate system.
Confirm tank band or integrated cylinder retention is tight—tank shouldn't rotate or slide: I check this after every adjustment by trying to twist the cylinder within the BCD; if it moves more than a few millimeters, the band needs retensioning.
The harness test is where proper BCD fit matters most—a correctly adjusted BCD distributes load across your shoulders and hips without creating pressure points. If you're constantly fighting strap slippage or experiencing pain on long dives, your BCD either doesn't fit your body or needs adjustment beyond what this pre-dive check covers.
Final Check Before You Go
You've completed the detailed inspection—now run this rapid-fire summary checklist in the minute before you enter the water:
Quick Verification Sequence:
- Visual scan: No obvious damage, tears, or frayed webbing
- Inflator connected and tested: Button works, oral backup confirmed
- BCD holds air: No leaks after 60-second pressurization
- All dump valves functional: Tested and resealed cleanly
- Harness secure: All buckles locked, weight pockets seated
- Tank band tight: Cylinder doesn't rotate or shift
- LP hose routed properly: No kinks or tight bends that restrict flow
I run this sequence in about thirty seconds after I'm fully geared up, right before my dive computer setup verification and final buddy check. It's the last moment you have to catch something in a controlled environment where you have options—once you're underwater, your options narrow considerably.
If you're traveling with your BCD, remember that baggage handling is brutal on equipment. I always run a full inspection protocol after flights, even if my BCD was in a protective travel bag, because zippers can partially open, straps can get caught in conveyor systems, and pressure changes during flight can reveal seal degradation you wouldn't otherwise notice.
Frequently Asked Questions
How often should I perform a complete BCD pre-dive check?
You should perform a complete BCD pre-dive check before every single dive, without exception—even if you're doing multiple dives in one day with the same equipment, because conditions between dives (boat movement, handling by other divers, thermal cycling as gear dries) can cause new problems to develop. Between dive trips, your BCD also needs a full maintenance service according to manufacturer schedules, typically annually or every 100 dives, whichever comes first.
What should I do if my BCD fails a pre-dive check?
If your BCD fails any part of the pre-dive check, you should not dive with that unit until the problem is identified and resolved—a compromised buoyancy compensator creates genuine safety risks that worsen with depth and stress. Minor issues like a sticky inflator button can sometimes be field-fixed with fresh water flushing, but bladder leaks, dump valve failures, and structural problems require professional service or equipment substitution before you enter the water.
Can I perform a BCD pre-dive check without connecting it to my regulator?
While you can complete the visual inspection and harness security checks without air pressure, you cannot properly test the inflator system, dump valves, or bladder integrity without pressurizing the BCD—which requires connecting your low-pressure inflator hose to your regulator's first stage. Some divers use a separate tank with a simple valve and LP hose specifically for pre-dive equipment checks, which works fine if you're assembling gear well before the dive.
Final Thoughts
The BCD pre-dive check isn't sexy, and it doesn't involve any new gear to buy or skills to master. It's just disciplined repetition of a safety protocol that takes two minutes and catches problems while you still have options to fix them.
I've seen experienced divers—people with hundreds of logged dives—skip this check because they're rushing to keep up with a group, or because they "just serviced" their BCD, or because nothing's gone wrong yet. Then something does go wrong, and suddenly they're managing an equipment problem at depth with reduced cognitive function and limited options. Every single time, they tell me afterward they knew they should have checked.
Understanding how your buoyancy compensator actually works makes this checklist faster and more intuitive, because you're not just going through motions—you're verifying specific mechanical functions that you understand. Whether you're diving a basic jacket BCD as a newly certified diver or a sophisticated wing system on technical dives, the pre-dive check principles remain exactly the same: verify structural integrity, test all pressure systems, and confirm your ability to control buoyancy before you commit to the dive.
I still remember the dives where my pre-dive check caught something critical—the stuck inflator button in Monterey, the pinhole bladder leak in Cozumel, the corroded dump valve in the Philippines. Each time, I was genuinely grateful for the two minutes I spent on the surface running through the sequence. Make the checklist automatic, make it non-negotiable, and you'll spend a lot less time managing equipment emergencies underwater.