Look, I'm going to be straight with you: learning how to service a scuba regulator is not something most recreational divers should do themselves. There, I said it. But understanding the process, knowing when service is due, and recognizing what's actually happening inside that critical piece of life-support equipment? That knowledge can absolutely save your dive—or your life.
In this guide, I'll walk you through the complete regulator service process, the recommended maintenance schedule, and help you understand what's happening when a certified technician tears down your reg. Whether you're considering becoming a factory-trained service technician yourself, want to perform basic preventative maintenance between professional services, or simply want to understand what you're paying for when you drop your reg at the shop, you'll come away with a solid grasp of the process.

Skill level: Basic maintenance: beginner-friendly. Full service: requires factory training and specialized tools. Time estimate: Basic cleaning and inspection: 30 minutes. Complete rebuild: 2-3 hours for your first attempt.
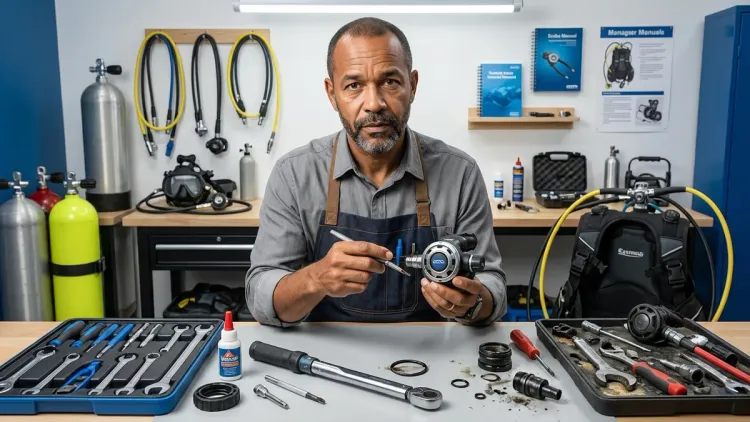
What You'll Need
Here's what's required for different levels of regulator maintenance:
Basic Maintenance (Anyone Can Do):
- Freshwater rinse tank or large container
- Warm (not hot) water
- Soft-bristled brush
- Microfiber towels
- Regulator dust cap
- Logbook or maintenance tracker
Professional Service (Factory-Trained Technicians Only):
- Manufacturer-specific service manual for your exact model
- Complete service kit with O-rings, seats, filters, and seals
- Intermediate pressure gauge (reading to 250 PSI/17 bar)
- Torque wrenches (typically inch-pounds range)
- Regulator-specific tools (depthing tools, spanner wrenches)
- Ultrasonic cleaner
- Clean, lint-free workspace
- Magnehelic gauge for cracking pressure testing
- Flow bench or water testing tank rated to service depth
Prerequisites for Full Service:
- Factory-authorized training for your specific regulator brand
- Current manufacturer certification
- Access to up-to-date service bulletins and technical updates
I've watched too many divers attempt full regulator rebuilds with YouTube videos and generic O-ring kits. It rarely ends well. A first stage with incorrect intermediate pressure or a second stage with improper seat geometry isn't just annoying—it can freeflow uncontrollably or fail to deliver adequate gas at depth.
Understanding When Service Is Actually Due
Before we dive into how to service a scuba regulator, let's talk about service intervals. Most manufacturers recommend annual service or every 100 dives—whichever comes first. But here's what actually happens underwater versus what happens in the marketing department.
I service my cold-water technical regs annually without question. Those regulators see 48-degree water, extreme depth changes, and challenging conditions. But my warm-water travel reg that sees 30 easy dives per year in 82-degree Caribbean water? I've safely extended that to 18 months when it's been properly maintained between trips.
Absolute service triggers include:
- Breathing resistance increases noticeably at depth
- Any freeflow or hissing when pressurized
- Visible corrosion on first or second stage bodies
- 12-18 months since last service, regardless of dive count
- Exposure to contaminated water (floods, sewage, industrial areas)
- Post-flood in the first stage (service immediately)
- Before any technical diving, wreck penetration, or overhead environment
Warning signs during pre-dive checks:
- Intermediate pressure creep (IP rises when tank sits pressurized)
- Inconsistent cracking effort between breaths
- Moisture or debris visible in second stage exhaust valve
- Stiff or sticky purge button
- Higher-than-normal tank pressure drop during surface breathing
The service interval isn't arbitrary marketing—it's based on O-ring compression set, seat wear patterns, and filter contamination rates. Those components degrade whether you're diving or not. A regulator sitting in your closet for two years still needs service before you splash.
For more background on how these components work together, check out our complete guide to scuba regulators.
Step 1: Pre-Service Documentation and Testing
This is where most DIY jobs go sideways. Professional service starts before any tools touch the regulator.
Start by documenting the current state:
- Record intermediate pressure with the regulator pressurized (should be 120-145 PSI or 8.3-10 bar for most models, though some cold water regulators run deliberately lower)
- Test cracking pressure (typically 0.8-1.5 inches of water column)
- Note any existing damage, scratches, or corrosion
- Check serial numbers against manufacturer service bulletins
- Photograph the regulator assembly before disassembly
I learned this lesson the hard way in 2019 when I serviced a DIN first stage without documenting an existing hairline crack in the swivel turret. Post-service, the customer claimed I caused it. No photo, no proof. Now I photograph everything.
Check your manufacturer's service bulletins. In 2024, several major brands issued updates for first stage piston stem O-rings after cold-water freeflow incidents. If you're working on a regulator without checking for recalls and technical updates, you're setting yourself up for failure—possibly catastrophic failure.
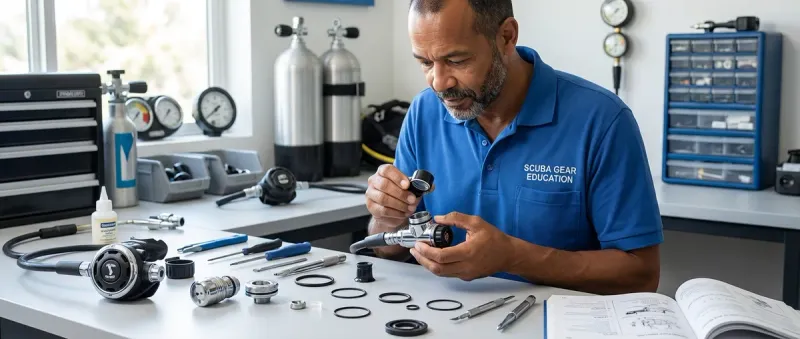
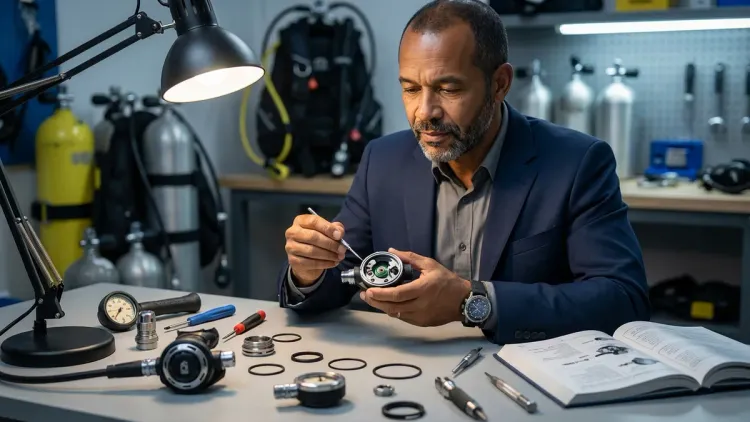
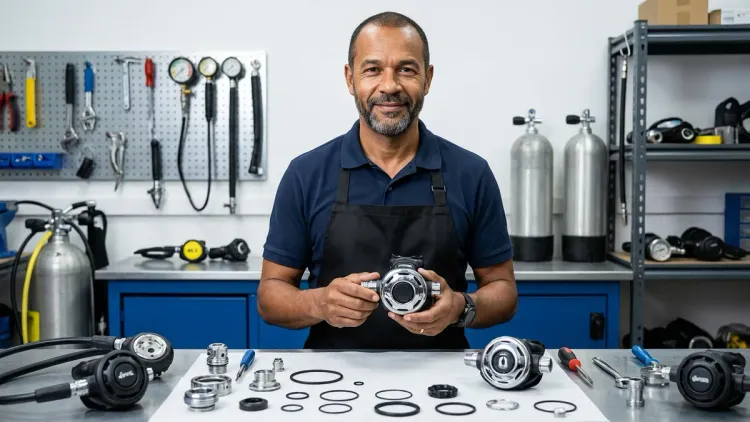
Step 2: Disassembly and Inspection
First stage disassembly requires following the exact sequence in your service manual. Piston first stages and diaphragm first stages use completely different architectures, and even within brands, different models require different procedures.
For a typical piston first stage:
- Remove all LP and HP port plugs, noting their positions
- Carefully remove the main spring cap (watch for spring tension)
- Extract the piston assembly without scratching the bore
- Remove all O-rings and inspect sealing surfaces
- Check the high-pressure seat for wear grooves or compression marks
- Examine the piston stem for scoring or corrosion
Second stage disassembly:
- Remove the front cover and exhaust valve
- Extract the purge button assembly
- Carefully remove the demand lever and spring
- Extract the inlet tube assembly without damaging the LP seat
- Inspect the diaphragm for tears, holes, or degradation
Here's what you're looking for: O-rings should be pliable, not flattened or brittle. Seats should be smooth with uniform contact patterns. Any scoring in the piston bore or valve body means the component needs replacement, not just O-rings. I've seen techs replace O-rings on a scored first stage body—that regulator failed 12 dives later at 85 feet.
The brass components should be smooth and corrosion-free. Marine-grade brass resists corrosion well, but neglected regulators develop verdigris and pitting. Titanium first stages (common in technical diving) rarely corrode but can gall if over-torqued during reassembly.
Step 3: Ultrasonic Cleaning and Component Preparation
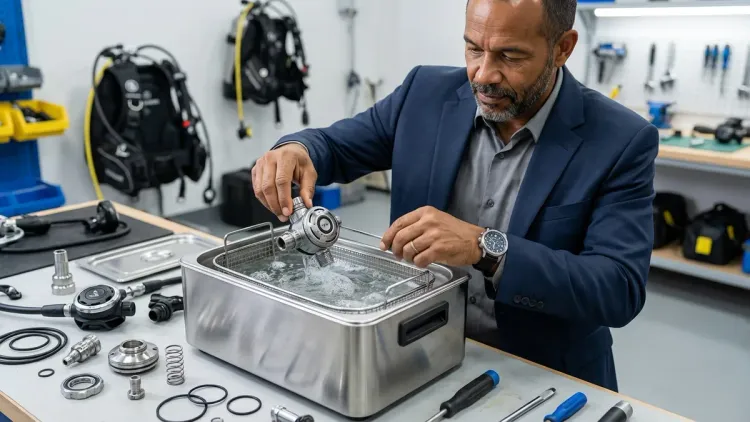
This step separates proper service from parts-swapping. Ultrasonic cleaning removes salt deposits, silicone residue, and microscopic particles that simple rinsing can't touch.
Metal components go into an ultrasonic bath with appropriate cleaning solution for 10-15 minutes. Do not ultrasonic clean:
- Plastic or rubber components
- Diaphragms
- Unsealed electronic components (if present)
- Sintered filters (these get replaced, not cleaned)
While the ultrasonic runs, prepare your new components from the service kit:
- Lay out all O-rings by size
- Identify the LP and HP seats
- Check filters against old ones to ensure correct parts
- Verify spring specifications match service manual
I once watched a new tech mix up the balance chamber O-ring with the main piston O-ring on a balanced diaphragm first stage. Same diameter, slightly different cross-section. That regulator delivered 180 PSI intermediate pressure and freeflowed both second stages immediately. The difference in O-rings? 0.5mm in cross-section.
After ultrasonic cleaning, rinse all metal components in clean freshwater and dry with compressed air (filtered, dry air only—never use shop air with moisture or oil contamination). Inspect every sealing surface under good light. Any imperfection means replacing that component.
Step 4: Lubrication and Reassembly
Lubrication is not optional, and the type matters enormously. Use only oxygen-compatible lubricants rated for regulator service. Most manufacturers specify Christolube or Tribolube. Silicone grease is acceptable for some applications but incompatible with others—check your service manual.
For O-rings:
- Apply a thin film of appropriate lubricant
- Roll the O-ring between your fingers to distribute evenly
- Stretch gently to check for weak spots or tears
- Install without twisting or pinching
For dynamic seals (piston stems, rotating turrets):
- Apply slightly heavier lubrication to reduce friction
- Ensure lubricant is compatible with oxygen (critical for first stages)
- Never over-lubricate—excess lubricant attracts contamination
Reassembly sequence is critical. Follow your service manual exactly. Torque specifications matter—the difference between 10 inch-pounds and 15 inch-pounds on a first stage cap can mean perfect performance or a blown O-ring seal. I use torque wrenches calibrated annually.
For DIN regulators, verify the DIN connector O-ring is properly seated and the threads are clean. DIN vs yoke connections have different service considerations, and cross-threading a DIN fitting during reassembly can ruin a $400 first stage body.
Step 5: Intermediate Pressure Setting and Testing
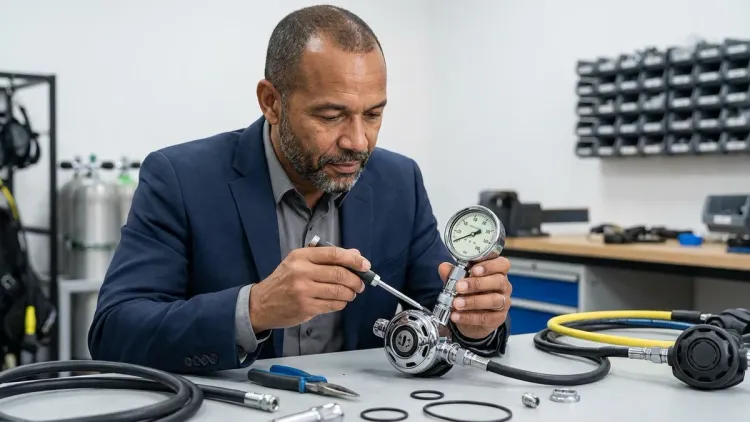
This is where knowledge of intermediate pressure becomes critical. Incorrect IP causes every problem from hard breathing to uncontrollable freeflow.
Connect your IP gauge to an LP port and pressurize the first stage:
- Initial IP should stabilize within 5-10 seconds
- Record the static IP (typically 120-145 PSI depending on model)
- Monitor for creep over 2-3 minutes (IP shouldn't rise more than 5 PSI)
- Purge the second stage and watch IP recovery
If IP is incorrect, adjust the shim stack (piston first stages) or spring tension (diaphragm first stages) according to manufacturer specifications. This requires specialized tools and understanding of the regulator's design.
IP creep indicates a leaking HP seat or improper piston/diaphragm sealing. If you see continuous creep, disassemble and inspect the HP seat for debris or damage.
I've tested regulators showing perfect 135 PSI IP at the surface that dropped to 115 PSI at 100 feet in cold water—that's venturi effect combined with temperature-induced seal contraction. This is why bench testing alone isn't sufficient for high-performance or cold-water applications.
Step 6: Second Stage Adjustment and Cracking Pressure
A perfectly serviced first stage is useless with a poorly tuned second stage. Cracking pressure is the effort required to initiate gas flow, and it's adjustable within specific ranges.
Using a magnehelic gauge:
- Connect the second stage mouthpiece to the gauge
- Apply suction until the valve cracks open
- Read the cracking pressure (typically 0.8-1.5 inches of water column)
- Adjust the spring tension via the external adjustment knob or internal spring
Too low, and the regulator freeflows at depth or in strong currents. Too high, and breathing becomes labored under exertion. My cold water regulators run slightly higher cracking pressure (1.2-1.4 inches) to prevent freeflow, while my warm-water travel regs run at 0.9 inches for effortless breathing.
Adjust in small increments—a quarter-turn of most adjustment mechanisms changes cracking pressure by 0.2-0.3 inches. After each adjustment:
- Test at multiple orientations (mouthpiece up, down, level)
- Verify no freeflow when pressurized
- Confirm smooth, consistent delivery
Step 7: Final Testing and Quality Control
Bench testing isn't diving, but it reveals most problems before they become underwater emergencies. At minimum, perform:
Flow test: Breathe hard through the regulator while monitoring IP gauge. IP drop shouldn't exceed 15-20 PSI during heavy breathing. Excessive drop indicates valve restriction or incorrect seat geometry.
Leak test: Submerge the entire regulator assembly in clean water while pressurized. Any bubbles indicate leaks requiring immediate correction. Check:
- All port plugs and hose connections
- DIN or yoke connection
- First stage cap and environmental seal (if present)
- Second stage diaphragm perimeter
Freeflow test: Place the second stage mouthpiece-down underwater while pressurized. It should not freeflow. Then purge it—when you release the purge, it should stop immediately.
Environmental seal check (sealed first stages): Verify the diaphragm or boot is properly seated and the environmental chamber is correctly filled (if fluid-filled designs).
The final test is the one that matters: diving. I test every regulator in controlled shallow water before using it on a real dive. I've caught post-service problems that weren't apparent on the bench but became obvious at 30 feet.
Pro Tips & Common Mistakes
Common mistakes I've seen (and made):
Using generic O-ring kits: That $12 assortment from the hardware store isn't rated for dynamic sealing at depth. Manufacturer service kits include O-rings with specific hardness ratings, materials (typically Buna-N, EPDM, or Viton), and dimensions accurate to 0.1mm. I've seen generic O-rings fail within 5 dives.
Over-torquing components: More isn't better. A first stage cap torqued beyond specification deforms O-rings and can crack housings. Use calibrated torque wrenches.
Skipping the service bulletin check: Manufacturers issue updates for safety reasons. That 2022 model might have a revised spring specification that prevents cold-water lockup. Service it to 2021 specs, and you're creating a hazard.
Mixing lubricants: Don't use what you have on hand. Oxygen-compatible lubricants prevent combustion risk in high-pressure oxygen environments. Using petroleum-based lubricants in regulators rated for nitrox above 40% is asking for an explosion.
Pro tips from 3,000+ dives:
- Keep detailed service records including IP readings, part replacements, and dive conditions since last service
- Test regulators in the most challenging conditions you'll encounter—if it's going to fail, better in training than on a wreck at 130 feet
- Replace all O-rings during service even if they look fine—they're cheap insurance
- Invest in proper tools if you're serious about learning—improvised tools damage components
- Find a mentor who's a factory-certified tech and shadow them through multiple rebuilds before attempting solo service
The reality is that most recreational divers should focus on proper between-dive maintenance—thorough rinsing, proper storage, and timely professional service—rather than DIY rebuilds. But for technical divers, instructors, or those working in remote locations, understanding how to service a scuba regulator is valuable knowledge that can extend equipment life and ensure reliable performance when it matters most.
Frequently Asked Questions
Q: How often should I service my scuba regulator?
A: You should service your scuba regulator annually or every 100 dives, whichever comes first, according to most manufacturer recommendations. However, regulators used in cold water, contaminated environments, or for technical diving should be serviced annually regardless of dive count, while lightly-used warm-water regulators may safely extend to 18 months if properly maintained between uses.
Q: Can I service my own regulator without factory training?
A: You should not perform complete regulator service without factory-authorized training, as improper service can create life-threatening failures including freeflows, breathing resistance, or complete failure at depth. Basic maintenance like rinsing and external inspection is appropriate for all divers, but internal service requires specialized tools, manufacturer-specific service manuals, correct parts, and knowledge of proper assembly sequences and torque specifications that only factory training provides.
Q: What causes a regulator to freeflow after service?
A: A regulator freeflows after service due to incorrect intermediate pressure settings (usually too high), improperly adjusted second stage cracking pressure (set too low), contamination on the LP seat preventing proper sealing, or incorrect installation of the demand lever or spring in the second stage. A properly serviced regulator should not freeflow at any depth or orientation, and any freeflow indicates the regulator requires immediate inspection and correction by a qualified technician.
Q: How much does professional regulator service cost in 2026?
A: Professional regulator service in 2026 typically costs around $80–$150 for a complete first and second stage service including labor and parts, with variations based on regulator complexity, brand, and regional labor rates. High-end regulators with environmental sealing, swivel turrets, or technical diving features typically cost around $150–$250, while basic single-hose regulators cost less, and many dive shops offer package pricing when servicing multiple regulators or complete life-support systems together.
Summary
Understanding how to service a scuba regulator gives you insight into your most critical piece of life-support equipment, even if you never turn a wrench yourself. The proper service sequence—documentation, careful disassembly, ultrasonic cleaning, correct lubrication, precise reassembly, and thorough testing—ensures reliable performance when you need it most.
For most recreational divers, the best approach is thorough between-dive maintenance combined with annual professional service by factory-certified technicians. But whether you're maintaining your beginner regulator or a high-performance technical diving system, understanding what happens during service helps you recognize problems early, communicate effectively with technicians, and make informed decisions about your equipment.
Remember: a properly maintained regulator doesn't just perform better—it can save your life at depth. Invest in professional service, keep detailed records, and never compromise on the quality of maintenance for equipment that keeps you breathing underwater.