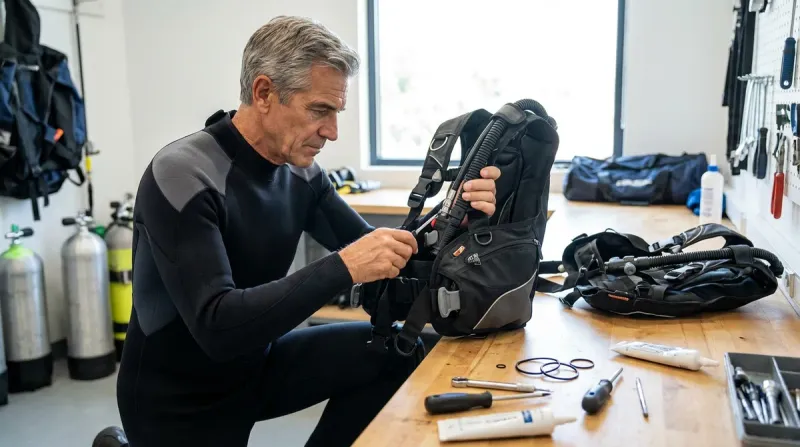
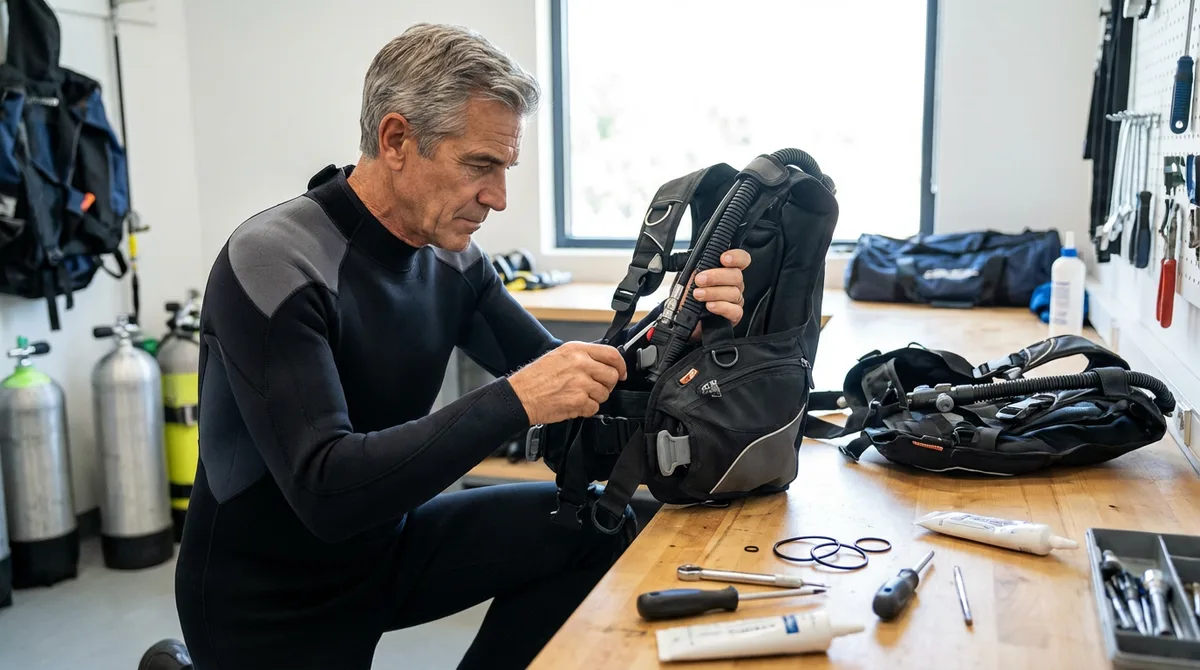
I've seen more dive trips ruined by neglected BCDs than I care to count. A properly maintained buoyancy compensator should last you ten to fifteen years—I've got a jacket-style BC in my garage that's been through over 2,000 dives and still holds air like the day I bought it. This bcd maintenance checklist covers everything from post-dive rinse procedures to annual service requirements, organized by frequency and complexity. Whether you're diving a back-inflate travel wing or a traditional jacket BC, these protocols will keep your buoyancy compensator reliable when you need it most.
Here's the thing: BCD maintenance isn't complicated, but it is consequential. I've watched divers struggle with partially inflated wings at 80 feet because they never cleaned their inflator mechanism, and I've personally dealt with a stuck dump valve during a safety stop because salt crystals had built up in the spring assembly. This checklist gives you the specific tasks, intervals, and techniques that actually matter.
After Every Dive Day: Immediate Post-Dive Care
These are the non-negotiables. Skip these steps and you're accelerating every failure mode your BC can experience—corroded inflator mechanisms, stuck dump valves, degraded bladder materials, and seized buckles.
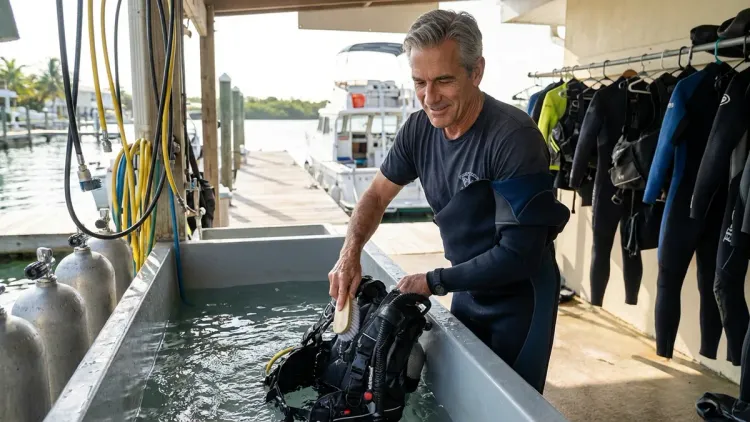
Rinse the entire BCD in fresh water for at least 3-5 minutes: I don't mean a quick spray-down. Submerge the whole thing in a rinse tank or use a hose with decent pressure. Pay special attention to the inflator mechanism, dump valves, and any metal D-rings or buckles. Saltwater crystallizes fast in Florida humidity—by the time you wake up the next morning, it's already started eating your brass fittings.
Partially inflate the bladder with 3-4 button pushes, then rinse internally: Press your inflator button while the BC is in the rinse tank to get fresh water inside the bladder. Slosh it around, turn the BC upside down, then drain completely through the dump valve. I've cut open bladders that looked fine externally but had a quarter-inch of salt crust on the interior walls because nobody ever rinsed inside.
Flush the inflator mechanism with fresh water while operating it: Hold the corrugated hose underwater and press the inflate button 8-10 times. The button should move freely without sticking. If it feels sluggish or doesn't spring back instantly, you've got salt buildup in the stem assembly—keep flushing until it operates smoothly.
Activate all dump valves multiple times during the rinse: Rear dump valves especially love to accumulate sand and salt crystals in the spring mechanism. Pull each dump cord or rotate each valve assembly at least 5-6 times while water is flowing over it. I tell people to be aggressive here—you're trying to dislodge particles, not protect them.
Rinse the inside of pockets and remove any trapped sand or debris: Integrated weight pockets are notorious for collecting sand that holds moisture against the fabric. Pull them completely out, shake them upside down, and rinse thoroughly. Same with accessory pockets—I once found a small piece of coral rubble that had worn a hole through a pocket lining over the course of a week-long trip.
Hang to dry in a shaded, ventilated area away from direct sunlight: UV degradation is real. I've seen nylon webbing literally crumble after a BC spent three years hanging in direct sun between dives. Hang it on a wide hanger or BC-specific rack so the weight distributes evenly—don't just throw it over a narrow shower rod where the bladder can develop permanent creases.
Drain all water from the bladder before storage: After it's hung for a few hours, manually deflate the BC completely using the oral inflator—tip it at different angles to get water trapped in corners of the bladder. Then inflate it about halfway and let it sit overnight. The next morning, deflate again to purge any remaining moisture. Storing a BC with water inside is asking for mold and accelerated bladder degradation.
Check the corrugated hose for kinks or damage: Run your hand along the entire length of the hose feeling for cracks, especially where it connects to the inflator mechanism and where it attaches to the BC. Corrugated hoses are one of the cheaper components to replace, but they'll absolutely ruin a dive if they split at depth. I replace mine every 200-250 dives regardless of appearance.
Weekly Maintenance: Deep Cleaning During Multi-Day Dive Trips
When you're doing 3-4 dives a day for a week straight, the standard post-dive rinse isn't enough. Salt accumulation happens faster than you think, especially in warm water where evaporation speeds up the process.
Soak the entire BCD in fresh water for 30-45 minutes mid-week: Fill a bathtub, large container, or rinse tank and submerge the whole unit. I do this on day three or four of any dive trip. While it's soaking, manually operate all the dump valves and inflator buttons every 10 minutes—you're trying to dissolve salt crystals that have formed in places rinsing alone can't reach.
Inflate the bladder fully, soak for 15 minutes, then drain completely: This internal soak addresses salt buildup on the bladder interior. Add fresh water through the inflator, inflate until the BC is firm, let it sit, then drain through the rear dump valve. You'll often see surprisingly dirty water come out even if you've been rinsing properly every day.
Inspect all connection points between the inflator and LP hose: Look where your low-pressure inflator hose connects to the power inflator mechanism. Feel for any stiffness when you disconnect and reconnect it. This quick-disconnect fitting should move smoothly—if it feels gritty or takes excessive force, it needs lubrication or replacement. I've seen these fittings corrode to the point where you literally can't disconnect your BC from your regulator without tools.
Clean the oral inflator mouthpiece with mild soap or BC-specific cleaner: These get disgusting. Use a soft brush and mild dish soap to clean the mouthpiece and the interior of the oral inflator tube. Rinse thoroughly—you don't want soap residue in your mouth on the next dive. Some divers use mouthwash for this, which works fine, though I prefer soap and water.
Check weight pocket security and operation under load: If you're using integrated weights, pull the pockets out and reinsert them at least once during the week. Make sure the retention system isn't getting loose and that the quick-release mechanism operates smoothly. I witnessed a diver lose a 10-pound weight pocket on a current drift dive because the Velcro had accumulated so much sand it wouldn't hold—she didn't notice until she was bobbing at the surface wondering why she was way too positive.
Inspect all straps, buckles, and adjustment hardware for salt crystals: The small spaces around buckle teeth and inside cam-band mechanisms love to trap salt. Use a soft brush or old toothbrush to clean these areas. Pay attention to shoulder strap adjusters—when these freeze up from salt, you can't adjust your BC fit on the boat, which means an uncomfortable dive.
Monthly Maintenance: Detailed Inspection and Minor Repairs
If you're diving regularly—say, every weekend—you need to do a more thorough inspection about once a month. I've found more potential failures during monthly checks than any other maintenance interval. These tasks take maybe 30-40 minutes total.
Perform a complete buoyancy hold test: Inflate your BC fully using the power inflator, disconnect it from your cylinder, and hang it for 24 hours. Check it periodically—it should maintain full inflation with minimal pressure loss. A slight deflation is normal (bladders aren't perfectly airtight), but if it's noticeably softer after a few hours, you've got a leak. I've traced leaks to everything from tiny pinhole punctures in the bladder to slow seepage around the over-pressure valve.
Inspect the entire bladder for signs of delamination, abrasion, or punctures: Pull the bladder partially out of the BC shell (on models where this is possible) or use a bright flashlight to examine it through the openings. Look for areas where the polyurethane coating appears milky, cracked, or separated from the backing material. Abrasion damage usually shows up along the bottom edge where the BC contacts surfaces. Small punctures are repairable—I keep a BC repair patch kit in my gear bag and have patched dozens of small holes over the years.
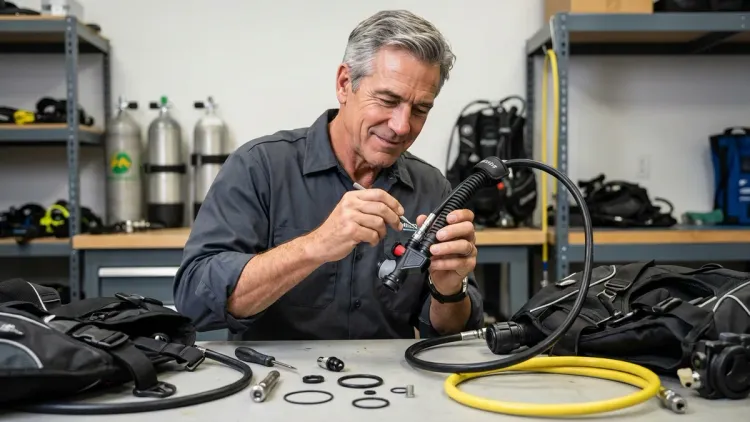
Clean and lubricate all dump valve assemblies with silicone grease: Most dump valves can be partially disassembled without tools—check your manufacturer's instructions. Remove the valve cap, inspect the spring and sealing surface for debris, clean with fresh water, and apply a thin coat of silicone grease to the moving parts. This 5-minute task prevents 90% of stuck dump valve issues. Use proper dive-grade silicone lubricant, not petroleum-based products that degrade o-rings and bladder materials.
Check the over-pressure valve for proper operation: Inflate your BC until the over-pressure valve vents—it should release air automatically before the bladder feels drum-tight. This valve prevents bladder rupture during ascents, and if it's not functioning, you risk catastrophic bladder failure. If your over-pressure valve is sticky or doesn't vent at the expected pressure, it needs service.
Inspect all D-rings and attachment points for corrosion or looseness: Give each D-ring a firm pull to check how securely it's mounted to the webbing. Look for corrosion on metal rings—surface oxidation is cosmetic, but deep pitting weakens the material. Plastic D-rings should be examined for cracks, especially if you're regularly clipping heavy accessories like cameras or lights. I replace D-rings at the first sign of structural compromise—they're cheap insurance against losing equipment at depth.
Test the inflator button and deflate button for smooth, immediate response: Press each button 15-20 times in quick succession. The inflate button should provide instant air flow and fully retract when released. The deflate button should vent air immediately without sticking. Any hesitation, sticking, or failure to return to neutral position means the inflator mechanism needs service. I've seen inflator buttons stick in the inflated position due to salt crystallization in the stem—that's a potentially fatal malfunction if it happens at depth.
Check the low-pressure inflator hose for bubbling when pressurized: Connect your BC to a cylinder, pressurize it, and submerge the inflator end in water. Watch for any bubbles indicating a leak from the hose or quick-disconnect fitting. Even a slow leak means moisture is getting into places it shouldn't be. Replace any LP hose showing bubbles, cracks, or unusual stiffness.
Examine all stitching on straps, weight pockets, and stress points: Heavy-duty nylon stitching is tough, but it does deteriorate over time, especially if exposed to UV. Look closely at where shoulder straps attach to the backplate or where the cummerbund connects to the main body. Any fraying, loose threads, or gaps in the stitching line needs attention. I carry a BC to my local dive shop for professional re-stitching at the first sign of thread failure—prevention is way cheaper than replacement.
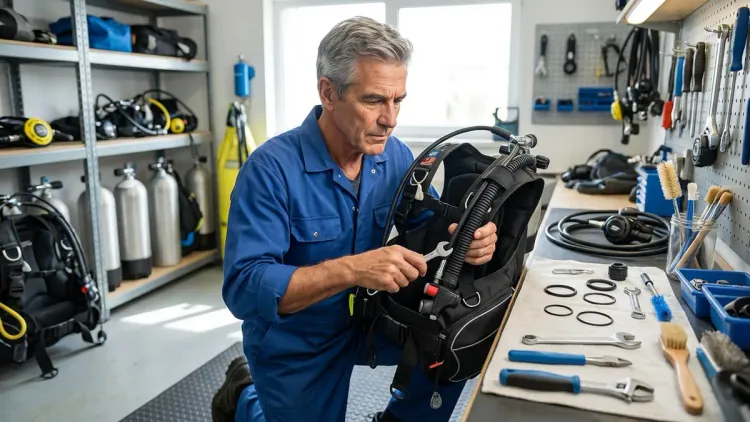
Annual Maintenance: Professional Service and Deep Component Inspection
I don't care how handy you are—your BCD needs professional inspection and service once a year if you're diving regularly, or every two years if you're a vacation-only diver with fewer than 20 dives annually. A good dive shop will charge around $50-75 for a thorough BC service, which includes tasks you can't easily do yourself.
Complete bladder inspection and pressure test by a qualified technician: A proper shop inspection includes removing the bladder entirely from the BC shell, examining every square inch for damage, and performing a controlled pressure test at higher-than-normal inflation. They're looking for weak spots, delamination, and early-stage failures that aren't obvious during normal use. I've had technicians catch small leaks I completely missed during my own monthly inspections.
Full disassembly and cleaning of the power inflator mechanism: This is the most failure-prone component on any BC, and most divers never properly service it. Annual service includes complete disassembly, ultrasonic cleaning of internal components, replacement of any worn springs or buttons, and proper lubrication. The labor takes maybe 20 minutes and dramatically extends the life of the inflator. As a reference point, proper regulator maintenance follows similar principles—internal cleaning and parts replacement at regular intervals prevents catastrophic failures.
Replacement of all user-serviceable o-rings: Your BC has multiple o-rings in the inflator mechanism, dump valves, and potentially the over-pressure valve. These should be replaced annually regardless of appearance. O-rings are cheap—the downside of an o-ring failure is expensive and potentially dangerous. Use manufacturer-specified o-ring sizes and materials; not all o-rings are compatible with all bladder materials.
Inspection and lubrication of all buckles, cam bands, and adjustment hardware: A tech can fully disassemble buckle mechanisms, remove all accumulated salt and debris, and properly lubricate moving parts with appropriate products. They'll also check for wear patterns that might indicate the buckle is nearing end-of-life. Cam bands in particular take a beating and stretch over time—I replace mine every 3-4 years even if they look fine.
Bladder interior sanitization to prevent bacterial growth and odor: Even with proper rinsing, organic matter accumulates inside bladders over time, leading to that characteristic musty smell. Professional service includes bladder sanitization using BC-specific cleaners that won't damage the polyurethane. Some shops use mild bleach solutions (properly diluted and thoroughly rinsed), while others use commercial BC cleaning products.
Weight system inspection including pocket stitching and quick-release mechanisms: Integrated weight systems are wonderful until they fail. Annual inspection should verify that quick-release handles operate smoothly under load, that weight pockets aren't developing tears or weak spots in high-stress areas, and that retention systems (whether Velcro, clips, or mechanical locks) are functioning as designed. This is a safety-critical system—weight ditching capability is your last-ditch buoyancy solution in an emergency.
Documentation review and service history logging: A reputable shop keeps service records for your BC, documenting what was inspected, what was replaced, and any concerns noted. This history is valuable for tracking recurring issues and planning component replacements. When I sell used gear, having complete service documentation adds significant value and buyer confidence.
Storage and Long-Term Care Between Dive Seasons
Proper storage matters as much as maintenance, especially if you're a seasonal diver who goes months between trips. I've seen BCDs emerge from garages after a winter looking like science experiments—mold, corrosion, and material degradation from improper storage.
Store partially inflated in a cool, dry location away from ozone sources: Inflate your BC to about 30-40% capacity—just enough to maintain the bladder's shape without stress. This prevents creases from becoming permanent deformation points. Keep it away from electric motors, welders, and other ozone-generating equipment that accelerates rubber and synthetic material degradation. My BC hangs in a climate-controlled closet on a dedicated wide hanger.
Keep away from petroleum products, solvents, and harsh chemicals: I've seen bladders literally dissolve because they were stored near paint thinner containers or automotive fluids. Petroleum-based products attack the polyurethane coating on most bladders. Even aerosol products like insect repellent can cause damage if the mist settles on your BC. Give it dedicated space away from your garage chemical shelf.
Avoid folding or compressing the BC for extended periods: If you must pack a BC for storage, roll it loosely rather than folding it at sharp angles. Repeated folding in the same spots creates permanent creases that become weak points. For travel BCDs, this is less of an issue since they're designed for packing, but even these should be stored inflated between trips.
Check monthly for any signs of mold, mildew, or musty odors: Even in supposedly dry storage environments, moisture can accumulate. A quick monthly sniff test tells you if something's growing inside the bladder. If you detect odor, do a full internal rinse and sanitization cycle before it gets worse. Mold isn't just gross—it actually degrades bladder materials over time.
Disconnect and separately store the low-pressure inflator hose if possible: This removes pressure from the quick-disconnect fitting and prevents the BC from developing a permanent curve in the corrugated hose. Some BCs make this easy; others require tools. If disconnection is impractical, at least ensure the corrugated hose is hanging naturally without sharp bends.
Final Check Before You Go
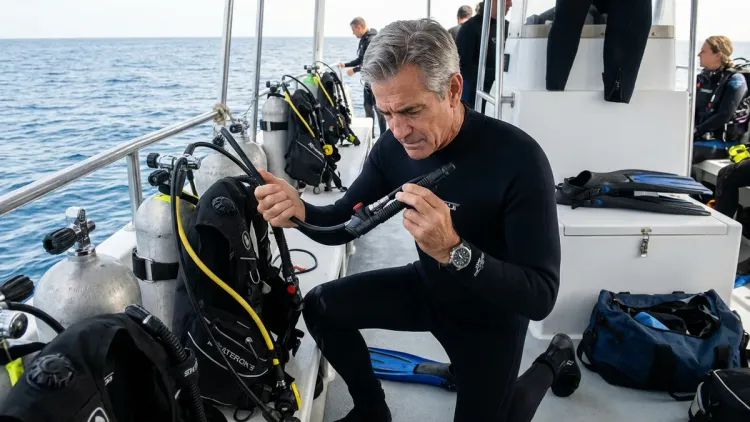
Use this condensed bcd maintenance checklist the night before any dive trip—whether you're headed across town or across the ocean. I run through this sequence every single time, even if I dove yesterday.
- Inflator button operates smoothly without sticking
- All dump valves pull freely and return to sealed position
- No visible damage to corrugated hose, straps, or bladder
- Integrated weight pockets insert and release smoothly
- All buckles and adjustment hardware operate under tension
- D-rings are secure and free of excessive corrosion
- LP hose connection is clean and connects without resistance
- No musty odor from the bladder interior
- BC holds air overnight without significant deflation
- Shoulder straps, cummerbund, and chest strap adjusted to your fit
This is essentially your pre-dive safety check for the BC—the same process you should repeat on the boat before every dive, but with the luxury of time to address anything you find.
How to Store Your BCD After Maintenance
This deserves its own callout because I see it done wrong constantly. After you've completed your post-dive care or any maintenance session, follow this specific storage protocol:
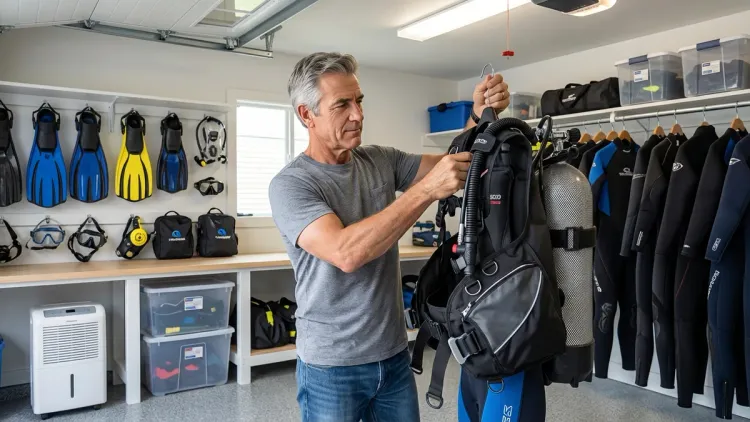
Hang the BC on a wide, padded hanger or dedicated BC rack—not a narrow coat hanger that concentrates weight on a few square inches. The BC should hang naturally without excessive strain on any attachment point. Shoulder straps should be draped normally, not twisted or kinked.
Partially inflate to maintain bladder shape—about one-third to one-half capacity. This prevents the bladder walls from sticking together and developing permanent adhesion points. I've cut apart bladders where the internal surfaces had actually bonded together from sitting deflated for years.
Store in a climate-controlled, ventilated space—ideally between 60-75°F with low humidity. Avoid attics (too hot), outdoor sheds (temperature extremes and moisture), and damp basements (moisture and potential mold). Your BC is life-support equipment; treat it like the critical gear it is.
Keep it covered or enclosed to minimize UV exposure and dust accumulation—I use a large breathable garment bag. Never store in sealed plastic bags or airtight containers where trapped moisture can't escape. A breathable cover keeps dust and light off the BC while allowing air circulation.
For more comprehensive guidance on choosing the right BC for your needs—which affects maintenance requirements significantly—see our detailed guide on how to choose a buoyancy compensator.
Frequently Asked Questions

How often should I rinse my BCD after diving?
You should thoroughly rinse your BCD with fresh water after every single dive day, not just at the end of a dive trip. This means soaking the entire unit for at least 3-5 minutes, flushing the interior bladder, operating all valves and buttons multiple times during the rinse, and then hanging to dry in shade—even if you're diving again tomorrow. Saltwater crystallization begins within hours and accelerates corrosion and mechanical failure in inflator mechanisms and dump valves, so immediate rinsing is non-negotiable for long-term gear reliability.
How do I know when my BCD bladder needs to be replaced?
Your BCD bladder needs replacement when it shows signs of delamination (milky or peeling coating), fails to hold air for more than a few hours after full inflation, has multiple punctures or repairs in the same area, emits a persistent musty odor even after sanitization, or exhibits obvious material fatigue like cracking or excessive stiffness. Most bladders last 500-800 dives with proper maintenance, though I've seen well-cared-for bladders exceed 1,000 dives and neglected ones fail at 200. Professional inspection during annual service is the most reliable way to assess bladder condition before catastrophic failure occurs.
Can I repair a leaking BCD bladder myself or does it need professional service?
Small punctures and pinhole leaks in BCD bladders can be successfully repaired at home using BC-specific patch kits (not wetsuit cement or bicycle tire patches). Clean and dry the damaged area completely, roughen the surface slightly with fine sandpaper, apply the adhesive according to kit instructions, and allow 24 hours of cure time before inflation testing. However, leaks near seams, around valve attachment points, or in areas showing delamination should be professionally evaluated because these often indicate broader bladder degradation that a patch won't solve. I've repaired dozens of small punctures successfully, but I always send the BC to a shop when the leak is in a structural or high-stress area.
Final Thoughts
Here's what four decades of diving has taught me about BCD maintenance: it's not glamorous, it's not complicated, and it's absolutely essential. The divers who treat their buoyancy compensators like throwaway gear are the ones making emergency ascents from stuck inflators or dealing with rental equipment on expensive dive trips because their personal BC failed at the worst possible moment.
Your bcd maintenance checklist doesn't require special tools, advanced mechanical knowledge, or hours of time—just consistency and attention to detail. Rinse thoroughly after every dive day. Do a detailed monthly inspection if you're diving regularly. Get annual professional service. Store properly between trips. That's it.
I've watched the diving industry develop increasingly complex BCDs over the years—back-inflate wings, hybrid designs, modular systems with removable bladders—but the fundamental maintenance requirements haven't changed. Salt corrodes, sand abrades, UV degrades, and neglect accelerates every failure mode. The specific procedures in this checklist work for every style of BC from traditional jacket designs to minimalist travel wings.
The BC hanging in my garage right now has over 2,000 dives on it because I've followed these same protocols for years. It holds air perfectly, every valve operates smoothly, and the bladder shows no signs of degradation. That's not luck—it's maintenance. Your BC should last you a decade or more of reliable service if you're willing to invest 20 minutes after each dive day and an hour a month for thorough inspection. That's a pretty reasonable insurance policy for a piece of equipment that literally keeps you alive at depth.