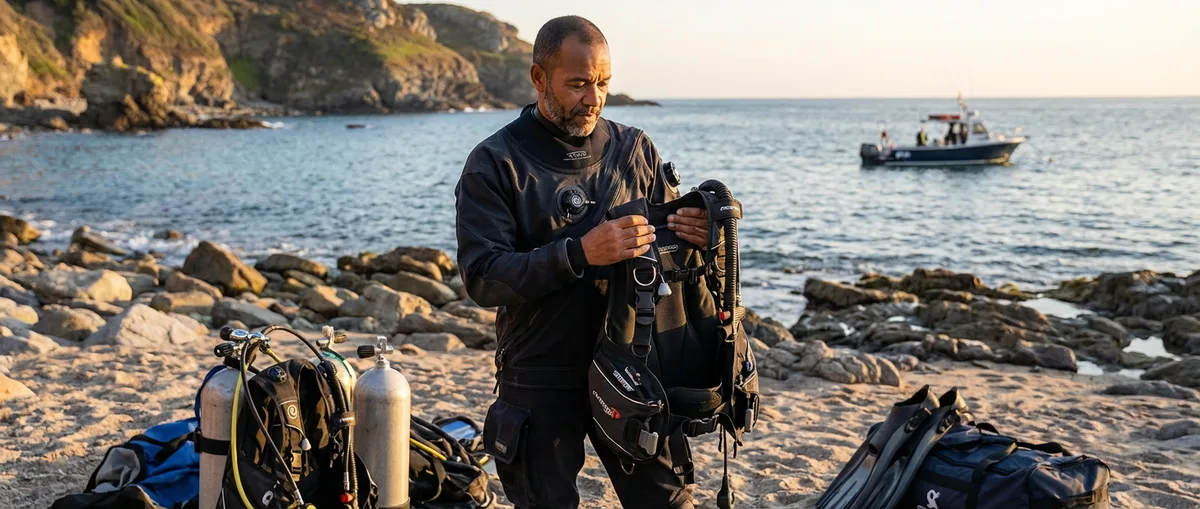
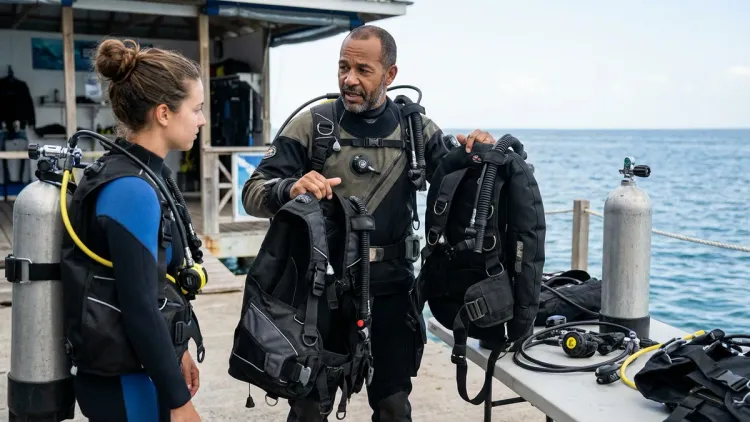
I've watched hundreds of divers struggle with the wrong BCD—fighting to stay horizontal, wrestling with integrated weight pockets that jam, or discovering their jacket-style BC turns them into a bobber at the surface when they really needed stable trim for underwater photography. Learning how to choose a buoyancy compensator isn't about finding the "best" BCD—it's about matching specific features to how you actually dive. In this guide, I'll walk you through the decision framework I use when students ask me which BC to buy, covering everything from lift capacity calculations to harness configurations for different diving environments. Whether you're buying your first BCD or upgrading after realizing your rental gear has been holding you back, you'll learn to evaluate bladder placement, weight integration systems, and materials based on your actual dive profile—not marketing claims.
What you'll accomplish: By the end of this article, you'll know how to assess your diving needs, decode BCD specifications, and select features that support your specific diving style.
Skill level: This guide is written for divers who've completed their open water certification and are ready to invest in personal gear.
Time required: Plan to spend 2-3 hours researching and trying on different styles before making a purchase decision.
What You'll Need
Before you start evaluating BCDs, gather these resources:
- Your current dive log (to assess your actual diving patterns vs. aspirational ones)
- Total weight requirements (including thermal protection you typically wear)
- Travel frequency and luggage constraints (if you fly to dive destinations regularly)
- Budget range (realistic total including accessories like weight pockets or backplate padding)
- Access to a dive shop with multiple BCD styles available for in-water testing
- List of planned diving activities for the next 12-18 months (recreational reef diving, wreck penetration, cold water, photography, etc.)
- Measurement of your torso length (base of neck to hip bone while seated)
If you're completely new to BCD terminology and function, I recommend reading What Is a Buoyancy Compensator Device: BCD Components and Function Explained first—it'll give you the foundation to understand why certain features matter.
Step 1: Assess Your Primary Dive Environment and Conditions
Here's what the dive industry won't tell you up front: the "best" BCD for warm-water vacation diving is often terrible for cold-water technical work, and vice versa. I learned this the expensive way when I bought a sleek travel BC for Caribbean trips, then moved to the Pacific Northwest and discovered it lacked the lift capacity for my 7mm wetsuit and steel tank setup.
Start by honestly answering where you dive most frequently—not where you dream about diving. If 80% of your dives happen in local quarries wearing thick exposure protection, don't optimize for the two tropical trips you take annually.
Cold water and heavy exposure protection (7mm wetsuits, drysuits, steel tanks) demands higher lift capacity—typically 30-40 pounds minimum. The bladder needs sufficient volume to compensate for neoprene compression at depth and the negative buoyancy of thick suits. I dive a back-inflate BC with 35 pounds of lift in the Pacific Northwest, and I use most of that capacity at the beginning of dives when my 7mm suit is maximally buoyant.
Tropical diving with aluminum tanks and 3mm suits requires far less—25-30 pounds of lift handles most scenarios comfortably. The BCD can prioritize packability and weight since you're not fighting heavy gear. My travel rig weighs 4.2 pounds and packs into a roller bag corner, which matters when airlines charge $100 for a second checked bag.
Mixed diving creates the real challenge. If you genuinely split time between environments, you'll need to either choose a versatile middle-ground option (accepting compromises in both scenarios) or invest in two BCDs. I went the two-BCD route after one too many dives where I was either over-lifted in Cozumel or under-lifted in Puget Sound.
Consider depth ranges too. If you regularly dive beyond recreational limits (deeper than 130 feet), you're entering technical diving territory where different BCD architectures—specifically wing-style BCDs with backplates—become standard for reasons I'll explain in Step 3.
Step 2: Determine Required Lift Capacity Based on Your Actual Weight Requirements
This is where most divers get it wrong. They pick a BCD that "feels nice" in the shop, then discover it can't handle their actual diving setup. Lift capacity isn't negotiable—it's physics. The BCD must be able to offset the negative buoyancy of all your gear at maximum weight plus provide a safety margin.
Here's the calculation I walk students through:
Add up the weight of everything that sinks: steel tank (typically -8 to -10 pounds when empty), lead weights (whatever you need for neutral buoyancy), exposure suit compression at depth (7mm suit loses 12-15 pounds of buoyancy between surface and 100 feet), accessories (lights, cameras, reels), and any negative buoyancy from the regulator and BCD itself.
Add a 25-30% safety margin for emergency situations. If you need to orally inflate your BCD at depth (because the inflator failed), or if you need to tow an unconscious diver to the surface, you want excess capacity.
For reference: A diver in a 7mm wetsuit with a steel HP100 tank, 15 pounds of lead, and typical accessories needs roughly 35-40 pounds of actual lift capacity. That same diver in a 3mm suit with an aluminum 80 and 6 pounds of lead needs maybe 25 pounds.
Don't confuse manufacturer claims with usable lift. A BCD rated for "around 40 pounds of lift" provides that amount when the bladder is 100% inflated—which creates massive drag and poor trim. Usable lift is closer to 70-80% of rated capacity. I've tested this repeatedly in pool sessions: once you exceed about 75% inflation, the BCD starts behaving unpredictably, shifting you into vertical positions or creating squeeze points around your torso.
If you're on the borderline between two lift ratings, size up. I've never met a diver who regretted having excess capacity, but I've assisted plenty who ran out of lift during safety stops when their thick suits compressed more than expected.
One more thing: if you're planning to add underwater photography equipment in the future, factor that weight now. A full camera rig with strobes and arms adds 8-12 pounds of negative buoyancy, and buying a new BCD six months after your first one because you discovered photography is an expensive mistake.
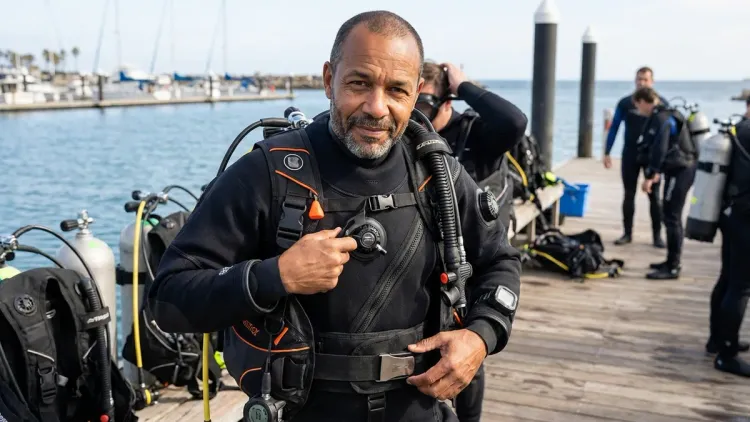
Step 3: Choose Between BCD Styles (Jacket, Back-Inflate, or Wing Configuration)
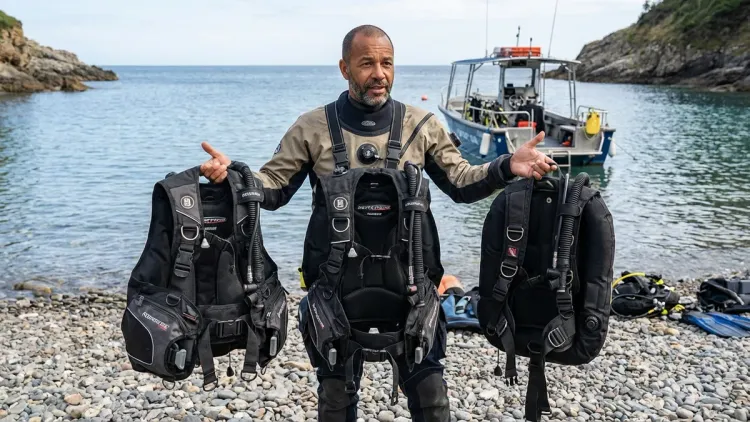
This is where personal preference intersects with function, and it's the decision that most dramatically affects your diving experience. I've logged hundreds of hours in each style, and they genuinely feel different underwater.
Jacket-Style BCDs
Jacket BCDs wrap around your torso, with the bladder forming a U-shape that inflates around your sides and back. When you add air, it distributes around your body like an inflatable vest.
Advantages: Surface stability is unmatched—the wraparound design keeps you upright and high in the water while you're waiting for the boat or dealing with surface swells. For new divers still developing buoyancy skills, this vertical stability reduces anxiety. Jacket BCDs also tend to have more accessory attachment points (D-rings, pockets, knife mounts) in easily accessible locations.
Disadvantages: Underwater trim suffers. That same wraparound inflation that stabilizes you at the surface tends to push you vertical at depth. I constantly see jacket-BC divers fighting a head-up, feet-down position, which increases drag and burns through air faster. The squeeze around your torso when inflated can restrict breathing—I've experienced this personally during ascents when teaching, feeling like I'm wearing a too-tight belt at rib level.
Best for: Brand-new divers still building comfort, those who do primarily boat diving with significant surface wait times, divers who prioritize having lots of pockets and attachment points for accessories, and anyone with lower back issues (the distributed support can be more comfortable).
Back-Inflate BCDs
Back-inflate BCDs concentrate all the air volume behind you, with a single bladder between your back and the tank. They look similar to jacket BCDs but inflate only in the rear.
Advantages: Much better horizontal trim underwater. Without air wrapping around your sides, you naturally settle into a streamlined position. Less squeeze on your torso means easier breathing throughout the dive. Most designs pack smaller than jackets since there's less bladder material. I switched to back-inflate about 2,000 dives into my career and immediately noticed reduced fatigue on multi-dive days.
Disadvantages: Surface positioning can feel awkward initially—you tend to face-plant forward unless you actively arch your back or add air. This takes adaptation, and some divers never feel comfortable with it. There's also a learning curve around managing air distribution in the bladder; if you don't keep the bladder centered on your back, it can push you off-axis.
Best for: Divers transitioning beyond beginner level, anyone prioritizing efficient horizontal position for underwater photography or videography, those seeking more streamlined profiles for moderate current diving, and divers who don't mind a brief acclimation period.
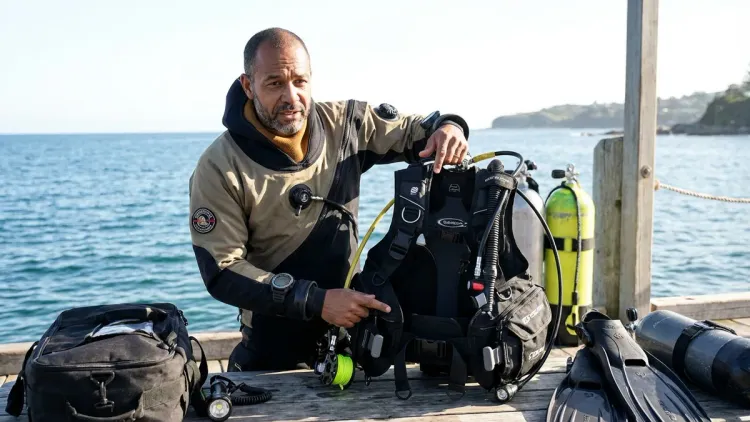
Wing and Backplate Systems
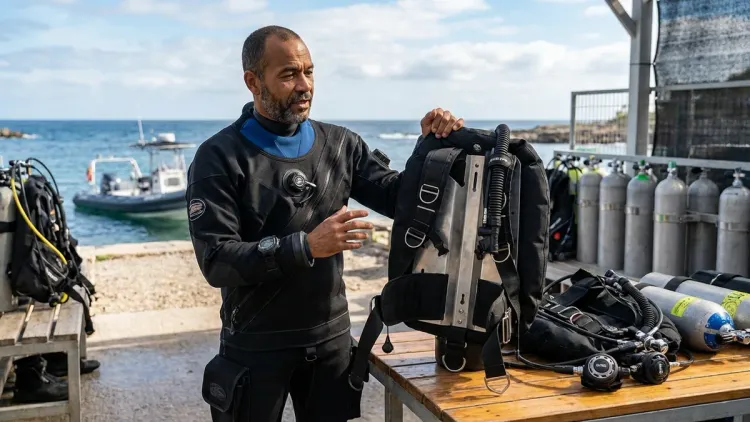
Wing BCDs pair a donut-shaped bladder (the "wing") with a rigid backplate (usually stainless steel or aluminum) and a minimalist harness. This is the technical diving standard, but it's increasingly popular for recreational use.
Advantages: The most modular and customizable system available. You can swap wing sizes, adjust harness geometry precisely, and configure the rig for different diving styles. Durability is exceptional—stainless backplates are nearly indestructible, and wings use heavy-duty materials since they're designed for technical diving stresses. The rigid plate provides the best possible tank stability and weight distribution. For long dives in cold water environments, this system excels.
Disadvantages: Setup complexity intimidates many recreational divers. There's a real learning curve to configuring the harness properly, and unlike jacket BCDs with quick-release buckles everywhere, you're dealing with continuous webbing that must be sized correctly. Cost is higher initially—around $600-900. And honestly, it's overkill for casual vacation diving where you're doing guided reef tours in warm water.
Best for: Technical divers, anyone serious about advancing to cave or wreck penetration, photographers who need absolute stability, divers who want a "buy once" solution that'll last 15+ years, and those willing to invest time in proper configuration. Also surprisingly good for travel if you choose an aluminum backplate—the system breaks down efficiently despite seeming bulky.
For more detailed comparison between the first two categories, check out Jacket BCD vs Back Inflate BCD: Which Is Better for Your Diving Style?
Step 4: Evaluate Weight Integration Systems and Capacity
This is one of those features that seems minor until you're on a pitching boat trying to jam lead into inadequate pockets while everyone waits for you. Weight integration determines how quickly you can configure your rig and how weight distributes across your body.
Most modern BCDs offer integrated weight pockets—pouches built into the BCD that eliminate the need for a separate weight belt. But implementation quality varies dramatically.
Weight pocket capacity matters first. Can the system actually hold all the lead you need? I've seen divers discover their "around 30-pound capacity" integrated system can only comfortably hold 20 pounds before pockets become impossible to secure properly. If you need more than 20 pounds total, verify that the pocket design accommodates it—go to a shop and physically load the pockets with your actual weight requirement.
Dump mechanism reliability is critical. Quick-release weight systems exist for emergency weight drops, but they must be intuitive and reliable. I test this by having divers pull the release while wearing gloves (simulating thick gloves or cold hands). If the mechanism is stiff, awkward to reach, or requires looking down to locate the handle, it fails the real-world test. In an actual emergency—say, a runaway ascent or surface distress—you won't have time to fumble.
But here's the counterintuitive part: systems that release too easily are dangerous. I've seen weight pockets fall out during giant stride entries because the securing mechanism was inadequate. You don't want hair-trigger releases; you want deliberate, reliable ones.
Trim weight pockets (usually positioned higher on the BC, near your shoulders or tank cam band) allow fine-tuning of horizontal position. If you tend to be leg-heavy or head-heavy, strategically placed trim weights fix this. Not all BCDs offer trim pockets, but if you struggle with trim, they're worth prioritizing.
Load distribution affects comfort significantly over multi-dive days. Integrated pockets typically position weight at your hips, which works well for most people. But if you have lower back issues, tank-mounted weight systems (where lead sits in pockets attached to the cam band) shift load higher and may feel better. I dive with about 60% of my weight in hip pockets and 40% in trim pockets near my shoulders—this configuration keeps me perfectly horizontal without effort.
Consider ditchability requirements too. Some diving situations demand the ability to dump all weight instantly (deep diving, overhead environments), while others don't. Technical divers often use non-ditchable weight systems, deliberately making it impossible to drop weight accidentally. For recreational diving, I recommend keeping at least 50% of your weight in quick-release pockets.
Step 5: Prioritize Fit, Adjustability, and Harness Configuration
I can hand you the perfect BCD on paper—ideal lift capacity, appropriate style, solid weight integration—and if it doesn't fit your torso properly, you'll hate diving with it. Fit determines comfort, control, and even safety.
Torso length is the primary measurement, not chest size. BCDs are sized by the distance from your shoulder to your hip, because that determines how the tank sits on your back and how the waist strap positions. A BCD that's too long for your torso places the tank too low, making you back-heavy; too short and you can't tighten straps properly. Measure from the base of your neck to your hip bone while seated, then compare to manufacturer sizing charts.
Try before you buy—actually submerge yourself in the BCD if possible. Pool tests reveal fit issues that shop try-ons don't. Can you reach all your dump valves comfortably? Does the BCD ride up your back during simulated swimming? When you arch backward (common during underwater photography), does anything pinch or bind? I once spent around $700 on a highly-recommended BC and discovered on the first boat dive that the shoulder straps dug into my collarbone whenever I looked up—completely unusable for wreck diving where I'm constantly looking upward.
Adjustment range determines long-term usability. Your body may change, your exposure protection will vary seasonally, and you might add or remove layers. Quality BCDs offer 4-6 inches of adjustment on major straps. Test this by wearing the BCD over just a t-shirt, then over your thickest wetsuit or drysuit—you should be able to achieve a snug fit in both scenarios with adjustment range to spare.
Buckle quality is a reliable indicator of overall build standard. Cheap plastic buckles fail—I've seen them crack, jam, and release unexpectedly. Look for marine-grade plastic or stainless steel buckles with overcenter mechanisms that lock positively. Squeeze buckles should require deliberate two-handed operation to release (so they don't pop open accidentally).
Dump valve placement needs to match your instinctive reach. Standard positions include left shoulder (pull-dump), right shoulder (controlled by the inflator), and lower right side (kidney dump). When you're dealing with a buoyancy problem underwater, you react instinctively—if the dump valve isn't where your hand naturally goes, you waste time hunting for it. I prefer shoulder dumps for rapid ascent control and kidney dumps for fine-tuning trim at depth.
For detailed instructions on optimizing fit once you own a BCD, see How to Properly Fit and Adjust Your Scuba BCD for Maximum Comfort.
Step 6: Consider Material Construction and Long-Term Durability
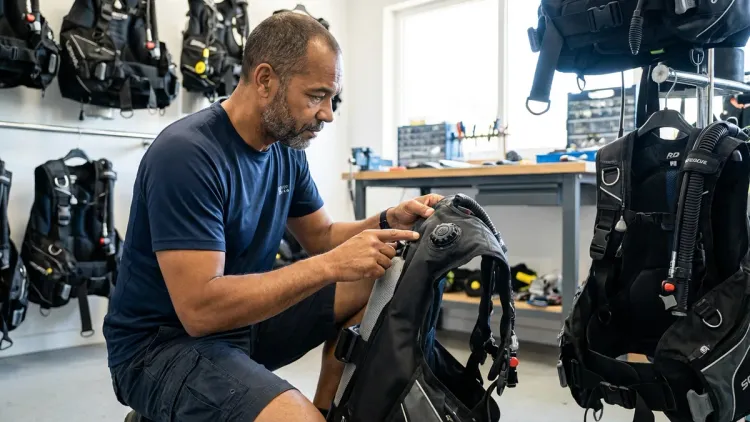
BCDs are expensive gear that should last 8-10 years minimum with proper care, so material quality directly affects your total cost of ownership. I've watched cheap BCDs fall apart in 18 months while quality ones soldier on through hundreds of dives.
Bladder material determines puncture resistance and longevity. Most BCDs use polyurethane-coated nylon, but material weight (measured in denier) and coating thickness vary. Look for at least 420-denier nylon with heavy polyurethane coating. Cheaper BCDs use 210-denier material that develops slow leaks from abrasion against tank valves and rough boat surfaces. I learned this the hard way with a budget BC that required bladder replacement after 80 dives—the replacement cost more than upgrading to quality material initially.
Thread type and stitch density signal manufacturing quality. Examine seams closely: high-quality BCDs use marine-grade nylon or polyester thread (never cotton, which rots in saltwater) with reinforced stitching at stress points. I specifically look at cam band attachment points and shoulder strap anchors—these experience the most tension. Double or triple stitching here is non-negotiable.
Hardware corrosion resistance matters more than you think. Stainless steel is ideal for D-rings, buckles, and tank bands, but quality marine-grade plastic is acceptable for buckles. Avoid any BCD with zinc alloy or cheap pot metal hardware—it'll corrode rapidly in saltwater, and I've seen D-rings literally crumble after a season of ocean diving.
Inflator mechanism quality differentiates good BCDs from great ones. The inflator assembly (the device on your left shoulder that adds and dumps air) contains moving parts, o-rings, and valves subject to wear. Premium BCDs use inflators with metal stems and high-quality buttons that maintain crisp operation. Budget versions use all-plastic construction that gets mushy after repeated use. Test the inflator in the shop: buttons should have distinct clicks, and the exhaust valve should vent air immediately when pressed.
Overpressure relief valve (OPV) is a critical safety feature that automatically vents excess air if you over-inflate. Quality OPVs are adjustable and serviceable—you can set the threshold pressure and replace internal components during maintenance. Cheap ones are fixed-pressure and non-serviceable, which means if they fail (and they do), you're replacing the entire bladder assembly.
Consider material weight if you travel frequently. A 1,200-denier Cordura BCD with stainless hardware might be bombproof, but it weighs 7-8 pounds—significant when you're managing airline baggage limits. Modern high-tenacity nylon blends provide 80% of the durability at 60% of the weight. My travel BC uses 420-denier laminated nylon and weighs 4.2 pounds while remaining durable enough for 300+ dives so far.
Step 7: Factor in Accessory Integration and Future Expansion Needs
This step separates "adequate for now" BCDs from "grows with your diving" BCDs. Think 18-24 months ahead: what equipment might you add as you gain experience?
D-ring quantity and positioning determines how much gear you can attach. Basic recreational diving requires maybe 4-6 D-rings for octo clip, pressure gauge clip, and accessories. Underwater photography adds another 4-6 requirements for strobe clips, flashlights, focus lights, and spare battery packs. Technical diving? I use 12+ attachment points on my wing setup. Count the D-rings available and consider whether positioning makes sense for your planned uses.
D-ring type matters too. Welded or bolt-snap D-rings maintain orientation and don't rotate under load—critical for items you need to grab quickly like backup regulators or cutting tools. Stamped D-rings are adequate for low-priority accessories but rotate annoyingly when you're trying to clip something back.
Integrated BCD pockets trade off convenience against streamlining. I appreciate having pockets for dive slates, safety sausages, and reef hooks, but overstuffed pockets create drag and buoyancy asymmetry. Some BCDs offer detachable pockets—nice if you want pockets for local diving but streamlining for travel. Test whether pocket zippers are usable with gloves, because fumbling a zipper with cold hands at depth is infuriating.
Tank band compatibility and sizing becomes important if you dive varied tank configurations. Most BCDs accommodate standard aluminum 80s fine, but if you use steel tanks, larger aluminum tanks (100-120 cubic feet), or small pony bottles, verify the cam bands adjust appropriately. I've encountered BCDs where the supplied cam band literally couldn't tighten enough for small-diameter steel tanks—the tank rocked loose during entries.
Lift handle placement seems trivial until you need to assist an unresponsive diver or get hauled onto a boat in rough conditions. A properly positioned upper-back handle allows boat crew to grab you securely and haul you aboard without choking you with shoulder straps. Cheap BCDs skip this feature or position it uselessly low.
Crotch strap availability prevents BC ride-up during ascents. Not everyone needs this—it's mostly relevant for back-inflate and wing BCDs that can shift upward under buoyancy. But if your BC choice includes an optional crotch strap, factor in whether you'll need it based on your body type and the BC's tendency to ride up during pool testing.
If you're specifically interested in travel-optimized options, I've reviewed several excellent compact designs in Best Travel BCDs Under 5 Pounds for 2026.
Step 8: Set a Realistic Budget Including Essential Accessories
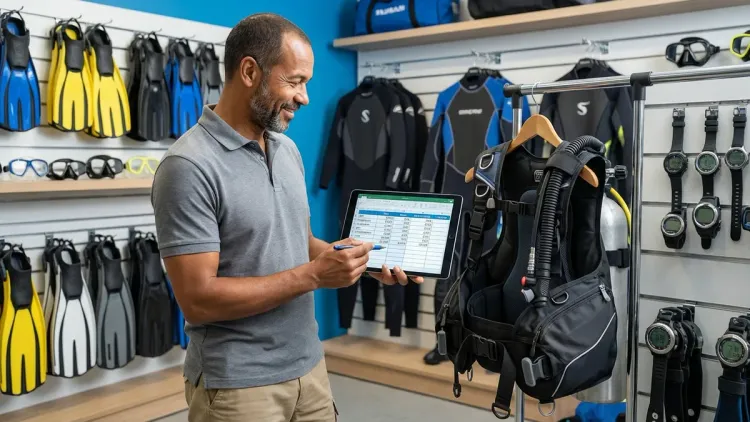
BCDs range from around $300 to around $1,500, but the sticker price doesn't reflect your actual investment. Factor in everything you need to actually dive the system.
Entry-level BCDs (around $300–500) sacrifice some durability and features but handle basic recreational diving adequately. You're typically getting lower-denier materials, plastic hardware, basic weight integration, and limited D-rings. These work fine if you're diving 15-20 times per year in straightforward conditions and aren't planning equipment-intensive diving like photography. I recommend models in this range for divers uncertain about committing long-term to the sport.
Mid-range BCDs (around $500–800) offer noticeably better materials, more thoughtful ergonomics, enhanced weight systems, and better long-term durability. This is the sweet spot for most committed recreational divers—you're getting a BC that'll last 8-10 years with proper maintenance and accommodate growing skill levels. Pretty much every serious diver I know dives something in this category unless they've moved to technical configurations.
Premium BCDs (around $800–1,500) provide top-tier materials, extensive customization, superior comfort systems, and either technical diving capability or ultra-lightweight travel optimization. You're paying for maximum durability and specific performance optimization. Unless you have specific needs in the technical or travel categories, the performance improvement over mid-range options is incremental.
Don't forget mandatory accessories in your budget:
- Replacement weight pockets or belt weights: around $50–150 depending on capacity required
- Hose protector for inflator mechanism: around $15–25 (often neglected, always important)
- Additional D-rings or attachment hardware: around $20–40 if you need more than supplied
- BCD maintenance kit (rinse tool, zipper lubricant, storage hanger): around $40–60
- Professional annual service inspection: around $50–80 per year
Also account for potential future modifications: trim weight pockets (around $40–70), crotch strap retrofits (around $30–50), upgraded inflator mechanisms (around $80–120), or accessory pockets (around $50–90).
Financing considerations: Some dive shops offer financing on gear packages. If you're buying a full kit (BCD, regulator, computer), bundled pricing often saves 15-20% compared to individual purchases. Just verify you're not paying financing fees that negate the discount.
One last financial reality: buying the wrong BCD and replacing it is the most expensive option. I've watched divers cheap out initially, discover the equipment doesn't support their actual diving, and end up buying twice. If you're genuinely uncertain about your long-term dive patterns, consider renting a bit longer while you develop clearer preferences. But if you know you're committed—you've logged 25+ dives and have specific plans—invest properly the first time.
Pro Tips & Common Mistakes
Pro tip: Test BCDs in actual dive conditions, not just shops. Many dive shops and manufacturers offer demo programs where you can dive a BCD before committing. I never recommend purchasing based solely on shop try-ons. In-water behavior—how it affects your trim, whether straps shift during swimming, how dump valves respond at depth—only reveals itself when you're actually submerged and task-loaded.
Common mistake: Choosing BCD style based on what your instructor or dive buddy uses. Your body type, diving environment, and comfort preferences may be completely different. I'm often asked "what BC do you dive?" and my answer (wing system in cold water, compact back-inflate for travel) is irrelevant to someone doing Caribbean vacation diving twice yearly. Match equipment to your profile, not someone else's.
Pro tip: Pay attention to inflator hose routing. The hose connecting your inflator to the regulator first stage needs appropriate length and routing. Too short and it's under tension, causing premature wear and difficult operation. Too long and it dangles annoyingly or snags on things. When testing a BCD, verify that the inflator hose reaches comfortably to your left shoulder without pulling tight, with maybe 3-4 inches of slack.
Common mistake: Ignoring maintenance requirements. Some BCDs require more frequent servicing than others. Wing systems with user-serviceable inflators can be maintained at home; sealed-system jackets may require annual shop service costing around $60–80. Factor this into total ownership cost. Also verify parts availability—esoteric models might have 6-week lead times for replacement bladders.
Pro tip: Consider resale value. Premium brands (Scubapro, Halcyon, Atomic) retain 50-60% of value even after years of use. Budget brands retain maybe 20-30%. If there's any chance you'll change equipment in 2-3 years (moving to technical diving, changing body size significantly, relocating to different diving environment), higher-quality BCDs cost less in the long run when you factor in resale recovery.
Common mistake: Overlooking color and visibility. This sounds superficial until you're on a dive boat with 20 other divers using rental black BCDs. Bright colors help your dive buddy track you underwater and help boat crew count heads at the surface. As a dive instructor doing open water checkouts in low visibility, I specifically chose a bright yellow BC so students can always locate me. Pure function over aesthetics, but it matters.
Frequently Asked Questions
Should I buy a BCD before or after choosing my regulator?
You should choose your regulator first because it determines tank valve type (DIN or yoke) and influences weight requirements, which then affect your BCD lift capacity needs. For example, if you select a technical diving regulator with DIN connection, you're likely diving steel tanks requiring higher BCD lift capacity. The regulator is also generally a larger investment (around $400–900 vs around $300–800 for BCDs), so it makes sense to make the bigger commitment first. That said, if you're buying a complete gear package, prioritize getting professional fit guidance on the BCD since improper fit creates immediate comfort and safety issues while regulator performance is somewhat more standardized.
How much lift capacity do I realistically need for typical recreational diving?
Most recreational divers need 25-35 pounds of lift capacity depending on exposure protection and tank type. If you dive tropical conditions with a 3mm wetsuit and aluminum tanks, 25-28 pounds is adequate; for cold water diving with 7mm wetsuits or drysuits paired with steel tanks, you need 32-40 pounds minimum. Calculate your maximum weight load (tank buoyancy characteristics, lead weights, gear, and exposure suit compression at depth), then add a 25-30% safety margin—this ensures you can achieve positive buoyancy at the surface even if you're at maximum negative buoyancy underwater. Undersizing lift capacity creates genuine safety issues; oversizing just means you'll never fully inflate the bladder, which is fine.
Can I use the same BCD for both warm water travel and cold water local diving?
You can use one BCD for both environments if you select adequate lift capacity for your cold water configuration—typically 32-35 pounds minimum—and choose a design that packs reasonably compact. A back-inflate BCD with 35-pound capacity handles cold water diving while remaining packable enough for travel, though it won't be as light as dedicated travel models weighing under 5 pounds. The compromise is that you're carrying extra BCD weight on tropical trips where you don't need the full lift capacity, and you're possibly sacrificing some cold water features for travel friendliness. I personally operate two BCDs—a full-featured wing system for cold water and technical diving, and an ultralight back-inflate for tropical travel—because I dive both environments frequently enough to justify the investment.
How often does a BCD need professional servicing and what does it cost?
BCDs should receive professional inspection and servicing annually, particularly the inflator mechanism, dump valves, and bladder integrity testing. Service typically costs around $50–80 and includes testing all inflation and deflation functions, replacing o-rings, lubricating valves, pressure testing the bladder for leaks, and inspecting stitching and hardware for wear. If you dive more than 80-100 times annually or in harsh conditions (lots of boat diving where the BCD gets thrown around, or cold water diving where inflator mechanisms freeze), consider servicing every six months. Between professional services, rinse your BCD thoroughly with fresh water after every saltwater dive, manually operate all dump valves during rinsing to flush salt deposits, and store it partially inflated to prevent bladder material from sticking to itself—this maintenance prevents 90% of common failures.
Summary

Learning how to choose a buoyancy compensator comes down to honest assessment of where and how you actually dive, then matching BCD architecture, lift capacity, and features to that profile. Start by determining your primary diving environment and calculating required lift capacity based on your full gear weight—this eliminates options that won't physically work for your needs. Choose between jacket, back-inflate, or wing configurations based on your priorities around surface stability versus horizontal trim and customization requirements. Evaluate fit carefully through in-water testing, because proper sizing affects comfort and control more than any other single factor. Consider material quality and construction if you want the BCD to last 8-10 years, and factor in accessory integration needs if you plan to add photography equipment or advance to technical diving. Set a realistic budget that includes essential accessories, not just the BCD sticker price. The right BCD disappears into the background of your diving—you don't fight it, adjust it constantly, or think about it. You just dive, with proper buoyancy control happening naturally because the equipment supports rather than hinders your positioning underwater. Before you finalize any purchase, complete a thorough BCD pre-dive safety check to understand all the systems you'll be depending on.