I still remember my first few dives after buying my own dive computer—I'd glance at it underwater and feel this weird mix of pride and panic. I had this amazing piece of tech on my wrist, but between the scrolling numbers, flashing icons, and my own excitement about the reef around me, I'd surface and realize I'd barely looked at it properly. Learning how to read dive computer displays underwater isn't just about understanding what the numbers mean (though that's important too)—it's about training yourself to actually check it regularly, interpret the information quickly, and use it to dive safely and confidently.
In this guide, I'll walk you through exactly how I learned to read my dive computer display during actual dives, from positioning it where you can actually see it to understanding what each screen element means when you're 60 feet down and a turtle swims by. Whether you just got your first computer or you're still figuring out all those extra screens, this will help you make it second nature. Time estimate: About 3-5 dives to feel comfortable; skill level: beginner-friendly.

What You'll Need
Before you practice reading your dive computer underwater, make sure you have:
- Your dive computer (obviously!) — fully charged or with fresh battery
- The user manual (seriously, keep it in your dive bag or saved on your phone)
- A slate or wet notes — helpful for recording readings during practice dives
- Good visibility conditions — at least 20-30 feet for your first practice dives
- A buddy who knows you're practicing and won't rush you
- Basic understanding of dive computer terminology — check out our complete guide to dive computers if you're totally new
You don't need anything fancy beyond your standard dive setup. I practiced this during regular recreational dives, just with a little extra focus on checking my computer instead of only watching the reef.
Step 1: Position Your Computer Where You Can Actually See It
This sounds obvious, but I spent my first ten dives with my computer on the inside of my wrist, which meant I had to twist my arm awkwardly every time I wanted to check it. Not ideal when you're trying to maintain buoyancy and hold a camera.
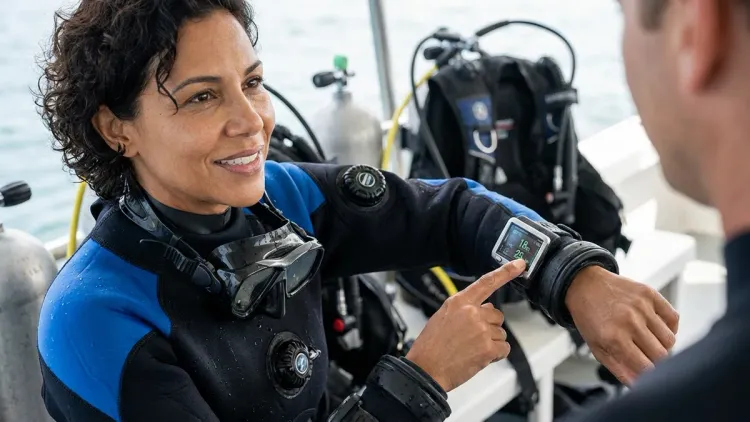
If you have a wrist-mounted computer (like most recreational divers), wear it on the outside of your wrist so the display faces you when your arm is in a natural swimming position. I wear mine on my right wrist because I hold my camera with my left hand, but choose whichever feels more natural for you. The key is that you should be able to glance at it by simply bending your elbow slightly, without contorting your whole arm.
For console-mounted computers that attach to your regulator hose, clip the console to a D-ring on your BCD where you can easily bring it up to eye level. Some divers clip it on their left chest, others prefer a hip D-ring—experiment before you dive to find what works. The console should hang securely when you're not using it but be easy to unclip and read without yanking on your regulator.
Backlighting is your friend. Most modern dive computers have backlight buttons—figure out where yours is before you descend. I learned this the embarrassing way during a dusk dive when I couldn't read my screen at all and had to surface earlier than planned. On most models, you'll press and hold a button for a second or two to activate the backlight, which usually stays on for 5-10 seconds.
Check your manual for the specific button combo on your model. This becomes critical if you're diving anywhere with lower light—even in clear tropical water, once you drop below 60 feet, colors disappear and screens can get harder to read without backlight.
Step 2: Master the Primary Display (Depth and Time)
Your computer's main screen shows the two most important pieces of information for every dive: current depth and elapsed dive time. These are typically the largest numbers on the display, usually in the center or top of the screen.
On my Suunto dive computer, current depth is displayed in big numbers at the top center, measured in feet or meters depending on your settings (I use feet since that's what my certification training used). Dive time shows how long you've been underwater on this specific dive, usually in minutes, displayed right below or next to depth.
Here's what I trained myself to do: check these two numbers every time I adjust my buoyancy or change depth zones. Not constantly—that's exhausting and you'll miss the dive—but as part of a regular scan pattern. When I'm cruising along a reef wall, I glance at my computer about every 2-3 minutes. When I'm actively ascending or descending, I check it more frequently, maybe every 30-60 seconds.
The depth reading updates in real-time, so you'll see it change as you move up or down. This is super helpful for maintaining buoyancy control, especially if you're trying to stay at a specific depth for photography. I use it as biofeedback—if I see my depth creeping from 45 feet to 50 feet, I add a tiny bit of air to my BCD.
Practice this: On your next dive, pick a target depth (say, 40 feet) and try to hold it for five minutes while watching your computer. You'll see the number fluctuate by a few feet—totally normal—but this exercise builds that neural pathway between seeing a depth change and making small buoyancy corrections.
Most computers also show maximum depth for the current dive somewhere on the display, usually smaller numbers near the current depth. This helps you track your dive profile, which is useful for logging dives and understanding your air consumption patterns at different depths.
Step 3: Understand Your No-Decompression Limit (NDL)
The NDL or No-Decompression Limit is probably the most important safety feature on your dive computer, and honestly, it confused me for way longer than I'd like to admit. This number (usually labeled as NDL, No Deco, or sometimes just shown as a time) tells you how many minutes you can stay at your current depth before you'd need to do decompression stops on ascent.
For recreational diving, we never want this number to get too close to zero. On my computer, the NDL is displayed prominently, usually near the depth and time. It constantly recalculates based on your current depth and your entire dive profile so far.
Here's how it works in practice: If you're at 60 feet and your NDL says "45," you have 45 minutes before you'd need to start worrying about decompression. If you ascend to 40 feet, you'll notice that NDL number increase because you're at a shallower depth where you can stay longer. If you descend deeper to 80 feet, it decreases because nitrogen absorption happens faster at depth.
The important habit: I always surface with at least 5-10 minutes of NDL remaining—this gives me a safety buffer and accounts for any unexpected delays during ascent. Most dive computers use different decompression algorithms, but they all work on the same basic principle of tracking nitrogen loading.
If your NDL gets low (usually under 5 minutes), your computer will probably start flashing or beeping at you. Don't panic—just start your ascent. The NDL will increase as you get shallower. I've had this happen once when I got really focused on photographing a seahorse and didn't notice how long I'd been at 70 feet. The flashing screen got my attention, I ascended to 50 feet, and my NDL immediately jumped back up to a comfortable number.
Different computers display this differently, so check your manual. Some show it as a countdown timer, others use a bar graph or percentage. Learn your specific model's visual language before you're trying to interpret it at depth.
Step 4: Monitor Remaining Air and Air Integration Features

Not all dive computers have air integration (the ability to display your tank pressure), but if yours does, learning to read this feature transforms how you manage your air underwater. I upgraded to an air-integrated computer about a year into diving, and it was a game-changer for my confidence.
For non-air-integrated computers: You'll monitor your air the traditional way with your SPG (submersible pressure gauge) on your regulator console. The principle is the same—check it regularly, plan your ascent with adequate reserve air.
For air-integrated computers: Your current tank pressure displays right on your wrist (if it's a transmitter-equipped wrist computer) or on your console. This is usually shown in PSI or bar, depending on your settings. Mine shows PSI as a three-digit number in the upper right corner.
What makes air integration really useful is the remaining bottom time or air time remaining (ATR) calculation. This feature estimates how many minutes of air you have left at your current depth and breathing rate. My computer displays this as "ATR" followed by a number in minutes.
Here's the thing I learned: this number is only as accurate as your breathing pattern. If you've been swimming calmly and then suddenly start working hard against a current, your actual air consumption will increase and that estimate becomes less reliable. I use ATR as a guideline, not gospel, and I always plan to surface with 700-800 PSI remaining (500 PSI is the typical minimum reserve, but I like extra cushion).
The computer typically calculates ATR by monitoring how quickly your pressure drops and then factors in your current depth. If you're breathing faster (using more air per minute), the ATR number will decrease faster. If you're breathing slowly and calmly, it might even increase slightly if the computer recalculates based on your improved consumption rate.
Practical workflow: I check my tank pressure at the start of the dive (should be around 3000-3200 PSI for a standard aluminum 80), then every 5 minutes or so during the dive, and more frequently once I drop below 1500 PSI. If my ATR shows less time than my NDL, air becomes my limiting factor and I plan my ascent accordingly.
One frustrating quirk of wireless transmitters: occasionally they lose signal and your computer will display dashes or zeros instead of pressure. This happened to me on a deep wall dive and my heart jumped until I checked my backup SPG and confirmed I had plenty of air. It's usually just a temporary glitch—the signal typically reconnects within a minute—but it's a good reminder to occasionally verify with your SPG if something looks weird.
Step 5: Interpret Ascent Rate Indicators and Warnings
Your dive computer constantly monitors how fast you're ascending, and this is where things get serious from a safety perspective. Ascending too quickly is one of the most dangerous things you can do while diving—it increases decompression sickness risk and can cause lung overexpansion injuries.
Most computers display your ascent rate either as a vertical speed number (in feet per minute or meters per minute) or as a visual indicator like bars or arrows. The maximum safe ascent rate is generally 30 feet per minute (about 9 meters per minute), though PADI recommends not exceeding this rate, especially for the last 20 feet.
On my computer, if I'm ascending too fast, a upward-pointing arrow appears and starts flashing, accompanied by an audible beep. Some computers show multiple arrows or bars that fill up as you go faster—more arrows or fuller bars mean you're ascending too quickly and need to slow down immediately.
Here's what I do when I see an ascent rate warning: I stop finning upward, exhale, and even add a tiny bit of air to my BCD if needed to slow or stop my ascent. Sometimes all it takes is going horizontal instead of angled upward to slow your rate. The key is responding immediately, not thinking "I'll slow down in a few seconds."
The most common time I see ascent warnings is during the final ascent from my safety stop. I get eager to surface, start finning upward a bit too enthusiastically, and bam—arrows and beeping. It's embarrassing but it's a good reminder to stay disciplined, especially when you're almost done.
Visual cue practice: During your next dive, watch your ascent rate indicator during a controlled ascent. Try to keep it just below the warning threshold—you'll develop a feel for what "30 feet per minute" actually feels like. For me, it's a very slow, relaxed upward drift, much slower than you'd think if you're used to swimming horizontally.
Some computers also show a safety stop indicator or countdown when you reach the 15-20 foot range. This usually displays as a timer (3:00 counting down) and sometimes with a depth range showing you should stay between 10-20 feet. I've found that maintaining my safety stop depth while watching this countdown timer is a great way to practice buoyancy control—you need to stay nearly motionless in the water column for three full minutes.
Step 6: Check Secondary Displays (Temperature, Compass, Alarms)

Once you're comfortable with the primary safety information—depth, time, NDL, and ascent rate—you can start paying attention to the secondary displays that make your dive computer more than just a safety tool.
Water temperature is usually displayed somewhere on the main screen, often in a corner or smaller font. I mostly ignore this during the dive itself, but I do check it at the start because it helps me decide whether I'm comfortable or if I'm going to be cold later in the dive. On my home reefs in Belize, water temp usually reads between 78-82°F year-round, so I'm fine in a 3mm wetsuit. If I traveled somewhere colder and saw 65°F on my computer, I'd know I probably should have rented a thicker wetsuit.
Many dive computers now include a digital compass that you can access by pressing a button or switching screens. This was completely useless to me until I started doing navigation dives and realized I could set a heading and follow it without constantly pulling out a separate compass. The digital compass usually shows your current bearing as a number (0-360 degrees) and sometimes an arrow pointing toward your set bearing.
To use it effectively underwater: surface, orient yourself toward your target (like the boat or shore), press the button to lock that bearing, then descend and follow the arrow. I still prefer my analog compass for serious navigation, but the digital one is handy for quick reference checks.
Alarm functions are something I initially disabled because the beeping startled me, but I eventually turned them back on for depth alarms. You can usually set custom alarms—like a warning when you reach 60 feet or when your tank pressure drops below 1000 PSI. These appear as flashing icons and audible beeps. Check your manual (preferably on the surface, not at depth when an alarm goes off unexpectedly) to understand what each alarm icon means.
Some computers also show surface interval time when you're on the surface between dives, along with information about your previous dive and residual nitrogen loading. This matters more for multi-dive days—if you're doing three dives in one day, your computer remembers your nitrogen loading from dive one and two, which affects your NDL calculations on dive three.
Step 7: Develop a Regular Scan Pattern and Make It Habit
Reading a dive computer isn't about constantly staring at the screen—that's how you miss incredible marine life and also how you become "that diver" who crashes into the reef because they weren't looking where they were going. Instead, it's about developing a regular scan pattern that becomes automatic.
Here's the pattern I use, which I adapted from what my instructor recommended: Every 2-3 minutes during cruising portions of the dive, I do a quick check in this order: depth, NDL, tank pressure, buddy location, depth again. That last depth check catches me if I've started drifting up or down without noticing.
When I'm actively changing depth (descending to a deeper section or ascending toward my safety stop), I check more frequently—probably every 30-60 seconds, focusing especially on depth and ascent rate.
The trick is making this feel natural. At first, I actually set the timer function on my computer to beep every three minutes as a reminder to check everything. It felt silly, but after about five dives, the habit was ingrained and I didn't need the reminder anymore. Now I just naturally glance down every few minutes without thinking about it.
Integration with photography: Since I'm usually diving with my camera, I trained myself to check my computer every time I move to a new subject or composition. Finished photographing that grouper? Quick computer check while I swim to the next coral formation. This way my computer checks coincide with natural breaks in my shooting, rather than interrupting moments when I'm focused on getting a shot.
If you're not sure whether you're checking often enough, try this: use a slate to note your depth and NDL at five different points during a dive. When you review it afterward, ask yourself if you would have caught any potential issues (like getting close to your NDL limit) in time. If the answer is no, you need to check more frequently.
Your dive buddy can help reinforce this habit too. My buddy and I do regular checks where we make eye contact, then each check our computers, then signal each other with our status—we both flash the "okay" sign if our air is good and our NDL is comfortable, or signal "going up" if either of us is getting low on air or NDL time. This takes literally five seconds and it's saved us from a few situations where one person lost track of time.
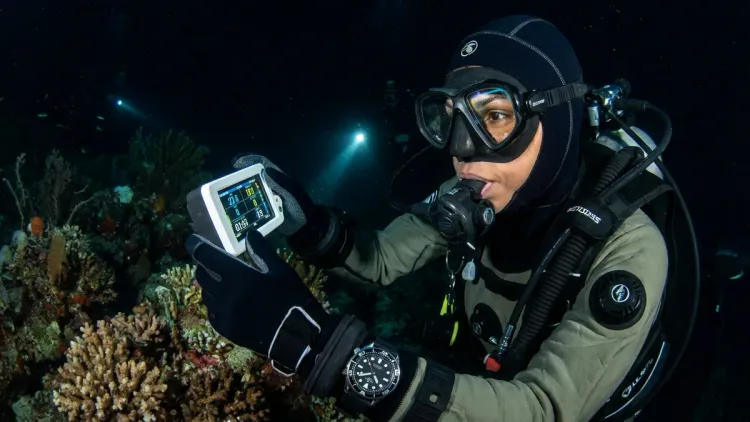
Step 8: Know How to Read Your Computer in Low Visibility or Night Conditions

Everything I've described so far assumes decent visibility and daylight, but learning how to read dive computer displays in challenging conditions is equally important—especially if you ever want to do dusk dives, night dives, or dive in areas with naturally lower visibility.
Backlight mastery becomes essential here. Like I mentioned earlier, every computer has a backlight function, but on most models, you have to activate it manually by pressing a specific button or button combination. On my Suunto, I press and hold the lower right button for two seconds and the screen lights up for about 10 seconds. Learn your specific activation method and practice it on land until it's muscle memory.
Here's a trick I learned from a more experienced diver: activate your backlight before you need it. If you're doing a dusk dive and you notice the light starting to fade, start using your backlight preemptively rather than waiting until you literally can't read the screen. This prevents that moment of fumbling in the dark trying to remember which button to press.
Contrast and display quality matter more than you might think. Some computers have high-contrast displays that are easier to read in low light even without backlight—my friend's Shearwater dive computer has an incredibly crisp OLED screen that's readable in almost any condition, while my Suunto's LCD screen can be a bit harder to read at depth or in murky water. This is something worth considering if you're choosing a new dive computer.
For night diving specifically, I've learned to check my computer more frequently because it's harder to judge depth and time by visual cues (there's no visible surface above you, no sense of how deep the reef below looks). I probably check every 1-2 minutes on night dives versus every 3 minutes on day dives.
One thing that surprised me: The backlight drains battery faster. If you do a lot of low-light diving, you'll need to replace batteries or recharge more frequently. I learned this the hard way when my computer died mid-dive on the third day of a dive trip because I'd been doing daily dusk dives and using the backlight constantly.
Pro Tips & Common Mistakes

Pro tip for new computer owners: Spend 20-30 minutes in a pool or confined water just practicing accessing all your computer's different screens and functions. Press buttons, cycle through menus, activate the backlight, see what happens when you go down to 10 feet and come back up. This "safe" practice environment lets you learn without the pressure (pun intended) of being on an actual dive.
Common mistake: Ignoring your computer early in the dive and then checking only when you remember. I did this constantly my first dozen dives—I'd get so excited about the reef that I'd forget to check, then I'd suddenly remember and discover I was at 70 feet when I thought I was at 50, or I'd been down for 35 minutes when I thought it had only been 20. Set a watch timer or use your computer's alarm function until the habit is built.
Pro tip for photographers: Mount a small clip or retractor on your camera rig so you can temporarily attach your computer console or secure your camera while you check your wrist computer. I clip my camera to my BCD D-ring for 10 seconds while I do a detailed computer check, then grab it again and keep shooting. This prevents that awkward juggling act of trying to hold your camera and check your wrist simultaneously.
Common mistake: Panicking when you see a warning and immediately bolting for the surface. I've seen newer divers do this, and it's dangerous—rapid ascents are worse than the problem the alarm is warning you about. If your computer beeps or flashes, first: stop moving, read what it's telling you, then respond calmly. NDL running low? Start a gradual ascent. Ascending too fast? Stop and equalize your ascent rate. Air getting low? Signal your buddy and begin your exit plan.
Pro tip: If you upgrade computers or borrow a different model, dive it in shallow water first—like 20-30 feet—even if you're an experienced diver. Every computer displays information slightly differently, and you want to learn its visual language in a low-stakes environment. I borrowed my buddy's Garmin dive computer for a dive once without familiarizing myself with the display layout first, and I spent half the dive trying to figure out where the NDL was displayed (it was in a different location than my Suunto).
The number one mistake I still catch myself making: Getting task-fixated on something else (usually lining up a photo) and completely forgetting to check my computer for 5-10 minutes. The solution isn't to never get absorbed in your dive—that's the whole point of diving—but to build automatic breaks into your activity where you surface mentally for a second, check computer and air, verify your buddy, then go back to what you were doing.
Frequently Asked Questions
How often should I check my dive computer underwater?
You should check your dive computer every 2-3 minutes during normal cruising portions of your dive, and every 30-60 seconds when you're actively ascending or descending. At minimum, verify your depth, remaining no-decompression limit, and air supply (if your computer has air integration or by checking your SPG) at these intervals. When I'm taking underwater photos, I check my computer every time I move between subjects or compositions, which naturally breaks up my dive into manageable monitoring segments.
What does it mean when my dive computer starts beeping underwater?
When your dive computer beeps underwater, it's alerting you to something that needs your attention—usually that you're ascending too quickly, approaching your no-decompression limit, reaching a preset depth alarm, or (if you have air integration) that your tank pressure is getting low. Don't panic, but do stop what you're doing and check your screen to see what specific warning is displaying. Most computers use different beep patterns or visual indicators like flashing arrows or icons to tell you exactly what the issue is.
Can I read my dive computer in low light or at night?
Yes, virtually all modern dive computers have backlight functions that make the display readable in low light, night diving conditions, or at significant depths where natural light is limited. You typically activate the backlight by pressing and holding a specific button (check your manual for your model's exact method), and it usually stays illuminated for 5-10 seconds. If you do regular dusk or night dives, be aware that frequent backlight use drains battery faster and you may need to recharge or replace batteries more often.
What should I do if my dive computer display stops working during a dive?
If your dive computer display stops working mid-dive, stay calm and follow your training's backup plan: check your analog depth gauge and watch if you have them, signal your buddy, note your current air supply on your SPG, and begin a safe, slow ascent to end the dive. Ascend no faster than 30 feet per minute, make a three-minute safety stop between 15-20 feet, and don't dive again until you've had your computer checked or replaced. This is why many experienced divers carry a backup computer or at minimum dive with analog gauges as redundancy—I learned to always dive with at least an SPG and depth gauge in addition to my computer after reading about a computer failure on a liveaboard trip.
Summary
Learning how to read dive computer underwater is one of those skills that feels overwhelming at first but becomes completely automatic with practice. Start by positioning your computer where you can see it easily, then master the primary displays—depth, time, and no-decompression limit—before worrying about all the extra features. The key is developing a regular scan pattern (I check mine every 2-3 minutes) that becomes habitual, not something you have to consciously remember.
Your computer is your most important dive safety tool after your regulator and BCD, but it only works if you actually look at it and understand what it's telling you. Take the time during your first few dives with any computer to really practice reading it at depth, activate the backlight, check it in different positions, and integrate those checks into your natural dive rhythm. Now get out there and practice—and don't forget to actually look at the reef occasionally too!