I'll be honest—underwater photography and video changed everything about how I experience diving. What started as me wanting a few fish pictures to show my family has turned into this whole creative journey that makes me look at reefs completely differently. Now I plan dives around lighting conditions and spend way too much time thinking about camera angles instead of just enjoying the swim-through. But I wouldn't have it any other way.
If you're curious about capturing what you see down there, this guide walks through everything I wish someone had explained to me three years ago when I was completely overwhelmed by all the gear options and technical talk.

What Is Underwater Photography and Video?
Underwater photography and video is the practice of capturing still images and motion footage while submerged, using specialized waterproof equipment designed to function at depth. It's basically regular photography, except you're weightless, the colors disappear after about 15 feet, and your subject might swim away mid-shot. Oh, and you're also managing your air supply and buoyancy while trying to frame the perfect composition.
When I first tried it, I thought it would be as simple as putting my phone in a waterproof case and pointing it at stuff. That worked for about one dive before I realized the ocean eats color in a very specific way—reds vanish first, then oranges and yellows, until everything past 30 feet looks blue-green no matter what it actually is. My "colorful" reef photos looked like I'd shot them through a blue filter.
The real definition involves understanding that underwater photography and video requires compensating for water's optical properties: light absorption, color filtration, refraction that makes everything look 25% closer and 33% larger than it actually is, and reduced contrast. You're essentially working in an environment that fights against good image quality at every turn.
Most underwater photographers fall into one of two camps: still photographers who chase that perfect single frame, or videographers who want to capture movement and tell stories. I started with stills because they felt less overwhelming, but lately I've been experimenting with video clips of turtle behavior and reef scenes. Both disciplines share the same fundamental challenges but require slightly different approaches to lighting and composition.
How Underwater Photography and Video Work
The basic concept is straightforward: you take a camera that wasn't designed to get wet, put it inside a waterproof housing, and bring it diving with you. The execution? That's where it gets interesting and occasionally frustrating.
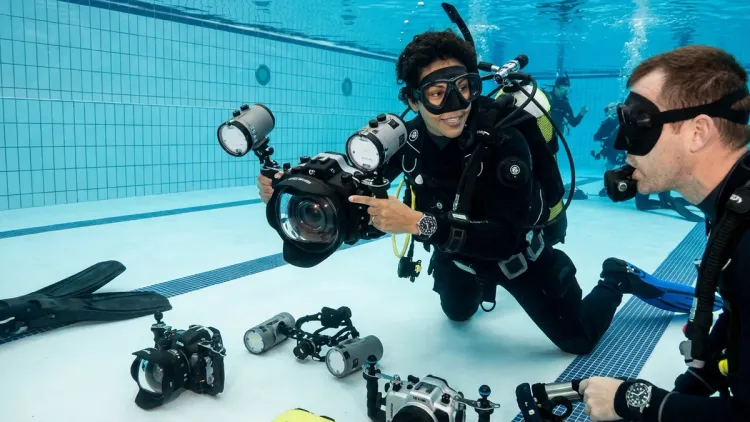
Camera housings create a watertight environment around your camera using o-ring seals—usually dual o-rings for redundancy—that keep water out even at recreational diving depths. Most housings are rated to at least 40 meters (130 feet), well beyond where most recreational divers operate. The housing has external controls—buttons, levers, or knobs—that connect to your camera's actual buttons through mechanical or electronic pass-throughs. When I first handled a housing, I was surprised by how bulky it made my compact camera. What used to fit in my pocket now needed its own spot in my mesh dive bag.
Here's what happens on a typical underwater photo dive for me: I set up my camera topside, checking settings and making sure the o-ring is clean and properly lubricated. One hair or grain of sand on that o-ring can cause a catastrophic flood. I learned this the terrifying way when I found a tiny piece of lint on my o-ring before a dive—thankfully I caught it during my pre-dive check, but the close call still makes me paranoid about triple-checking everything now.
Lighting is the make-or-break element. Natural light only works in the first 15-20 feet in clear water, and even then, you're losing color rapidly. That's why most serious underwater photographers use either strobes (powerful flashes that freeze motion and restore color) or continuous video lights. I started with just my camera and natural light, which taught me a lot about composition but left my photos looking flat and monochromatic. Adding my first strobe was like discovering color underwater for the first time all over again.
The actual shooting process requires juggling more variables than topside photography. You're managing your buoyancy control—staying perfectly neutral or slightly negative so you don't crash into the reef or float up mid-shot. You're watching your air consumption, especially when you get absorbed in photographing something interesting (I've ended dives with less air than I should have because I was too focused on getting the shot). You're adjusting your camera settings, strobes or lights, and your position relative to your subject, all while maintaining safe diving practices.
White balance correction is critical because water filters out wavelengths progressively. Most underwater photographers shoot in RAW format to retain maximum editing flexibility later, but you still need to get white balance roughly correct in-camera. I use custom white balance settings now—taking a reading off my dive slate or a white reference card at depth—but when I started, I just used the underwater preset on my camera and hoped for the best. The results were... inconsistent.
For video specifically, smooth motion requires excellent buoyancy control even more than stills do. You can't just stabilize for one shot; you need to maintain your position and move fluidly while recording. I'm still working on this—my early videos look like they were shot during an earthquake because I was constantly adjusting my buoyancy and kicking to stay in place. If you want to dive deeper into this specific skill, I wrote about mastering buoyancy control for underwater photography based on techniques that actually helped me improve.
Why Underwater Photography and Video Matter
Beyond just having cool pictures to share on social media (though let's be real, that's part of it), underwater photography and video fundamentally change how you dive. You slow down. You notice things.
Before I started shooting photos, I'd swim right past tiny nudibranchs and juvenile fish because I was looking for the "big stuff"—sharks, rays, turtles. Now I'll spend an entire dive in a 20-foot radius because I found an interesting cleaning station or a well-camouflaged scorpionfish. Photography trains you to observe details you'd otherwise miss entirely. I've become a much better diver because of it—more aware of my surroundings, more controlled in my movements, more patient.
There's also something powerful about documenting what you see for conservation purposes. The reef systems I dive in Belize are changing year to year, and having photo records of specific coral formations or fish populations actually contributes to citizen science efforts. Several dive operations here work with marine biologists who appreciate photos showing reef health, unusual species sightings, or evidence of bleaching events. Your photos aren't just vacation memories—they can be actual data points.
Video storytelling takes this even further by capturing behavior and interaction. A still photo of a turtle is nice; a video of that turtle hunting jellyfish or interacting with cleaner fish tells a story. When I showed my nephew a video of a spotted eagle ray gliding past me, he understood why I love diving in a way that a slideshow of still images never conveyed.
For me personally, it's about holding onto moments that otherwise disappear. Diving is this weird temporary experience—you can't stay down there, you can't bring anything back, and trying to describe it to non-divers always falls flat. Photos and videos are the closest I can get to actually sharing what it feels like to be weightless over a wall drop-off or to have a curious squid inspect your dome port.
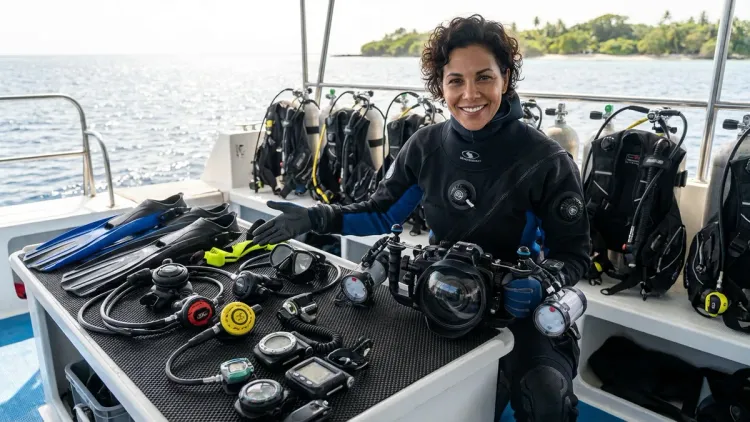
Types of Underwater Photography and Video Equipment
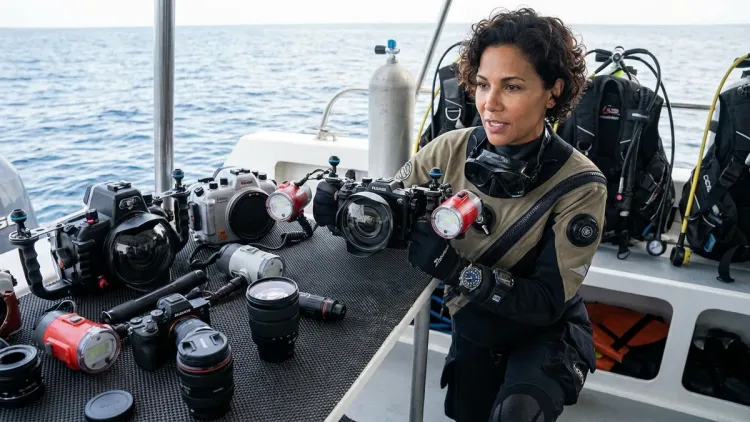
The gear spectrum for underwater photography and video ranges from "smartphone in a basic case" to "professional DSLR rig worth more than a used car." I've tried a few different approaches, and each has its place depending on what you want to accomplish and how much you want to carry.
Compact cameras in dedicated housings are where most beginners start, and honestly, they're extremely capable. I use the Olympus TG-6 in its housing, and for recreational diving, it handles probably 90% of what I want to do. The advantage is simplicity—fewer settings to worry about, built-in macro modes, and a relatively affordable package. The limitation is lower image quality in challenging conditions and less control over depth of field. When I eventually want to create that dreamy blurred background effect (bokeh), my compact won't cut it.
Mirrorless and DSLR systems offer professional-level image quality but require much larger, more expensive housings. Each lens needs its own compatible port (dome ports for wide-angle, flat ports for macro), and the whole system becomes heavy and bulky both on land and underwater. I've used a friend's setup a few times, and while the images are noticeably superior, the logistics stressed me out. You need a substantial gear bag system just to transport everything, and the pre-dive setup is like preparing for surgery—meticulous and time-consuming. For serious photographers, it's absolutely worth it. For someone still figuring things out like me, it's probably too much too soon.
Action cameras like GoPros excel at video and wide-angle POV shots but struggle with close-up detail work and low-light scenarios. They're incredibly convenient—small, simple, affordable—and the newer models have pretty decent built-in color correction. Several divers I know mount them on their BCDs or use them as secondary cameras alongside their main setup. The fish-eye distortion is a love-it-or-hate-it characteristic.
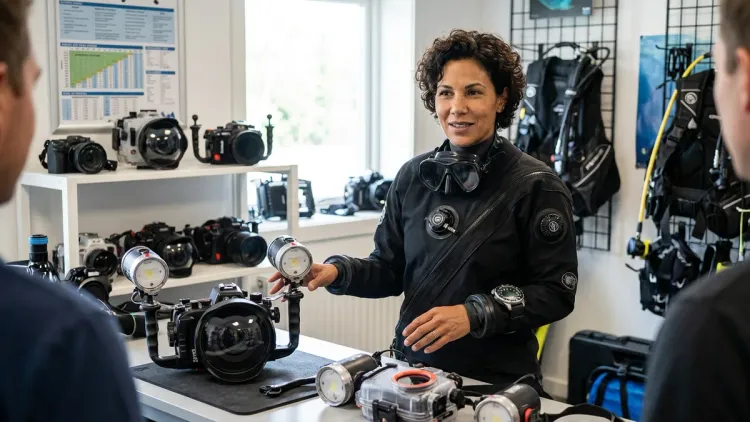
Lighting equipment deserves its own category because it's arguably more important than the camera itself. You're choosing between strobes (for stills) and continuous LED lights (for video), and the decision affects your entire shooting style. I wrote a detailed breakdown of strobes vs continuous video lights that covers the practical differences, but the short version: strobes freeze motion and save battery life but only work for photos, while video lights let you see what you're lighting but drain batteries faster and can disturb some marine life.
Housings themselves vary dramatically in build quality and features. Budget housings use acrylic or polycarbonate plastic, which can develop fine scratches over time and may have limited control access. Higher-end housings use machined aluminum, offer ergonomic grip designs, and provide access to every camera function. I'm currently using a mid-range polycarbonate housing that works fine but occasionally makes me wish I could adjust settings that aren't accessible through the external controls. If you're considering investing in a quality housing, the guide on best underwater camera housings covers what actually matters in real-world diving conditions.
Frequently Asked Questions
What camera should I buy for underwater photography and video as a beginner?
Start with a compact camera in a dedicated housing rather than jumping straight to a DSLR system, because compacts offer the best balance of image quality, ease of use, and affordability while you're learning underwater shooting techniques. The Olympus TG-7 or similar models are excellent first cameras that handle both stills and video well, or if you already own a mirrorless camera you're comfortable with, investing in a housing for it makes sense since you already understand the controls and settings.
Do I need strobes or video lights for underwater photography?
You need artificial lighting for any underwater photography deeper than about 15 feet if you want accurate colors and detail, but whether you choose strobes or continuous lights depends on whether you're primarily shooting stills or video. Strobes are ideal for still photography because they provide powerful bursts of light that restore color and freeze motion, while continuous LED lights are necessary for video work since strobes don't help with motion footage. I started shooting with just natural light and quickly realized my photos looked flat and blue-green regardless of how colorful the reef actually was.
How do I prevent backscatter in my underwater photos?
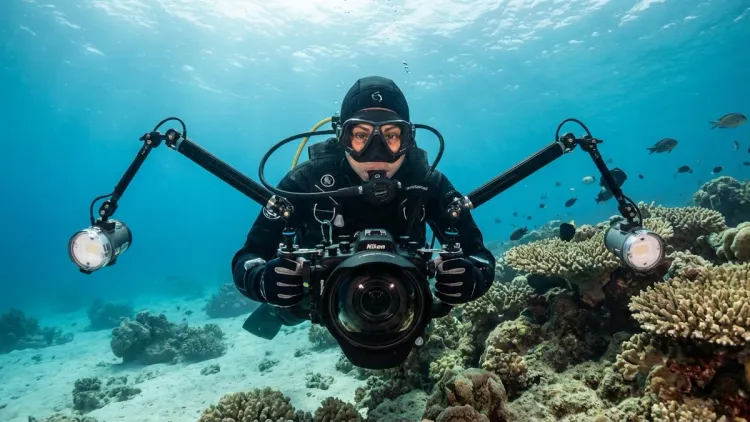
Prevent backscatter by positioning your strobes or lights away from your camera at 45-degree angles pointed slightly outward, which lights your subject while keeping the light beams outside your camera's field of view where they would otherwise illuminate floating particles. You also want to avoid diving in conditions with heavy particulate matter when possible, get close to your subject (the less water between you and your subject, the less stuff in that water column), and maintain good buoyancy control so you're not stirring up sediment from the bottom. When I first started, my photos were full of white specks because I had my lights mounted too close to my camera lens—angling them outward made an immediate difference.
What camera settings should I use for underwater photography?
Use the fastest shutter speed your lighting allows—typically 1/125 second or faster—to freeze motion and reduce blur from camera shake or subject movement, while keeping your ISO as low as possible (ISO 200-400) to minimize noise in your images. Aperture depends on your creative intent: f/8 to f/11 for wide-angle reef scenes where you want everything in focus, or f/4 to f/5.6 for macro work where you want background separation. I shoot in manual mode now because auto mode struggles with underwater exposure, but when I was starting out, aperture priority mode with exposure compensation dialed down by -0.3 to -1.0 stops worked reasonably well. For detailed guidance on dialing in your settings, check out how to set up your camera settings for underwater photography.
How often do I need to maintain my underwater camera housing?
You should rinse your housing in fresh water after every single dive, inspect and clean the o-ring after every dive day, and apply a thin layer of o-ring grease every 5-10 dives or whenever the o-ring looks dry. Before every dive, do a thorough pre-dive inspection following your underwater camera maintenance checklist that includes checking the o-ring for debris, testing that all controls move freely, and verifying lens port clarity. I also have my housing pressure-tested annually at a dive shop even though I'm careful with maintenance, because a flood would destroy my camera and ruin a dive trip—the peace of mind is worth the small service fee.
Summary
Underwater photography and video open up a completely new dimension to your diving experience, transforming you from a passive observer into an active participant who notices details, slows down, and truly engages with the underwater environment. The learning curve feels steep at first—I'm definitely still on it—but the progression is incredibly rewarding as you start capturing images that actually look like what you remember seeing.
Start simple with a compact camera system and basic lighting, focus on mastering your buoyancy before worrying about advanced techniques, and give yourself permission to take terrible photos for a while. My first hundred photos were genuinely awful: blurry, badly composed, everything weirdly blue. But somewhere in that second hundred, things started clicking, and now even my mistakes teach me something useful.
The ocean is the most photogenic environment on the planet. You just need to bring the right tools and the patience to learn how water changes everything about photography. Trust me, once you nail that first really good shot—the one that makes someone who wasn't there understand what you saw—you'll be planning your next dive before you've even finished rinsing your gear.