I've seen more dive computers fail from neglect than from actual use. Here's the thing: your computer is the one piece of gear that does the most critical thinking for you underwater, yet most divers treat maintenance like an afterthought until the low battery icon shows up during a dive briefing. This dive computer maintenance checklist covers everything from battery replacement intervals to o-ring inspection, sensor calibration, and the routine care that keeps your computer reliable for years. Whether you're diving a basic wrist-mount or a technical trimix-capable unit, these procedures apply across the board.
I've been diving since the late '70s—back when we used tables and watches—and I've watched dive computers evolve from experimental curiosities into mandatory safety equipment. Over 8,000 dives later, I can tell you that proper maintenance isn't complicated, but it absolutely matters. Let's walk through what you need to do, how often, and why skipping these steps will eventually cost you a computer, a dive trip, or worse.

Battery Service and Replacement Schedule
Your computer's battery is its lifeline. I tell people this constantly: don't wait until you see a low battery warning. That warning means you're already operating on borrowed time, and Murphy's Law says it'll die during your deepest dive of the trip.
Check battery status before every dive trip. Most modern computers display remaining battery life as a percentage or bar graph. If you're below 30%, replace it. I don't care if the manual says it's good for another 20 hours of dive time—saltwater, temperature swings, and screen brightness drain batteries faster than manufacturer estimates suggest.
Know your computer's battery type and service requirements. User-replaceable batteries (typically CR2032 or CR2450 coin cells in wrist computers) should be changed annually or every 100-150 dives, whichever comes first. I've seen cheap o-rings in battery compartments fail after 18 months, flooding the electronics even when the battery itself was fine. Rechargeable lithium-ion models like many Shearwater and high-end Garmin units need different attention—track charge cycles and expect degraded capacity after 300-500 full cycles, usually 2-4 years depending on use.
Use only manufacturer-specified batteries. I watched a diver trash a computer costing around $600 by installing a slightly thicker aftermarket CR2032. It compressed the o-ring unevenly, created a leak path, and flooded the case on dive two. Spend the extra dollar for the exact replacement.
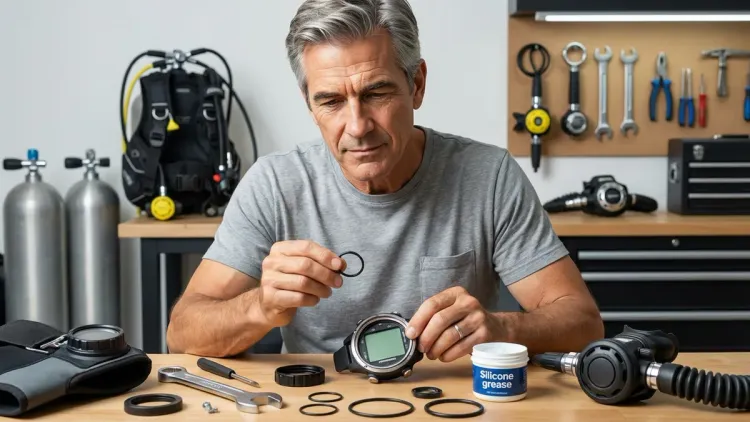
Replace the battery o-ring every single time you open the compartment. This is non-negotiable. O-rings are cheap—typically under $5—and they take 30 seconds to swap. The battery cap o-ring sees direct seawater exposure and takes mechanical stress every time you thread that cap. I replace mine annually whether I've opened the compartment or not, because the silicone or EPDM rubber degrades with UV exposure and salt crystallization even when closed.
Apply a thin layer of silicone grease to the new o-ring. Not petroleum-based lubricant—that attacks rubber. A tiny dab of Dow Corning DC-4 or Christo-Lube MCG-111 keeps the o-ring supple and helps it seat properly. I keep a small tube in my dive kit permanently.
Torque battery caps to spec, not as tight as you can crank them. Most battery caps seal with 1/8 to 1/4 turn past finger-tight. Over-torquing crushes the o-ring and distorts the threads. I've seen ham-fisted divers crack plastic battery cap threads by treating them like lug nuts.
Test the computer's depth sensor after battery replacement. Some computers require a reset or lose calibration when power is interrupted. Power it on, let it run through its self-check, then take it down to 10 feet in a pool or shallow site to verify it's reading accurately. I've caught faulty installations this way more than once.
Send pressure-integrated or AI computers to the manufacturer for battery service. If your computer has a hoseless air integration transmitter or internal pressure sensor, don't attempt DIY battery replacement. These units require pressure testing to 300+ meters, specialized tools, and sometimes calibration. I learned this the hard way in 1998 with an early Suunto transmitter—opened it myself, thought I did everything right, and it flooded at 90 feet. Cost me around $400 in repairs.
O-Ring Inspection and Replacement
O-rings are the unsung heroes of dive computer reliability. They're also the most commonly neglected component. I pull my computer's o-rings for inspection every six months, and I replace them annually as a matter of course. A $3 o-ring failing can destroy a computer costing around $1,000.
Inspect o-rings under good lighting with clean hands. Remove the o-ring carefully—don't use metal tools that can nick it—and lay it on a white paper towel. Look for cracks, flat spots, discoloration, or embedded debris. Any of those conditions mean immediate replacement. I use a magnifying glass for this because the cracks that cause leaks are often hairline-thin.
Feel the o-ring for texture changes. A healthy o-ring feels uniformly soft and pliable with a slightly tacky surface. If it feels hard, brittle, sticky, or has slick spots, it's degrading. Silicone and EPDM rubber both break down with salt exposure, sunlight, and time. I've seen o-rings that looked perfect visually but felt like dried-out rubber bands—those fail under pressure.
Check the o-ring groove for corrosion or debris. Salt crystals, sand grains, and thread sealant residue all create leak paths. I use a cotton swab dipped in freshwater to clean the groove, then dry it completely. If there's corrosion (white or green deposits on metal battery caps, particularly on older computers), clean it with white vinegar on a toothbrush, rinse thoroughly, and dry. Severe corrosion means it's time for professional service.
Verify o-ring fit in the groove. The o-ring should sit evenly in the groove without twisting or bunching. If it's too loose, it's the wrong size or it's stretched out. If you have to force it into place, same problem. Either condition creates an uneven seal. I keep a set of spare o-rings for every computer I own, organized by size and labeled clearly.
Replace display lens o-rings every two years. Most computers have a second o-ring sealing the display lens or crystal. This one's harder to access—usually requires removing the back case—and I recommend having a shop do it unless you're mechanically confident. That said, it's critical for water-resistant integrity. I've seen computers flood through failed lens o-rings even when the battery compartment was perfect.
Rinse computers in freshwater after every dive, but don't over-soak them. Five minutes in a rinse tank is plenty. Extended soaking (hours or overnight) can actually allow water to seep past o-rings through osmotic pressure and capillary action. I rinse mine, shake off excess water, and let them air-dry on a towel away from direct sunlight.
Store computers in a cool, dry place away from UV light. Heat and UV accelerate o-ring degradation. Don't leave your computer in a car, on a boat deck, or in a mesh bag in the sun. I keep mine in a padded case in my dive bag's interior pocket when traveling, and in a drawer at home.
Sensor Calibration and Accuracy Verification
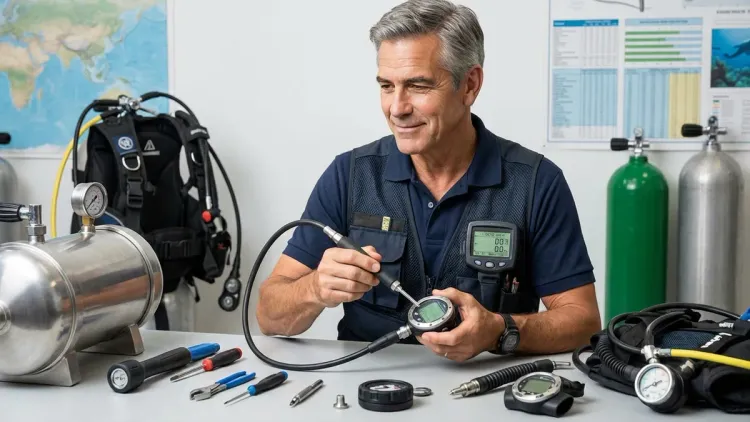
Dive computers rely on pressure sensors, temperature sensors, and sometimes additional sensors for trimix or CCR applications. These sensors drift over time, and calibration verification should be part of your dive computer maintenance checklist at least annually.
Verify depth sensor accuracy in a controlled environment. Take your computer to a known depth—either a pool with marked depth lines or a shallow dive site with a depth gauge—and compare readings. At 10 feet, your computer should read 10 feet ±0.5 feet. At 30 feet, ±1 foot is acceptable. Greater variance means the sensor needs calibration or the algorithm has drifted. I do this check every spring before dive season ramps up.
Test depth sensor response time. Descend slowly and watch how quickly the computer updates depth readings. It should respond within 1-2 seconds of depth change. Sluggish response (3+ seconds) can indicate a blocked sensor port, internal moisture, or sensor failure. I've caught clogged sensor ports this way—tiny grains of sand or salt buildup that clear with a freshwater flush.
Check temperature sensor readings against a known reference. Fill a container with ice water (32°F/0°C) and submerge your computer. After 5 minutes, it should read within 3-4°F of freezing. Then test in warm water (80-85°F/27-29°C). Temperature sensor drift usually indicates moisture intrusion or sensor aging. This matters more than you'd think—temperature affects decompression algorithms significantly, especially in cold water diving conditions.
Verify compass calibration in air-integrated or multi-sensor computers. Electronic compasses drift with magnetic interference, battery replacements, and time. Follow your manufacturer's calibration procedure—usually involves slowly rotating the computer through all three axes. I recalibrate my Shearwater compass after every battery change and whenever I've flown (aircraft magnetic fields can mess with calibration).
Confirm nitrox sensor accuracy if your computer has one. This applies mainly to CCR computers with integrated oxygen sensors, but some higher-end recreational computers have this feature. Follow the manufacturer's calibration protocol using ambient air (20.9% O₂) as a reference. Sensor drift on nitrox or trimix computers is a safety-critical issue—off by even 2% FO₂ and your decompression calculations are wrong. If you're diving nitrox regularly, read up on how nitrox mode affects computer algorithms.
Run the computer's self-diagnostic routine monthly. Most modern computers have a built-in diagnostic mode accessible through button combinations. This checks battery voltage, sensor function, display pixels, and algorithm integrity. I run mine after any significant travel or if the computer has been unused for more than a month. It takes 60 seconds and catches problems before you're gearing up on a boat.
Send your computer for manufacturer calibration every 2-3 years or 300-500 dives. This is the interval most manufacturers recommend for professional service. They'll pressure-test it, recalibrate all sensors, update firmware, and replace internal seals. Cost runs around $75-150 depending on the model, and it's worth every penny. I treat this like regulator service intervals—non-negotiable preventive maintenance.
Software Updates and Data Management
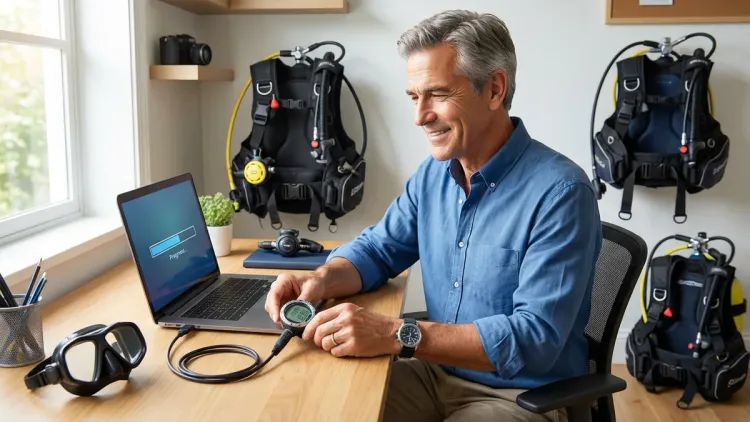
Modern dive computers are essentially waterproof dive-specific computers, and like any computer, they need software maintenance. I've seen divers ignore firmware updates for years, then wonder why their computer's algorithm behaves strangely or fails to sync with newer devices.
Check for firmware updates every 3-6 months. Manufacturers release updates to fix bugs, improve algorithms, add features, and address safety issues. Connect your computer to the manufacturer's app or desktop software and check for available updates. Shearwater, Garmin, and Suunto all have straightforward update processes. I set a calendar reminder every April and October to check this—takes 10 minutes and has saved me from known bugs multiple times.
Update your computer before major dive trips, not during. I learned this in the Bahamas in 2009 when a mid-trip firmware update bricked my computer for 24 hours. Always update at least a week before travel, then do a test dive locally to confirm everything works. If something goes wrong, you have time to fix it.
Download and back up your dive logs regularly. Most computers store 50-200 dives internally, and when memory fills, they start overwriting the oldest logs. I download my logs monthly to both the manufacturer's cloud platform and a local backup. This creates a permanent record for training requirements, insurance purposes, and tracking your own diving patterns. Plus, if your computer floods or gets stolen, you haven't lost your entire dive history.
Review your dive profiles periodically. This isn't just about nostalgia—it's a diagnostic tool. Look for patterns: Are you consistently violating ascent rates? Are your safety stops too short? Is your gas consumption changing? These trends can reveal developing skills issues or equipment problems. I review my last 20 dives before any technical or deep diving trip to check my performance baseline. Understanding how to read your computer's display properly makes this much easier.
Clean the USB or wireless charging contacts monthly. Corrosion on charging contacts is common and prevents firmware updates or log downloads. I use a cotton swab with white vinegar to clean the contacts, then dry thoroughly and apply a tiny amount of dielectric grease. This has fixed "computer won't connect" issues dozens of times—both my own and other divers'.
Verify algorithm settings match your training and dive plan. Accidentally switching from normal conservatism to aggressive mode, or enabling technical modes you're not trained for, creates serious safety risks. I check my computer's settings before every dive trip—it takes 30 seconds in the setup menu. Make sure conservatism factors, nitrox percentages, and altitude adjustments are correct for where you're diving.
Replace batteries in wireless transmitters on the same schedule as your computer. If you dive with air integration, the transmitter battery typically lasts 200-300 dives or 18-24 months. Battery failure means you lose SPG data mid-dive. I replace transmitter batteries every 200 dives religiously, and I carry a spare transmitter battery in my save-a-dive kit. For help understanding these systems better, our complete guide to dive computers covers everything from basic wrist mounts to AI-enabled models.
Physical Care and Storage
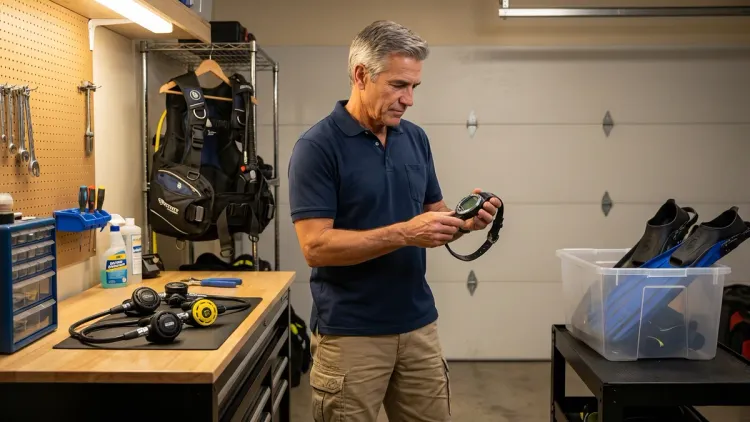
How you treat your computer between dives matters as much as how you maintain it mechanically. I've seen pristine computers rendered unreliable by sloppy post-dive care and poor storage habits.
Never skip the post-dive freshwater rinse. Five minutes in a rinse tank or under a gentle freshwater tap clears salt crystals from sensors, buttons, o-ring grooves, and screen edges. Pay special attention to button crevices where salt buildup can seize buttons or cause phantom presses. I agitate buttons underwater during the rinse to flush crud out from underneath.
Dry your computer thoroughly before storage. Don't throw a wet computer into a dive bag or closed case. Salt water trapped in crevices continues to corrode even after the surface looks dry. I pat mine dry with a towel, then let it air-dry for at least an hour before storage. If I'm traveling, I pack it in a mesh pocket of my dive gear bag where air can circulate.
Avoid impact damage and pressure on the display. Dive computers aren't military watches—the crystal and housing are pressure-rated for depth, not for being crushed under 50 pounds of gear in your bag. I use a neoprene or padded case for transport, and I never stack gear on top of my computer. I've seen cracked screens and damaged buttons from careless packing more times than I can count.
Protect your computer from extreme temperatures. Both heat and freezing can damage LCD displays, degrade internal components, and accelerate battery drain. Don't leave your computer in a hot car (dash temps can hit 150°F+), and don't pack it in checked luggage in winter where cargo holds drop below freezing. Room temperature storage is ideal—50-80°F.
Remove your computer during boat handling and surface intervals. Tanks rolling across decks, ladders banging into wrists, and accidental drops are leading causes of computer damage. I take mine off and stash it in a padded pocket or case as soon as I'm back on the boat. If you're diving from shore, secure it in a BC pocket during surface swims.
Check mounting straps and bungee cords regularly. Wrist strap buckles crack, bungee cords fray, and Velcro wears out. I inspect my computer's mounting system after every 20-25 dives and replace worn components immediately. A $5 strap failure dropping a computer costing around $800 onto rocks during entry is a stupid way to lose gear. For wrist-mounted models, our article on dive computer watches covers different mounting options and their durability.
Don't expose your computer to chemicals. Sunscreen, DEET-based insect repellent, fuel, and even some cleaning solutions attack plastics and rubber. I'm careful to apply sunscreen and let it absorb completely before handling my computer. If you get chemicals on it, rinse immediately with freshwater and mild dish soap.
Service pressure-rated components at the manufacturer's recommended intervals. Most dive computers are rated to 100-150 meters and carry an IP68 water resistance rating. These ratings degrade over time as seals age and case materials fatigue. Manufacturers typically recommend pressure testing and seal replacement every 2-3 years or after significant impact. This isn't DIY work—send it to an authorized service center.
Final Check Before You Go

Here's your condensed dive computer maintenance checklist to run through before any dive trip. Print this, laminate it, and keep it with your gear:
Battery and Power
- Battery charge/life above 50%
- Spare battery for user-replaceable models
- All o-rings inspected and lubricated within 6 months
- Computer powers on and completes self-check
Sensors and Calibration
- Depth sensor verified within ±1 foot at known depth
- Temperature reading reasonable for ambient conditions
- Compass calibrated (if equipped)
- No blocked sensor ports
Software and Settings
- Firmware updated within last 6 months
- Algorithm settings match training level
- Nitrox/gas percentages set correctly
- Altitude/salinity adjustments made if needed
- Dive logs backed up
Physical Condition
- Display clear with no cracks or water inside
- All buttons function properly
- Mounting strap secure with no fraying
- Case shows no cracks or damage
- Post-dive rinse completed, dried fully
Documentation
- Dive plan entered (if computer supports it)
- Computer synced with dive buddy's computer (if applicable)
- User manual accessible (digital or print)
This list takes 5-10 minutes to verify before travel. I've caught failing batteries, incorrect gas settings, and damaged straps this way—all things that would've ruined dives or worse. Consider pairing this with your BCD pre-dive safety checks for a complete equipment verification routine.
Frequently Asked Questions

How often should I replace my dive computer's battery? User-replaceable batteries should be changed annually or every 100-150 dives, whichever comes first, even if the low battery indicator hasn't appeared yet. Rechargeable lithium-ion batteries degrade after 300-500 charge cycles, typically 2-4 years depending on use frequency. The battery compartment o-ring must be replaced every single time you open the battery compartment, regardless of battery condition, because o-ring integrity is critical to maintaining water resistance and a used o-ring has already been compressed and exposed to saltwater.
Can I service my dive computer myself or should I send it to the manufacturer? Basic maintenance like battery replacement, o-ring inspection, and software updates can be performed at home if your computer has a user-serviceable battery compartment and you follow the manufacturer's procedures exactly. However, pressure testing, sensor calibration, internal seal replacement, and battery service on pressure-integrated or AI-enabled computers require specialized equipment and should only be performed by authorized service centers. DIY service on sealed units or integrated sensors typically voids the warranty and risks flooding the electronics. Manufacturer service every 2-3 years costs around $75-150 and includes pressure testing to verify water resistance at depth ratings.
What should I do if my dive computer display shows condensation or moisture inside? Stop using the computer immediately and do not attempt any dives with it, as internal moisture indicates a failed seal and the electronics are at risk of complete failure under pressure. Remove the battery to prevent short circuits, rinse the exterior with freshwater, and allow it to air-dry completely in a warm, dry location for 24-48 hours. Do not use heat guns, ovens, or direct sunlight as excessive heat can damage the LCD display and internal components. After drying, send the computer to an authorized service center for inspection, pressure testing, and seal replacement—attempting to use a compromised computer underwater creates a serious safety risk since you're relying on it for decompression calculations and no-stop time limits.
Final Thoughts
Your dive computer is making life-or-death calculations every second you're underwater. It's tracking nitrogen loading, calculating no-stop limits, monitoring ascent rates, and warning you before you cross into decompression or violate safety margins. Treat it accordingly.
I've been diving longer than many of today's popular computers have existed, and I've watched this equipment evolve from luxury items into essential safety gear. The good news is that modern computers are remarkably reliable when properly maintained. The bad news is that neglect adds up fast—skipped rinses, ignored battery warnings, and deferred o-ring replacements compound until you're looking at a flooded unit or, worse, a computer that quits mid-dive.
Run through this dive computer maintenance checklist every six months as a minimum, and before any major dive trip. Replace consumables on schedule, not when they fail. Back up your logs and update firmware regularly. And if you're ever uncertain whether your computer needs professional service, err on the side of caution and send it in. A $100 service bill beats a computer replacement costing around $700, and it definitely beats trusting your decompression status to a computer you're not confident in.
Take care of your gear and it'll take care of you. I've got computers in my collection that are 15+ years old and still diving reliably because they've been maintained properly. Yours can do the same. Now get out there and dive—just make sure your computer is ready first.