I still remember my first regulator freeflow—halfway through a wreck dive in 52-degree water off the Washington coast, breathing resistance went from smooth to fire hose in about three seconds. That particular incident was a stuck first stage piston that should have been caught during the annual service I'd skipped "just this once." I learned how to service a scuba regulator the hard way that day, treading water topside while my buddy finished the dive with my camera.
Understanding regulator maintenance isn't just about extending equipment life—it's about preventing failures that happen when you're 80 feet down with no immediate surface option. This guide breaks down what you can safely inspect yourself, what requires a certified technician, and how to build a maintenance rhythm that actually fits into your diving schedule. Whether you're running a piston or diaphragm first stage, balanced or unbalanced second stage, the principles remain consistent.
Skill level: Beginner to intermediate divers can handle all pre-dive and post-dive procedures; full teardown servicing requires manufacturer certification.
Time commitment: 15-20 minutes for thorough post-dive care; 20-30 minutes for quarterly deep inspections; annual professional service takes 3-5 days turnaround.
What You'll Need
For routine post-dive maintenance and inspection:
- Fresh water rinse bucket (5-gallon minimum capacity)
- Soft-bristle toothbrush or dedicated regulator brush
- Lint-free microfiber cloths (at least 2)
- Low-pressure compressed air source or manual bulb blower
- Silicone spray (food-grade, oxygen-compatible—check manufacturer specs)
- Regulator dust cap and second stage mouthpiece cover
- Inspection light or headlamp (300+ lumens recommended)
For quarterly detailed inspection:
- Intermediate pressure gauge (0-300 psi range, ±2 psi accuracy)
- Magnifying glass or jeweler's loupe (10x magnification)
- Service log or maintenance journal
- Manufacturer's specification sheet for your specific model
For professional annual service (technician-performed):
- Complete manufacturer service kit for your regulator model
- Torque wrench calibrated to manufacturer specs (typically 20-40 inch-pounds for port plugs)
- Ultrasonic cleaner
- O-ring pick set and installation tools
- Manufacturer certification and specialized training
Prerequisites: Basic understanding of regulator components (first stage, second stage, intermediate pressure hose). If you're new to regulator architecture, I'd recommend reading How Scuba Regulators Work: First Stage, Second Stage, and Pressure Mechanics Explained before diving into maintenance procedures.
Step 1: Post-Dive Freshwater Rinse (Within 2 Hours of Surfacing)
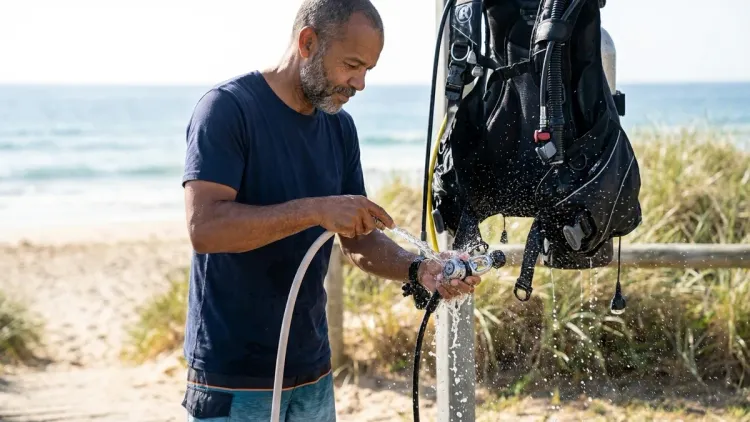
This is where most regulator damage actually occurs—not from diving, but from improper rinsing or letting saltwater sit and crystallize inside ports and moving parts. I've seen first stages destroyed by aggressive garden hose rinsing that forced salt water past unsealed ports. Here's what actually happens at depth: you're breathing dry tank air while external surfaces are bathed in salt water. That salt needs to come off before it forms crystals.
First, pressurize the system before rinsing. Keep the regulator connected to your tank with 500-1000 psi in the system, or at minimum ensure the dust cap is firmly secured on the first stage inlet. Water forced into an unpressurized first stage can contaminate internal components and corrode the valve seat. I cannot overstate how many regulators I've seen damaged by this single mistake—it's the most common preventable failure mode I encounter teaching equipment specialty courses.
Submerge the entire regulator assembly in fresh water (not under running water initially) for 3-5 minutes. Gently press the second stage purge button 4-5 times while submerged—this flushes salt water from the demand valve and exhaust tee. If you're rinsing while pressurized, you'll hear air bubbling out. That's normal and desirable. Watch for continuous bubbling when you're not pressing the purge—that indicates a leaking valve seat that needs service attention.
After soaking, use a soft-bristle brush around port plugs, the yoke screw or DIN threads, and second stage exhaust valves. These areas trap salt crystals. Rinse low-pressure and high-pressure hoses separately, checking for abrasion or cracking in the outer rubber sheath. The connection points where hoses meet the first stage deserve extra attention—salt creeps into the threaded interface and causes corrosion on the brass fittings underneath.
Never use hot water above 120°F. High heat degrades rubber components and can deform plastic parts in modern lightweight second stages. Room temperature or lukewarm water works perfectly. After thorough rinsing, shake out excess water and hang the regulator to dry in a shaded, well-ventilated area. Don't dry in direct sunlight—UV degrades hose materials and can fade mouthpiece silicone.
Step 2: Visual Inspection During Drying
While your regulator is drying, perform a systematic visual check. I do this every single dive, without exception. It takes maybe five minutes and has caught problems ranging from worn mouthpiece tabs to cracked LP hose swivels before they became dive-ending failures.
First stage inspection: Look closely at the yoke screw or DIN connector threads. Check for cross-threading, metal shavings, or brass discoloration that indicates corrosion. On yoke regulators, inspect the filter screen visible through the inlet—it should be clean and intact. A clogged filter restricts air flow and increases breathing resistance, particularly noticeable below 60 feet. I once had a first stage filter completely blocked by rust particles from a rental tank in the Philippines. Breathing felt like sucking air through a coffee stirrer.
Examine all port plugs for proper seating. They should be flush with the first stage body, not protruding or recessed. Loose port plugs allow water intrusion. Check the environmental seal if your regulator has one (common on diaphragm first stages rated for cold water). The seal should be intact with no cracks or tears in the rubber boot.
Second stage inspection: Check the mouthpiece for tears, particularly where the bite tabs meet the body. Mouthpiece failure is annoying but not dangerous—I've had them split mid-dive and finished breathing around the tear. Still, replace worn mouthpieces before they fail. The Scubapro Comfort Mouthpiece is a standard replacement that fits most regulators and runs around $15-20.
Look inside the second stage barrel (the part the mouthpiece attaches to) using your inspection light. You're checking for sand, debris, or biological growth. I've found everything from tiny amphipods to shrimp larvae living inside second stages that weren't properly rinsed. The demand valve diaphragm should be centered and flat—no bulging or deformation.
Inspect the purge button for smooth operation. Press it several times—it should move freely without sticking and return completely when released. Check the exhaust valve (the rubber dome on the front of the second stage) for tears or detachment. A leaking exhaust valve causes constant water intrusion while diving. You'll spend the dive clearing your reg instead of enjoying it.
Step 3: Quarterly Intermediate Pressure Check
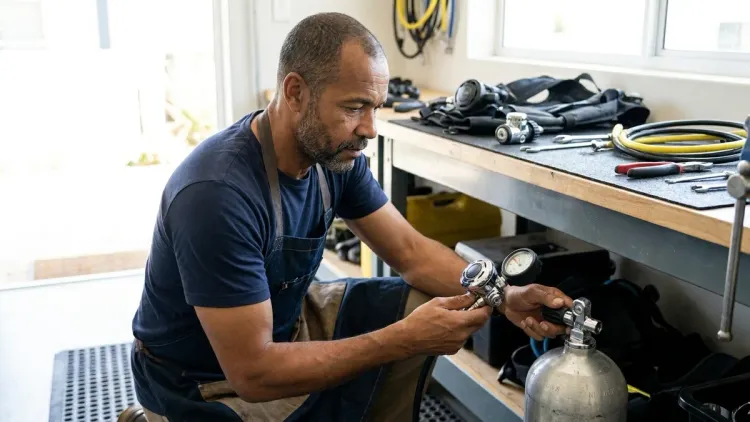
Every 30-40 dives or quarterly (whichever comes first), check your regulator's intermediate pressure. IP drift is the most reliable early warning of impending service needs. Your first stage maintains constant intermediate pressure—typically 125-145 psi depending on manufacturer specs—between the first stage and second stage. As internal components wear, that pressure drifts outside specification.
You'll need an intermediate pressure gauge for this check. These aren't expensive—a basic IP gauge runs around $30-50 and pays for itself by catching problems before they require emergency service. Some dive shops will check IP for free if you're a regular customer, but owning your own gauge means you can monitor trends over time.
Here's the procedure: Attach the regulator to a full tank (minimum 2000 psi). Install the IP gauge on any low-pressure port on your first stage (you may need to remove a port plug—remember to have a replacement). Slowly open the tank valve. Watch the IP gauge needle—it should rise smoothly and settle at a specific pressure. Check your manufacturer's spec sheet for the exact range, but most regulators settle around 135-145 psi.
The critical test happens next. Press and hold the second stage purge button. The IP gauge should drop 5-10 psi as air flows through the system, then return immediately to the initial pressure when you release the purge. If IP drops more than 15 psi or takes more than 2-3 seconds to recover, your first stage valve seat is wearing and needs service attention soon.
Now monitor for IP creep. With the tank valve open and no one breathing from the regulator, watch the gauge for 5 minutes. IP should remain rock steady. Any upward drift—even 2-3 psi—indicates the first stage valve isn't sealing properly. This is especially critical for cold water diving. A creeping first stage will freeflow when exposed to cold water because the pressure increase eventually overcomes the second stage spring tension. I learned about IP creep the hard way diving off British Columbia—my regulator started freeflowing on the surface before we even descended. The dive shop where I'd rented it hadn't checked IP in probably six months.
For divers using DIN vs Yoke Regulators, note that DIN connections typically maintain more consistent IP under varying tank pressures due to the superior sealing interface. That said, yoke regulators are perfectly reliable when properly maintained—I've logged hundreds of dives on yoke setups without issues.
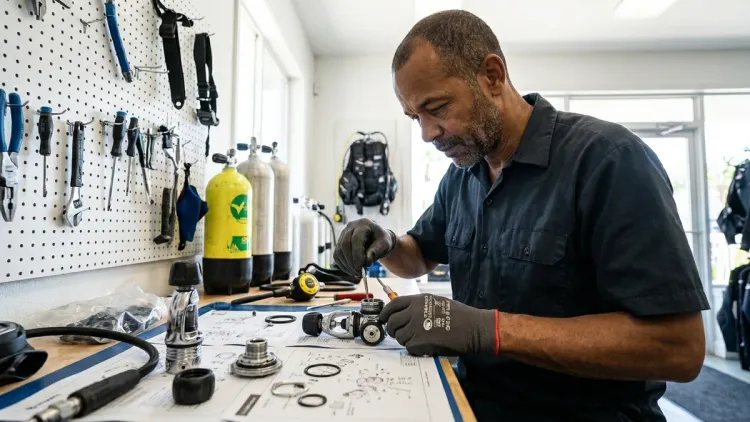
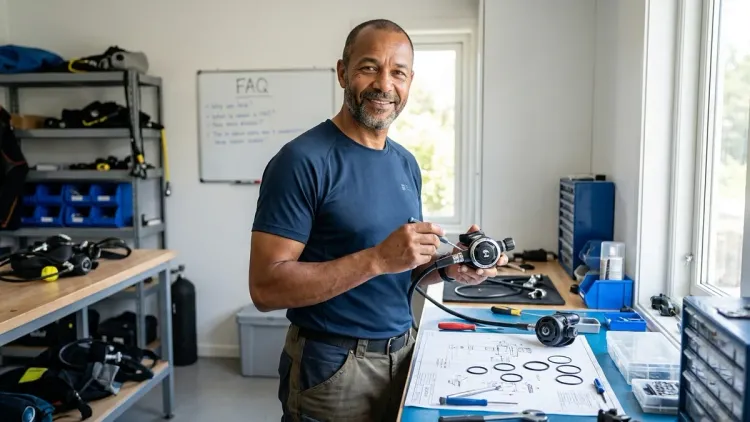
Step 4: Monthly Deep Clean and Lubrication Points
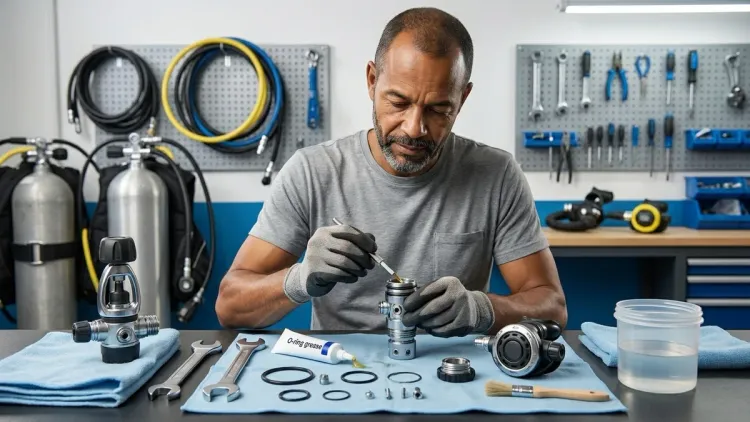
Once a month during active diving seasons (or before any extended trip), perform a deeper maintenance routine. This goes beyond rinsing to address the specific areas where salt, chlorine, and biological material accumulate.
Start with the mouthpiece and cable ties. Remove the mouthpiece completely from the second stage barrel. Most are held by a single cable tie that you'll need to cut. Soak the mouthpiece separately in a vinegar solution (1 part white vinegar to 3 parts water) for 15 minutes. This dissolves mineral deposits and kills bacteria. Rinse thoroughly and inspect the bite tabs and attachment point. Reattach using a new cable tie—don't reuse old ones, they're 50 cents and old ties can slip under breathing stress.
Clean the second stage exhaust valve. On most second stages, the exhaust valve pops out with gentle finger pressure (some are held by a small retaining ring). Remove it, rinse in fresh water, and check for tears or hardening. The rubber should be flexible. If it feels stiff or shows cracks, replace it. Exhaust valves are inexpensive parts that directly impact breathing performance. A properly functioning exhaust valve opens with minimal exhalation pressure—worn valves require harder breathing and increase CO₂ retention.
Address the yoke screw or DIN connector. This is a frequently overlooked lubrication point. Use a tiny amount of silicone grease (manufacturer-approved, oxygen-compatible) on the threads. Work the yoke screw in and out several times to distribute the lubricant. This prevents galling and makes tank attachment/removal smoother. For DIN regulators, apply a thin coating to the O-ring that seals against the tank valve. Don't over-lubricate—excess grease attracts sand and grit.
Inspect all hose protectors (the ribbed rubber sections where hoses connect to the first stage and second stages). These take significant bending stress. Cracks in hose protectors expose the internal hose braiding to salt water and UV, leading to eventual hose failure. I replace hose protectors at the first sign of splitting—usually every 150-200 dives in tropical conditions, sooner in cold water with drysuits where hoses see more extreme bending angles.
Check swivel connections on your primary second stage and alternate air source. Modern regulators often use swivel barrels that allow the second stage to rotate freely. These contain small O-rings that need occasional attention. Test the swivel by rotating the second stage through its full range of motion—it should move smoothly without binding or excessive play. Rough movement or clicking sounds indicate worn internal components.
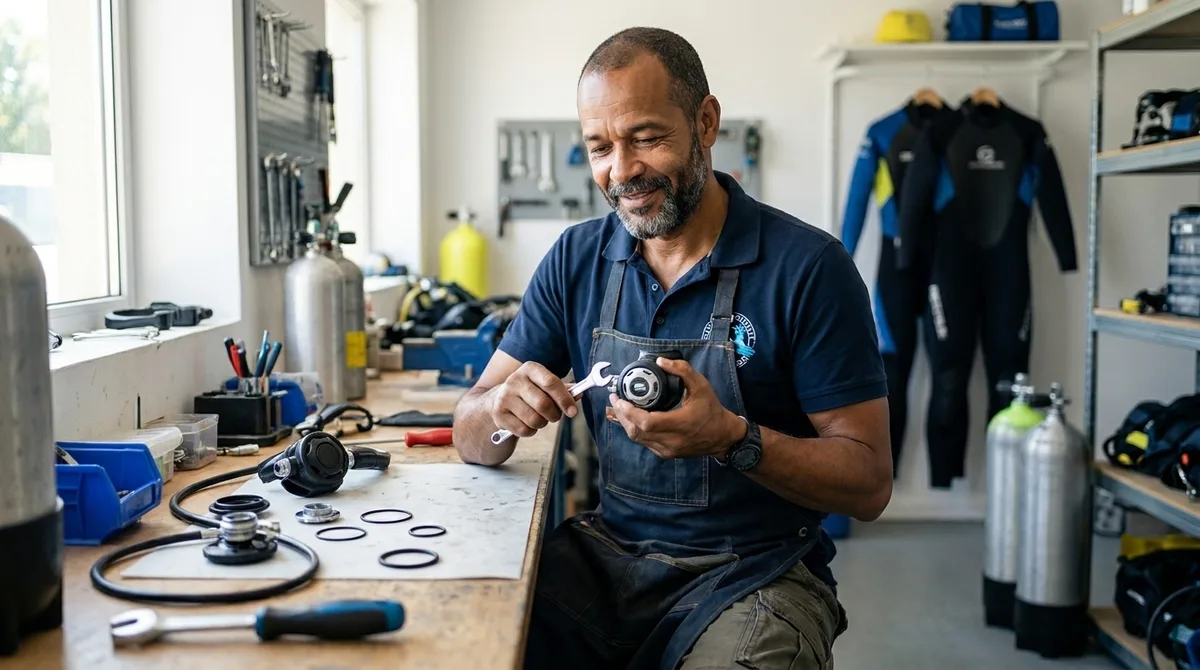
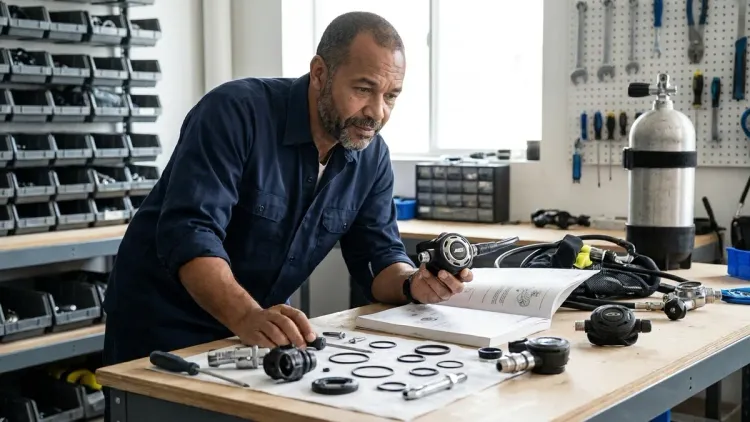
Step 5: Annual Professional Service (Non-Negotiable)
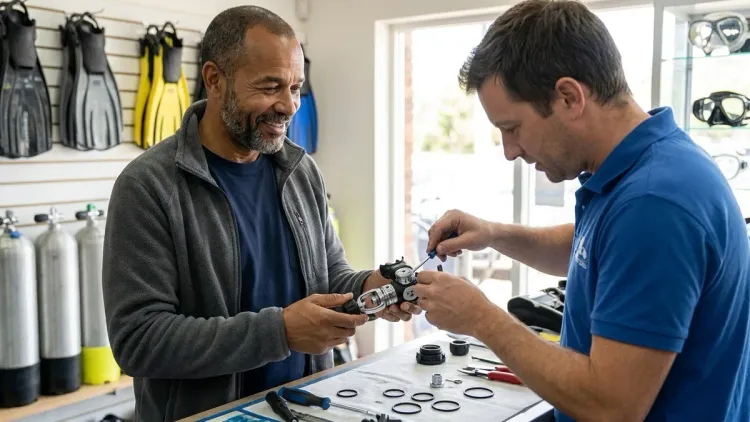
Here's where I need to be absolutely clear: full regulator servicing requires manufacturer certification and specialized tools. This isn't a DIY project, no matter how mechanically inclined you are. I'm a PADI Master Scuba Diver Trainer who's been inside more regulators than I can count during training courses, and I still send mine to certified technicians for annual service. The liability and safety stakes are too high.
Most manufacturers recommend annual service regardless of dive count, or every 100 dives—whichever comes first. In my experience, 100 dives is a reasonable threshold. I log about 250 dives annually and service my primary regulator twice a year, my backup regulator once. The manufacturer's recommendation exists because internal O-rings, valve seats, and piston/diaphragm seals degrade over time even when not in use. UV exposure, temperature cycling, and humidity all contribute to material breakdown.
What actually happens during professional service: A certified technician completely disassembles both first and second stages. Every O-ring is replaced using the manufacturer's service kit specific to your regulator model. The valve seat (which creates the seal that controls air flow) is inspected and typically replaced. Piston springs are checked for compression fatigue. All metal parts are ultrasonically cleaned to remove salt deposits and corrosion. The diaphragm (if applicable) is replaced. Every threaded connection is re-torqued to exact specifications using calibrated torque wrenches.
After reassembly, the regulator undergoes bench testing. The technician tests breathing resistance at various simulated depths, verifies IP settings, checks for leaks under pressure, and confirms all safety mechanisms function correctly. A properly serviced regulator should breathe as smoothly at 100 feet as it does on the surface—if it doesn't, something's wrong with the service work.
Service costs typically run $80-150 for a complete regulator set (first stage, primary second stage, and octopus), plus the service kit itself which ranges from $30-80 depending on manufacturer. That might seem steep until you consider what you're buying: continued reliable life support at depth. I've never once regretted paying for proper service. I have regretted trying to extend service intervals—breathing resistance increases, IP drift develops, and freeflow risk goes up.
Look for technicians certified by your regulator's manufacturer. Scubapro, Atomic, Apeks, and other major brands run certification programs. A good technician should be willing to show you the old parts they replaced and explain what they found. If something unusual shows up—corrosion you weren't expecting, unusual wear patterns, contamination—you want a technician who'll walk you through it rather than just hand you a bill.
Step 6: Pre-Dive Safety Verification
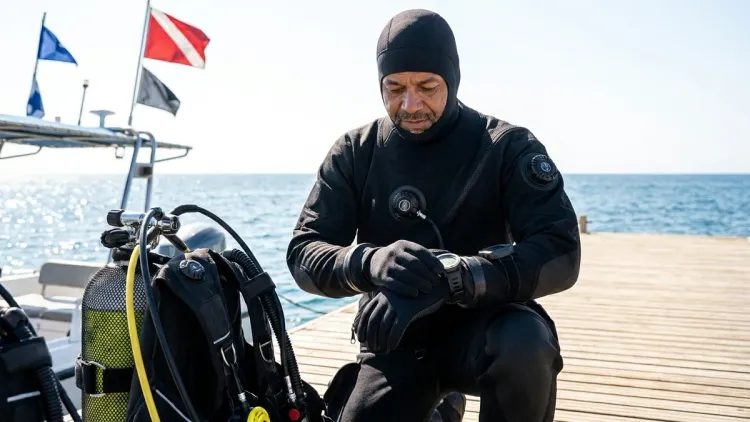
Before every dive, run through a standardized pre-dive check. This is separate from your buddy check and focuses specifically on regulator function. I teach this as part of my open water courses and I still run through it myself before dive 3,000-something. The routine becomes muscle memory.
With the regulator attached to a full tank (minimum 2000 psi):
Check the SPG reading. It should match the tank's known pressure. An SPG that reads zero or obviously incorrect indicates a failed high-pressure seat in the first stage.
Breathe from the primary second stage. Inhalation should be smooth and effortless. No clicking, whistling, or unusual resistance. Exhale—the exhaust valve should clear immediately without back pressure.
Press and hold the purge button for 5 full seconds. Air flow should be immediate, strong, and constant. Release the purge—air flow should stop immediately with no lingering hiss. A slow leak after purge release indicates a worn valve seat.
Check your alternate air source (octopus). Breathe from it just like your primary. Many divers skip this step and it drives me crazy. Your octopus sits unused most of the time and is more likely to develop problems. The one time you need it in an actual emergency is not when you want to discover it's freeflowing or breathing wet.
Test the low-pressure inflator if integrated with your BCD. It should respond crisply when pressed. If you're doing detailed pre-dive checks on all equipment, reference the BCD Pre-Dive Safety Checklist for the full inflator system verification.
Listen for unusual sounds. With everything pressurized but not in use, the regulator should be silent. Any hissing indicates a leak—track it down before entering the water.
This entire check takes maybe 90 seconds. I've caught leaking HP hoses, sticky purge buttons, and failing exhaust valves during pre-dive checks that would have resulted in aborted dives (or worse) if discovered underwater. For a comprehensive pre-dive verification routine covering all critical inspection points, see the Pre-Dive Regulator Safety Checklist: 12 Critical Inspection Points Before Every Dive.
Step 7: Proper Storage Between Dive Trips
How you store your regulator between uses significantly affects its service life. I see more damage from improper storage than from diving. Regulators stored in hot cars, damp garages, or direct sunlight age faster and require more frequent service.
First, ensure everything is completely dry. This seems obvious but rushed divers pack wet regulators constantly. Any residual moisture—especially salt water—will corrode brass components and grow biological material. After your final rinse, hang the regulator for at least 24 hours in good air circulation. I use a simple coat hanger in my gear room with a fan nearby.
Once dry, install all protective covers. Dust cap on the first stage inlet, mouthpiece cover on both second stages. These aren't optional accessories—they prevent contamination. I learned this watching a friend discover a wasp nest inside his second stage mouthpiece after storing the regulator uncovered in his garage for six months. Wasps, spiders, and various other creatures find second stage barrels inviting.
Store in a cool, dry location away from UV exposure. Ideal temperature range is 50-75°F. Don't store in attics (too hot), basements (too humid), or anywhere with temperature swings exceeding 30-40 degrees. UV degradation happens faster than most divers realize—a regulator stored in a sunny window for a year will show visible hose deterioration. Ozone exposure (common near electric motors and HVAC systems) also degrades rubber, so avoid storage near these sources.
Don't coil hoses tightly. Hang the regulator or lay it flat with hoses gently curved. Tight coiling creates permanent set in the hoses and stresses the internal braiding. I hang mine on a padded hanger that supports the first stage without putting weight on the hoses. Some divers use dedicated regulator bags—those work fine as long as everything's completely dry before bagging.
For extended storage (more than 3 months between uses), consider pressurizing the regulator briefly every 6-8 weeks. Attach it to a tank, crack the valve for 30 seconds, then disconnect. This exercises the internal seals and prevents them from sticking or deforming from prolonged static compression. I do this with my cold water regulator during summer months when I'm diving exclusively tropical. The brief pressurization keeps everything moving.
If you're traveling frequently with your regulator, read How to Pack Scuba Gear for Remote Liveaboard Trips for specific guidance on protecting regulators during transit. Regulators are somewhat fragile—first stages can be damaged by impact, second stages can be crushed if heavy items are stacked on them. I always pack mine in carry-on luggage when flying, wrapped in soft exposure suit material.
Pro Tips & Common Mistakes
The most dangerous myth I encounter is "if it ain't broke, don't fix it" applied to regulator service. Regulators don't always give obvious warning before catastrophic failure. That smooth-breathing reg can have an O-ring 90% deteriorated that fails mid-dive. Annual service catches these issues during inspection before they become problems. I've seen divers skip service for 3-4 years on regulators that "worked fine" until they didn't—usually at the worst possible moment.
Don't attempt DIY repairs beyond what's outlined here. Replacing a mouthpiece or exhaust valve is reasonable for experienced divers. Disassembling a first stage requires specialized training, proper tools, and manufacturer certification. I've watched well-meaning divers turn minor issues into expensive repairs by attempting service they weren't qualified to perform. Incorrectly torqued port plugs leak. Improperly installed piston heads cause IP creep. Contaminated valve seats freeflow. Leave internal work to professionals.
Track your service history. I maintain a simple logbook noting service dates, technician names, and any issues found. This creates a maintenance history that's invaluable for diagnosing patterns. If your regulator consistently develops IP creep every 60 dives, that suggests something beyond normal wear—possibly tank contamination or an incompatibility between your diving environment and the regulator design.
Cold water divers need extra vigilance. Regulators used in water below 50°F experience different stresses. Free-flowing becomes a real risk when first stages ice up. Diaphragm regulators generally handle cold better than piston designs, though sealed piston regulators work well. If you're diving cold water regularly, consider a regulator specifically designed for those conditions—reference Best Cold Water Scuba Regulators: Performance Testing Down to 35°F for models proven in extreme conditions.
Pay attention to breathing resistance changes. If your regulator suddenly feels harder to breathe from, don't ignore it. Increased resistance indicates a problem—clogged filter, IP drift, worn valve seat, or damaged demand valve. Surface, check your SPG (you might be low on air and not realize it), and if tank pressure is adequate, end the dive and investigate. I've had divers tell me "my reg just felt a little stiff" when in reality they were breathing through a nearly-blocked first stage filter. Trust your instincts. Changes in breathing feel warrant attention.
Rinse your regulator before your wetsuit. This seems trivial but matters on multi-day dive trips. Regulator rinsing can't wait—the 2-hour window is real. Wetsuits are more forgiving. If you're pressed for time, prioritize the regulator. Better yet, rinse both properly, but that's the triage order if you're rushed.
Frequently Asked Questions
Can I service my own scuba regulator at home?
You can perform all the inspection, cleaning, and preventive maintenance steps outlined in this guide, but full internal servicing requires manufacturer certification and specialized tools. Attempting DIY disassembly and rebuild without proper training risks equipment failure that could be life-threatening underwater. Even as an equipment specialist, I send my regulators to certified technicians for annual internal service—the liability and safety requirements are too significant for home servicing. That said, diligent post-dive care, regular inspections, and proper storage will extend the intervals between professional service needs and catch small issues before they escalate.
How often should I service my scuba regulator if I only dive a few times per year?
Annual service remains the recommendation even for occasional divers. Internal O-rings and seals degrade over time regardless of use—UV exposure, temperature fluctuation, and humidity all contribute to material breakdown. A regulator sitting unused for 18 months may have more deteriorated seals than one actively used and properly maintained for 80 dives. If you dive fewer than 20 times annually, you can sometimes extend service to 18 months, but only if you perform quarterly IP checks and visual inspections to confirm no drift or visible deterioration. When in doubt, service annually.
What causes a regulator to freeflow and how can I prevent it?
Freeflow occurs when the first stage intermediate pressure overcomes the second stage spring tension, causing uncontrolled air delivery. Common causes include IP creep from worn first stage valve seats, frozen first stages in cold water, debris blocking the second stage valve, or damaged demand valve diaphragms. Prevention starts with annual service to maintain proper IP settings and replace worn components. Cold water divers should use regulators specifically rated for low temperatures with environmental sealing. Always rinse regulators properly after every dive to prevent salt crystal buildup that can jam valve mechanisms. If your regulator has freeflowed once, have it professionally serviced immediately—freeflow indicates a problem that won't resolve itself.
Is it safe to use a regulator that hasn't been serviced in 3 years if it still breathes fine?
No. Breathing feel on the surface doesn't tell you about internal degradation that manifests under load at depth. O-rings can appear fine but fail suddenly when exposed to pressure and temperature change. Valve seats wear gradually, creating IP drift that you won't notice topside but that increases breathing resistance at 80 feet. I've personally witnessed regulators that breathed smoothly in pre-dive checks develop severe freeflow at depth due to worn components. The annual service interval exists because manufacturers have data on component degradation rates—they know when parts statistically begin failing. A regulator 3 years overdue for service has extensively degraded internal seals, regardless of how it performs during casual testing. Get it serviced before diving.
Summary
Learning how to service a scuba regulator properly extends equipment life, prevents mid-dive failures, and keeps your most critical piece of life support functioning reliably. The routine is straightforward: thorough freshwater rinsing within two hours of every dive, monthly deep cleaning during active seasons, quarterly IP checks to monitor first stage performance, and non-negotiable annual professional service regardless of dive count.
What separates conscientious regulator maintenance from neglect isn't complicated procedures—it's consistency. Divers who never skip post-dive rinsing, who actually inspect their gear instead of just throwing it in a bag, and who track service intervals prevent 95% of regulator failures I encounter in the field.
Your regulator delivers every breath you take underwater. Treat that responsibility seriously. The twenty minutes you spend on proper post-dive care and monthly inspections buys you hundreds of reliable dives. Skip those steps and you're gambling with equipment that has no business being treated as expendable. I've seen both approaches play out thousands of times—trust me, the disciplined maintenance routine wins every time.